Replacement
7-43
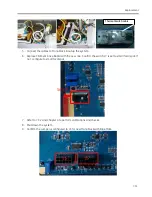
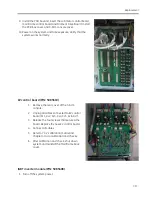
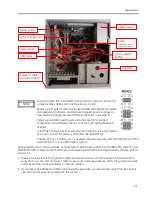
Communication flat cable shall be connected to Com3 port and Com3
Jumper setting shall be same as the picture on right.
Replacing computer mother board need reload WKS Operation System
and Application Software, and then need request new licence key to
load product configuration and software options for new Host ID.
Replacing Hard disk need to get existing licence file for product
configuration and software options, so license and setting backup is
needed.
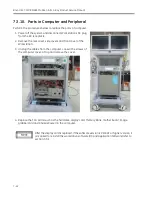
Cut off the binding tie before removing the memory bank. And replace a
new one to secure the memory bank after the replacement.
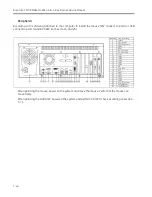
CD/DVD Rom is an option part, so upgrade software need use USB CD/DVD Rom with Part
No# 5075511 on none CD/DVD Rom system.
During replacement of the Hard Disk, connect system SATA cable to SATA1, DVD ROM SATA cable to other
SATA ports. After replacement of hard Disk, you should reinstall both OS and Application software. Refer to
section 5.3.
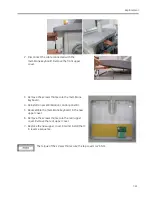
5.
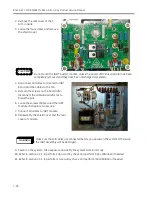
Power on the system. After login the Patient information screen, enter the patient information and
verify that you can enter normally. Create a new exam and take exposure. Verify the system can work
normally and the image will display on the left monitor.
6.
If you have replaced the Hard Disk and backup the user data, you should also verify that the original
user data and images are remained in the system.
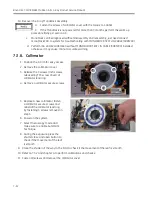
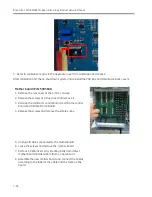
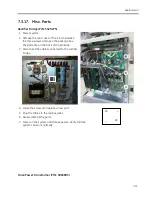
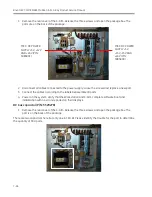
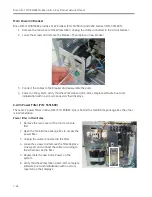
Chassis Power
Hard Disk
Memory Bank
Mother Board
Slot for Display Card
SATA ports
Power on cable
(Connect to PDU)
Com3
(Extend to rear of
computer, then to
Com3 Jumper
Setting
Содержание Brivo OEC 715
Страница 2: ......
Страница 19: ...Chapter1 Introduction and Safety...
Страница 41: ...Introduction and Safety 23 46 54 20 18 26...
Страница 55: ...Chapter2 System Overview...
Страница 137: ...Chapter3 Installation...
Страница 147: ...Installation 3 11 7 Put the ramp in position Release all bracket and move the workstation along the ramp off the pallet...
Страница 211: ...Installation 3 75 3 9 Reporting For U S Systems Complete and submit Form 2579 within 15 days of installation...
Страница 212: ...Chapter4 Calibration...
Страница 223: ...Brivo OEC 715 785 865 Mobile C Arm X Ray Product Service Manual 4 12 Mainframe Control Board TP7...
Страница 231: ...Brivo OEC 715 785 865 Mobile C Arm X Ray Product Service Manual 4 20 Mainframe Control Board TP17 POT4 J5 TP7 POT7 POT5...
Страница 275: ...Brivo OEC 715 785 865 Mobile C Arm X Ray Product Service Manual 4 64...
Страница 284: ...Chapter5 Software...
Страница 312: ...Software 5 29 4 Click Next 5 Click Install 6 Click Finish button to complete installation procedure...
Страница 326: ...Software 5 43 2 Click on install to continue 3 Click Next to continue...
Страница 335: ...Chapter6 Troubleshooting...
Страница 408: ...Chapter7 Replacement...
Страница 418: ...Replacement 7 11 166...
Страница 488: ...Chapter8 Periodic Maintenance...
Страница 502: ...Periodic Maintenance 8 15...
Страница 505: ...Chapter9 Technical Reference...
Страница 520: ...Brivo OEC 715 785 865 Mobile C Arm X Ray Product Service Manual 9 16 Lateral configuration 1 5m Lateral configuration 1m...
Страница 521: ...Technical Reference 9 17 Vertical configuration 1 5m Vertical configuration 1m...
Страница 526: ...11 Appendix System Schematics...

