7. Heatbed & PSU assembly
Original Prusa i3 MK3S+ kit assembly
103
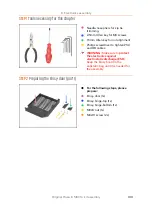
STEP 18
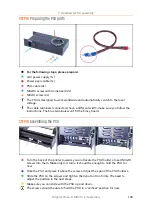
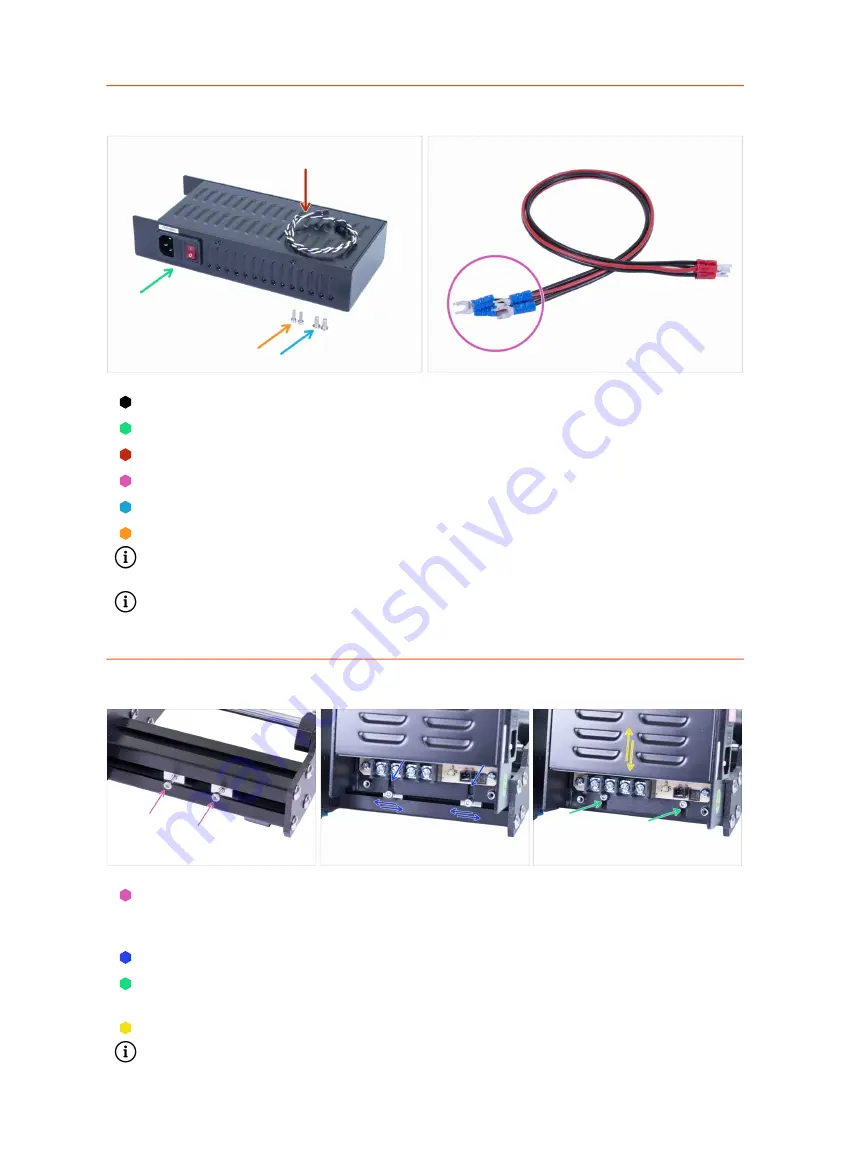
Preparing the PSU parts
For the following steps, please prepare:
24V power supply (1x)
Power panic cable (1x)
PSU-cable (2x)
M4x10r screw with dome head (2x)
M3x10 screw (2x)
The PSU is designed to work worldwide and automatically switch to the local
voltage.
The cable terminals (connectors) have a different width, make sure you follow the
instructions. The blue terminals won't fit the Einsy board.
STEP 19
Assembling the PSU
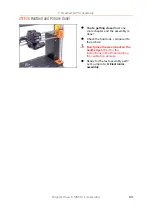
Turn the back of the printer towards you and locate the PSU holders. Insert M3x10
screws into them. Make only 3-4 turns, it should be enough to hold the PSU for
now.
Take the PSU and place it above the screws. Adjust the span of the PSU holders.
Slide the PSU on the screws and tighten them, but not too firmly. We need to
adjust the position in the next steps.
Make sure you can slide with the PSU up and down.
The screws should be able to hold the PSU in a "vertical" position for now.
Summary of Contents for i3 MK3S+
Page 6: ...6 ...
Page 7: ...Original Prusa i3 MK3S kit assembly 7 1 Introduction ...
Page 15: ...Original Prusa i3 MK3S kit assembly 15 2 Y axis assembly ...
Page 36: ...36 Original Prusa i3 MK3S kit assembly 3 X axis assembly ...
Page 44: ...44 Original Prusa i3 MK3S kit assembly 4 Z axis assembly ...
Page 51: ...Original Prusa i3 MK3S kit assembly 51 5 E axis assembly ...
Page 88: ...88 Original Prusa i3 MK3S kit assembly 6 LCD assembly ...
Page 94: ...94 Original Prusa i3 MK3S kit assembly 7 Heatbed PSU assembly ...
Page 108: ...108 Original Prusa i3 MK3S kit assembly 8 Electronics assembly ...
Page 132: ...132 Original Prusa i3 MK3S kit assembly 9 Preflight check ...
Page 137: ...137 Notes ...
Page 138: ...138 ...
Page 139: ...139 Notes ...
Page 140: ...140 ...
Page 141: ...141 Notes ...
Page 142: ...142 ...
Page 143: ...143 Notes ...
Page 144: ...144 ...

