


5. E-axis assembly
Original Prusa i3 MK3S+ kit assembly
57
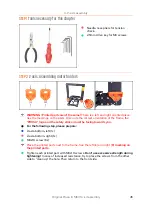
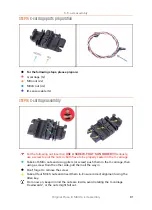
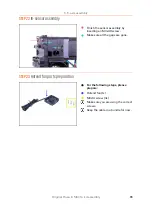
STEP 8
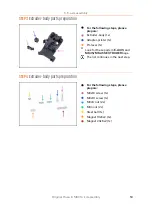
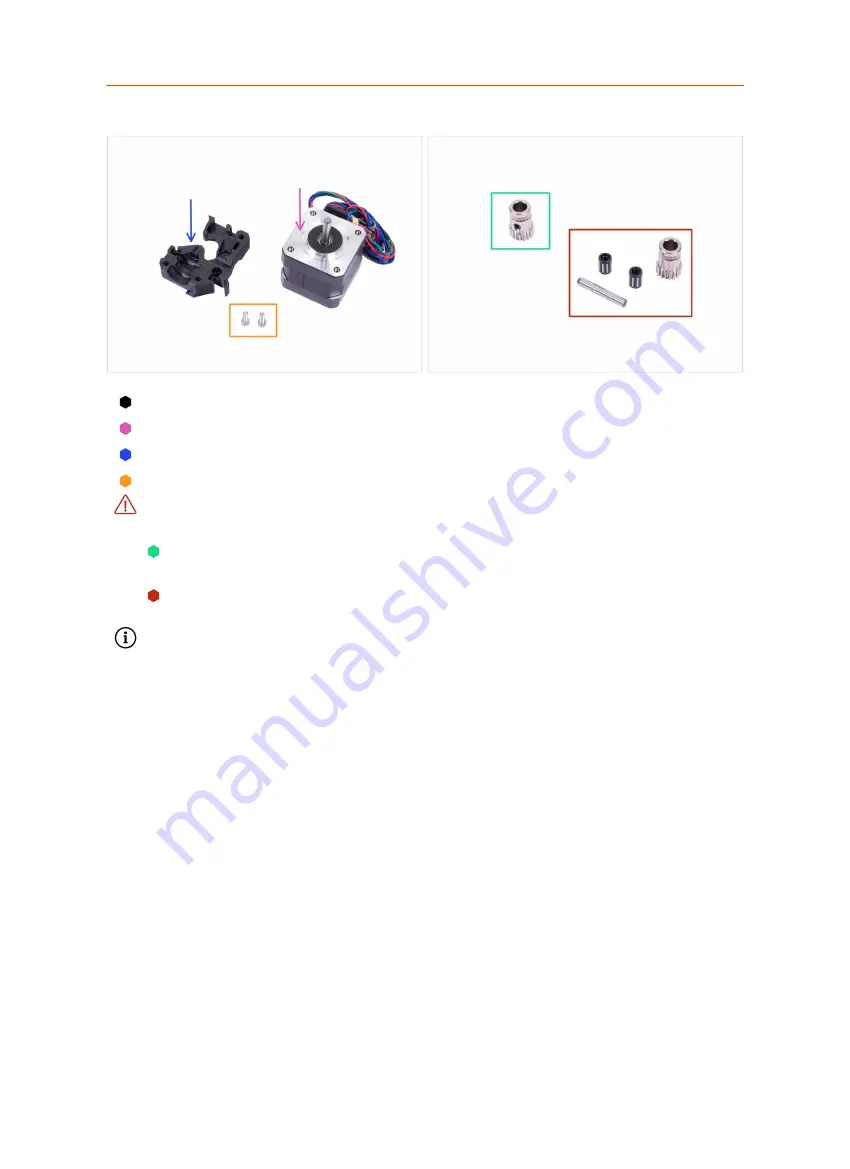
Extruder motor parts preparation
For the following steps, please prepare:
Extruder motor (1x)
Extruder-motor-plate (1x)
M3x10 screw (2x)
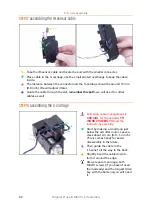
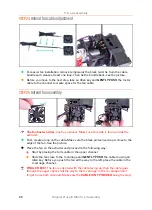
ATTENTION:
there is a set of the Bondtech gears. Make sure you have all the parts
and you are using correct ones.
Use now:
Bondtech gear with a set screw. If the screw is out, gently screw it in
(leave space inside for the shaft).
Use later:
Bondtech without a set screw, bearings and a shaft. Keep the
bearings somewhere safe, they tend to roll away ;)
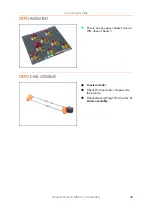
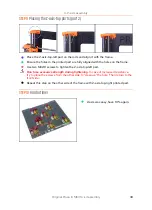
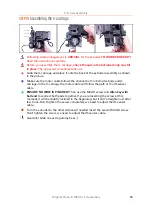
In the upcoming steps, always check the pictures to
ensure the correct orientation
of the Bondtech gears
. Always double-check your work.
Summary of Contents for i3 MK3S+
Page 6: ...6 ...
Page 7: ...Original Prusa i3 MK3S kit assembly 7 1 Introduction ...
Page 15: ...Original Prusa i3 MK3S kit assembly 15 2 Y axis assembly ...
Page 36: ...36 Original Prusa i3 MK3S kit assembly 3 X axis assembly ...
Page 44: ...44 Original Prusa i3 MK3S kit assembly 4 Z axis assembly ...
Page 51: ...Original Prusa i3 MK3S kit assembly 51 5 E axis assembly ...
Page 88: ...88 Original Prusa i3 MK3S kit assembly 6 LCD assembly ...
Page 94: ...94 Original Prusa i3 MK3S kit assembly 7 Heatbed PSU assembly ...
Page 108: ...108 Original Prusa i3 MK3S kit assembly 8 Electronics assembly ...
Page 132: ...132 Original Prusa i3 MK3S kit assembly 9 Preflight check ...
Page 137: ...137 Notes ...
Page 138: ...138 ...
Page 139: ...139 Notes ...
Page 140: ...140 ...
Page 141: ...141 Notes ...
Page 142: ...142 ...
Page 143: ...143 Notes ...
Page 144: ...144 ...