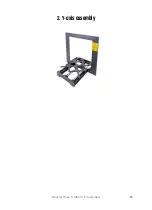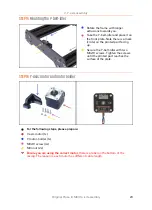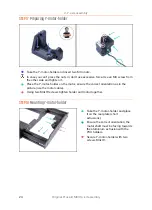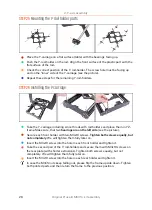
2. Y-axis assembly
22
Original Prusa i3 MK3S+ kit assembly
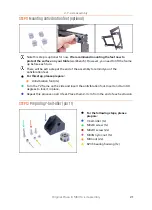
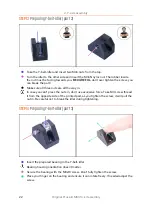
STEP 13
Preparing Y-belt-idler (part 2)
Take the Y-belt-idler and insert two M3n nuts from the top.
Turn the idler to the other side and insert the M3nN nyloc nut. The rubber inside
the nut must be facing towards you.
BE CAREFUL
, don't over tighten the screw, you
can break the part!
Make sure all three nuts are all the way in.
In case you can't press the nuts in, don't use excessive force. Take M3 screw thread
it from the opposite side of the printed part, as you tighten the screw, it will pull the
nut in. Be careful not to break the idler during tightening.
STEP 14
Preparing Y-belt-idler (part 3)
Insert the prepared bearing in the Y-belt-idler.
Bearing housing orientation doesn't matter.
Secure the bearing with the M3x18 screw. Don't fully tighten the screw.
Place your finger on the bearing and ensure it can rotate freely. If needed adjust the
screw.
Summary of Contents for i3 MK3S+
Page 6: ...6 ...
Page 7: ...Original Prusa i3 MK3S kit assembly 7 1 Introduction ...
Page 15: ...Original Prusa i3 MK3S kit assembly 15 2 Y axis assembly ...
Page 36: ...36 Original Prusa i3 MK3S kit assembly 3 X axis assembly ...
Page 44: ...44 Original Prusa i3 MK3S kit assembly 4 Z axis assembly ...
Page 51: ...Original Prusa i3 MK3S kit assembly 51 5 E axis assembly ...
Page 88: ...88 Original Prusa i3 MK3S kit assembly 6 LCD assembly ...
Page 94: ...94 Original Prusa i3 MK3S kit assembly 7 Heatbed PSU assembly ...
Page 108: ...108 Original Prusa i3 MK3S kit assembly 8 Electronics assembly ...
Page 132: ...132 Original Prusa i3 MK3S kit assembly 9 Preflight check ...
Page 137: ...137 Notes ...
Page 138: ...138 ...
Page 139: ...139 Notes ...
Page 140: ...140 ...
Page 141: ...141 Notes ...
Page 142: ...142 ...
Page 143: ...143 Notes ...
Page 144: ...144 ...

