6. LCD assembly
Original Prusa i3 MK3S+ kit assembly
89
STEP 1
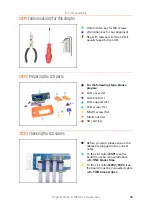
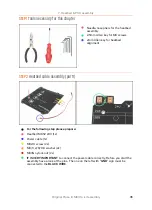
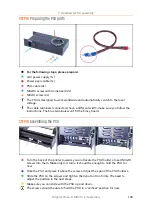
Tools necessary for this chapter
2.5mm Allen key for M3 screws
2mm Allen key for nut alignment
Bag with fasteners for the LCD is
usually taped to the LCD.
STEP 2
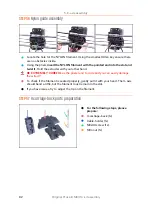
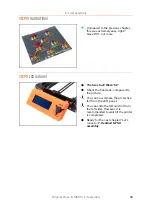
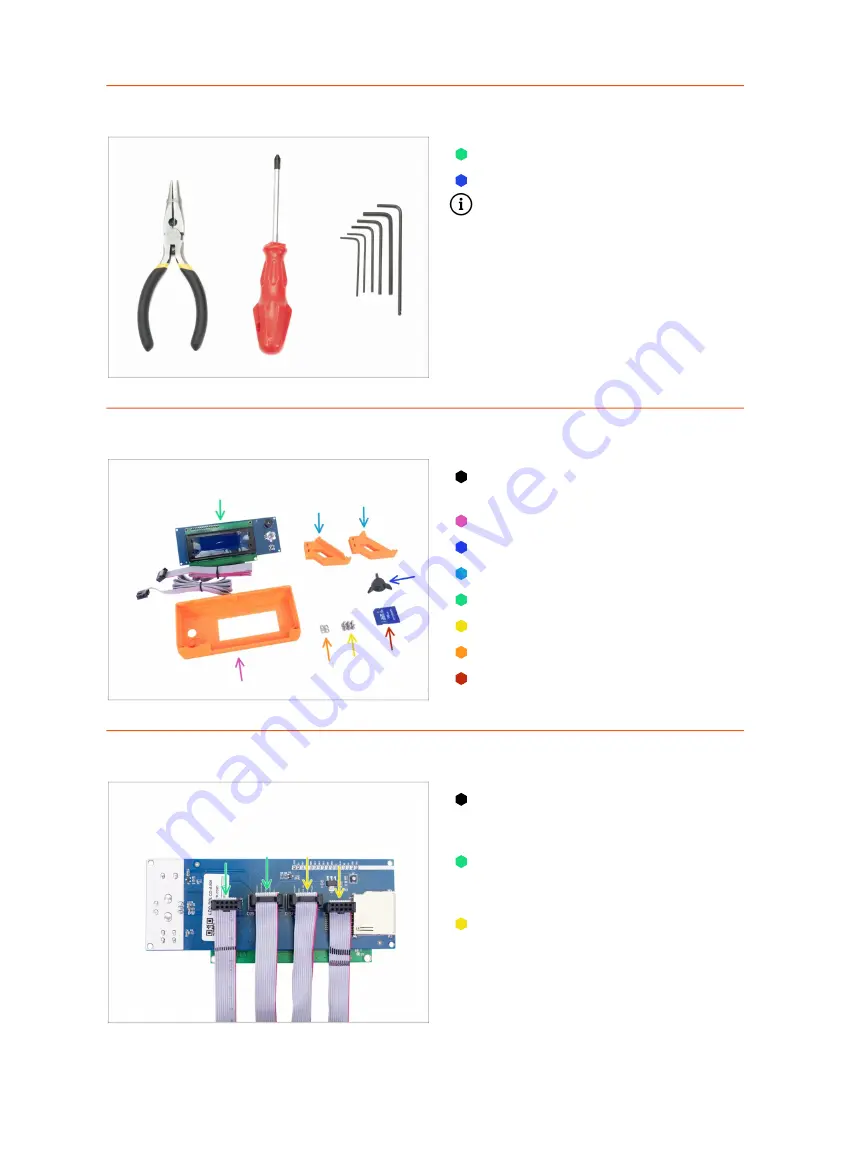
Preparing the LCD parts
For the following steps, please
prepare:
LCD-cover (1x)
LCD-knob (1x)
LCD-support (2x)
LCD screen (1x)
M3x10 screw (6x)
M3nS nut (4x)
SD card (1x)
STEP 3
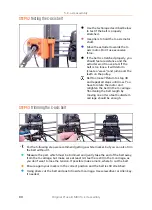
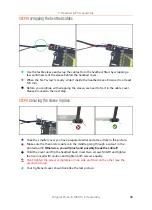
Checking the LCD cables
Before you start, please ensure the
cables are plugged in the correct
order.
To the slot called
EXP1
(see the
board) must be connected cable
with
ONE black stripe
.
To the slot called
EPX2/EXP2
(see
the board) must be connected cable
with
TWO black stripes
.
Summary of Contents for i3 MK3S+
Page 6: ...6 ...
Page 7: ...Original Prusa i3 MK3S kit assembly 7 1 Introduction ...
Page 15: ...Original Prusa i3 MK3S kit assembly 15 2 Y axis assembly ...
Page 36: ...36 Original Prusa i3 MK3S kit assembly 3 X axis assembly ...
Page 44: ...44 Original Prusa i3 MK3S kit assembly 4 Z axis assembly ...
Page 51: ...Original Prusa i3 MK3S kit assembly 51 5 E axis assembly ...
Page 88: ...88 Original Prusa i3 MK3S kit assembly 6 LCD assembly ...
Page 94: ...94 Original Prusa i3 MK3S kit assembly 7 Heatbed PSU assembly ...
Page 108: ...108 Original Prusa i3 MK3S kit assembly 8 Electronics assembly ...
Page 132: ...132 Original Prusa i3 MK3S kit assembly 9 Preflight check ...
Page 137: ...137 Notes ...
Page 138: ...138 ...
Page 139: ...139 Notes ...
Page 140: ...140 ...
Page 141: ...141 Notes ...
Page 142: ...142 ...
Page 143: ...143 Notes ...
Page 144: ...144 ...

