


4. Z-axis assembly
Original Prusa i3 MK3S+ kit assembly
47
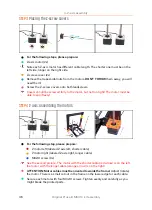
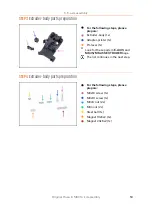
STEP 5
X-axis: trapezoidal nuts (part 1)
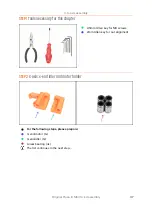
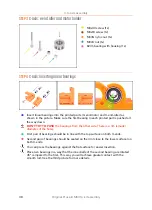
For the following step, please prepare:
Trapezoidal nut (2x)
M3x18 screw (4x)
M3n nut (4x)
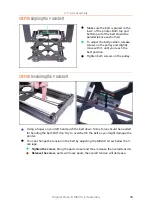
Turn the X-axis upside down and insert nuts into traps on both X-ends.
In case you can't press the nuts in, don't use excessive force. First, check that there
isn't any obstacle in the nut trap.
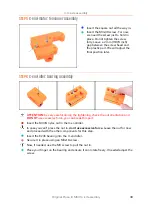
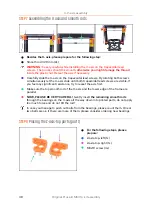
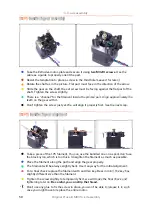
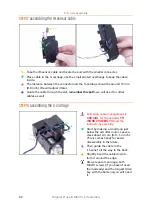
STEP 6
X-axis: trapezoidal nuts (part 2)
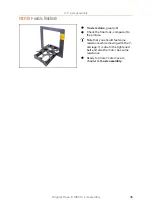
Carefully rotate the X-axis onto its backside.
Insert the trapezoidal nuts to each X-end.
Note the correct orientation
of the trapezoidal motor nuts!
Tighten the nuts with M3x18 screws.
You can use any of all four holes on the trapezoidal nuts.
Summary of Contents for i3 MK3S+
Page 6: ...6 ...
Page 7: ...Original Prusa i3 MK3S kit assembly 7 1 Introduction ...
Page 15: ...Original Prusa i3 MK3S kit assembly 15 2 Y axis assembly ...
Page 36: ...36 Original Prusa i3 MK3S kit assembly 3 X axis assembly ...
Page 44: ...44 Original Prusa i3 MK3S kit assembly 4 Z axis assembly ...
Page 51: ...Original Prusa i3 MK3S kit assembly 51 5 E axis assembly ...
Page 88: ...88 Original Prusa i3 MK3S kit assembly 6 LCD assembly ...
Page 94: ...94 Original Prusa i3 MK3S kit assembly 7 Heatbed PSU assembly ...
Page 108: ...108 Original Prusa i3 MK3S kit assembly 8 Electronics assembly ...
Page 132: ...132 Original Prusa i3 MK3S kit assembly 9 Preflight check ...
Page 137: ...137 Notes ...
Page 138: ...138 ...
Page 139: ...139 Notes ...
Page 140: ...140 ...
Page 141: ...141 Notes ...
Page 142: ...142 ...
Page 143: ...143 Notes ...
Page 144: ...144 ...