


2. Y-axis assembly
32
Original Prusa i3 MK3S+ kit assembly
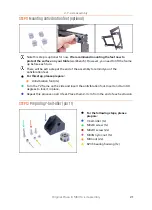
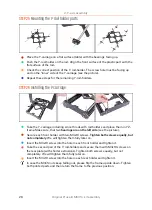
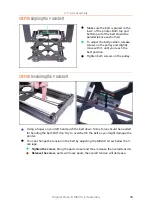
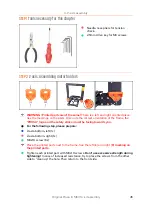
STEP 33
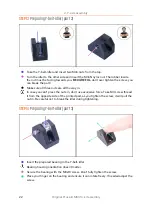
Y-axis: Assembling the belt
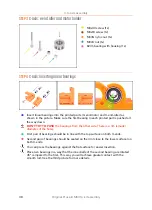
Take the Y-belt-tensioner (bigger of the two printed parts).
Insert M3n nut, all the way in.
Use the screw pulling technique.
Bend second end of the belt around the screw and push it in the holder as in the
picture. Use an Allen key to push the belt in.
Make sure the bent part and the end are within the width of the printed part.
Teeth on the belt must be facing up!
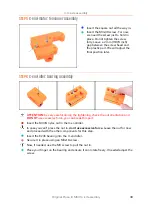
Tighten the screw until you reach the nut, don't over tighten the screw, you will
deform the belt.
Hold the nut from the other side until the screw reaches its thread.
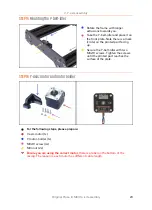
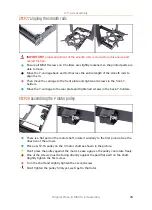
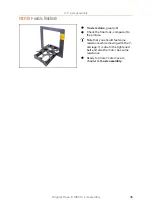
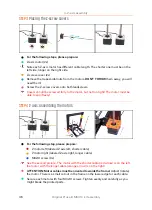
STEP 34
Y-axis: Assembling the belt
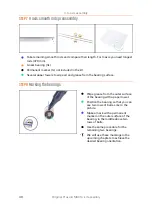
Using M3x10 screw fix the Y-belt-tensioner to the Y-carriage.
Don't tighten the
screw completely
, we need to adjust the position of the printed part.
Use the hole on the right, see the picture.
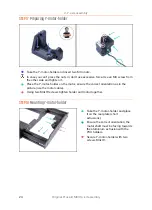
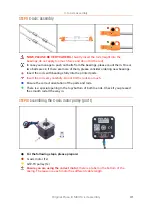
Insert the M3x30 screw through both printed parts. Start tightening until you reach
the M3nN nyloc nut.
Summary of Contents for i3 MK3S+
Page 6: ...6 ...
Page 7: ...Original Prusa i3 MK3S kit assembly 7 1 Introduction ...
Page 15: ...Original Prusa i3 MK3S kit assembly 15 2 Y axis assembly ...
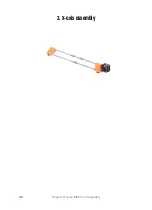
Page 36: ...36 Original Prusa i3 MK3S kit assembly 3 X axis assembly ...
Page 44: ...44 Original Prusa i3 MK3S kit assembly 4 Z axis assembly ...
Page 51: ...Original Prusa i3 MK3S kit assembly 51 5 E axis assembly ...
Page 88: ...88 Original Prusa i3 MK3S kit assembly 6 LCD assembly ...
Page 94: ...94 Original Prusa i3 MK3S kit assembly 7 Heatbed PSU assembly ...
Page 108: ...108 Original Prusa i3 MK3S kit assembly 8 Electronics assembly ...
Page 132: ...132 Original Prusa i3 MK3S kit assembly 9 Preflight check ...
Page 137: ...137 Notes ...
Page 138: ...138 ...
Page 139: ...139 Notes ...
Page 140: ...140 ...
Page 141: ...141 Notes ...
Page 142: ...142 ...
Page 143: ...143 Notes ...
Page 144: ...144 ...