5. E-axis assembly
58
Original Prusa i3 MK3S+ kit assembly
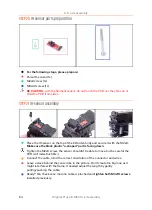
STEP 9
Bondtech gear assembly
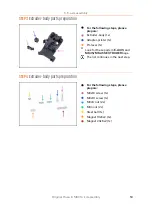
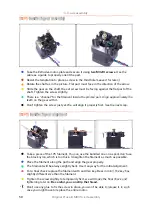
Take the Extruder-motor-plate and secure it using
two M3x10 screws
. Use the
cable as a guide to properly orient the part.
Resist the temptation to place a screw in the third hole! Leave it for later ;)
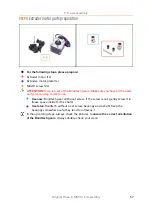
Rotate the shaft as in the picture. Flat part must face in the direction of the arrow.
Slide the gear on the shaft, the set screw must be facing against the flat part of the
shaft. Tighten the screw slightly.
There is a "channel" for the filament inside the printed part. Align approximately the
teeth on the gear with it.
Don't tighten the screw just yet. We will align it properly first. See the next step.
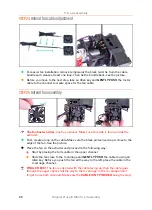
STEP 10
Bondtech gear alignment
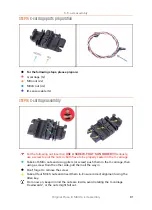
Take a piece of the 1.75 filament. You can use the bundled one on a spool, don't use
the black nylon, which is too thick. Straighten the filament as much as possible.
Place the filament along the path and align the gear properly.
The filament will be always slightly bent. Use it anyway for the initial alignment.
For a final check replace the filament with an Allen key. Bear in mind, the key has
slightly different size than the filament.
Tighten the screw slightly to temporarily fix it, we will make the final check and
tightening later on.
Be careful, you can strip the thread.
Don't use any glue to fix the screw in place, you won't be able to release it, in such
case you might have to replace the entire motor.
Summary of Contents for i3 MK3S+
Page 6: ...6 ...
Page 7: ...Original Prusa i3 MK3S kit assembly 7 1 Introduction ...
Page 15: ...Original Prusa i3 MK3S kit assembly 15 2 Y axis assembly ...
Page 36: ...36 Original Prusa i3 MK3S kit assembly 3 X axis assembly ...
Page 44: ...44 Original Prusa i3 MK3S kit assembly 4 Z axis assembly ...
Page 51: ...Original Prusa i3 MK3S kit assembly 51 5 E axis assembly ...
Page 88: ...88 Original Prusa i3 MK3S kit assembly 6 LCD assembly ...
Page 94: ...94 Original Prusa i3 MK3S kit assembly 7 Heatbed PSU assembly ...
Page 108: ...108 Original Prusa i3 MK3S kit assembly 8 Electronics assembly ...
Page 132: ...132 Original Prusa i3 MK3S kit assembly 9 Preflight check ...
Page 137: ...137 Notes ...
Page 138: ...138 ...
Page 139: ...139 Notes ...
Page 140: ...140 ...
Page 141: ...141 Notes ...
Page 142: ...142 ...
Page 143: ...143 Notes ...
Page 144: ...144 ...


