7. Heatbed & PSU assembly
Original Prusa i3 MK3S+ kit assembly
95
STEP 1
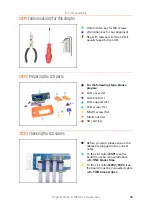
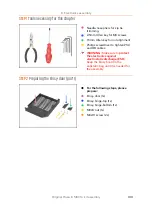
Tools necessary for this chapter
Needle-nose pliers for the heatbed
assembly
2.5mm Allen key for M3 screws
2mm Allen key for heatbed
alignment
STEP 2
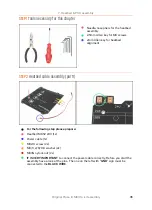
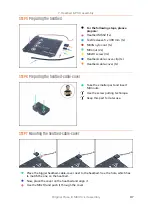
Heatbed cable assembly (part 1)
For the following step please prepare:
Heatbed MK52 24V (1x)
Power cable (1x)
M3x10 screw (2x)
M3/3,2/9/0,8 washer (2x)
M3nN nylock nut (2x)
IT IS VERY IMPORTANT
to connect the power cable correctly. Before you start the
assembly have a look at the pins. The one on the left with "
GND
" sign must be
connected to the
BLACK WIRE
.
Summary of Contents for i3 MK3S+
Page 6: ...6 ...
Page 7: ...Original Prusa i3 MK3S kit assembly 7 1 Introduction ...
Page 15: ...Original Prusa i3 MK3S kit assembly 15 2 Y axis assembly ...
Page 36: ...36 Original Prusa i3 MK3S kit assembly 3 X axis assembly ...
Page 44: ...44 Original Prusa i3 MK3S kit assembly 4 Z axis assembly ...
Page 51: ...Original Prusa i3 MK3S kit assembly 51 5 E axis assembly ...
Page 88: ...88 Original Prusa i3 MK3S kit assembly 6 LCD assembly ...
Page 94: ...94 Original Prusa i3 MK3S kit assembly 7 Heatbed PSU assembly ...
Page 108: ...108 Original Prusa i3 MK3S kit assembly 8 Electronics assembly ...
Page 132: ...132 Original Prusa i3 MK3S kit assembly 9 Preflight check ...
Page 137: ...137 Notes ...
Page 138: ...138 ...
Page 139: ...139 Notes ...
Page 140: ...140 ...
Page 141: ...141 Notes ...
Page 142: ...142 ...
Page 143: ...143 Notes ...
Page 144: ...144 ...

