5. E-axis assembly
Original Prusa i3 MK3S+ kit assembly
85
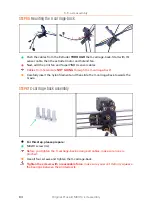
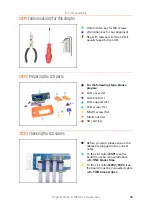
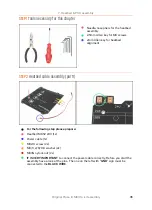
STEP 62
Textile sleeve parts preparation
For the following steps, please prepare:
Zip tie (5x)
Textile sleeve 13 x 490 mm (1x)
There are three textile sleeves in the package, use the largest one (both diameter
and length).
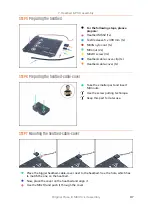
STEP 63
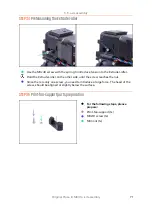
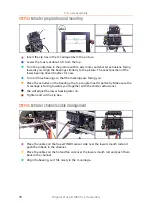
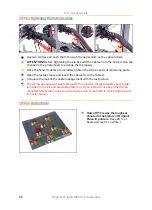
Tightening the textile sleeve
Open one end of the textile sleeve and slide it on the cable bundle leading from the
extruder.
Don't forget to include the black nylon filament inserted earlier!
Leave the cables from the hotend out for now.
Length of the first wrap should be slightly longer than the cable-holder part, about
5 cm is enough.
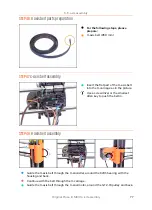
Gently twist the sleeve to make it smaller and tighter around the cables, orient the
sleeve's seam downwards, then slide the sleeve towards the extruder.
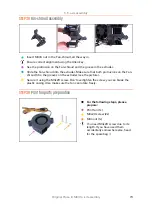
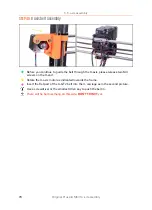
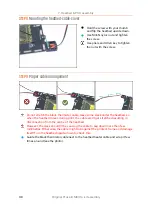
Take 3 zip ties
and insert them into the
lower row
of holes on the cable-holder.
Twist the sleeve again (without twisting the cables inside) and tighten the zip ties.
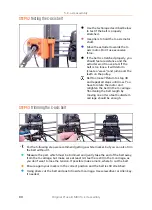
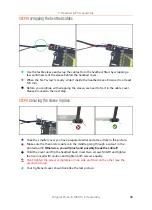
IMPORTANT:
Cut the remaining part of each zip tie using pliers as closest to its
head as possible. Note the correct position of each zip ties's head (slightly off-
centre to the left).
Summary of Contents for i3 MK3S+
Page 6: ...6 ...
Page 7: ...Original Prusa i3 MK3S kit assembly 7 1 Introduction ...
Page 15: ...Original Prusa i3 MK3S kit assembly 15 2 Y axis assembly ...
Page 36: ...36 Original Prusa i3 MK3S kit assembly 3 X axis assembly ...
Page 44: ...44 Original Prusa i3 MK3S kit assembly 4 Z axis assembly ...
Page 51: ...Original Prusa i3 MK3S kit assembly 51 5 E axis assembly ...
Page 88: ...88 Original Prusa i3 MK3S kit assembly 6 LCD assembly ...
Page 94: ...94 Original Prusa i3 MK3S kit assembly 7 Heatbed PSU assembly ...
Page 108: ...108 Original Prusa i3 MK3S kit assembly 8 Electronics assembly ...
Page 132: ...132 Original Prusa i3 MK3S kit assembly 9 Preflight check ...
Page 137: ...137 Notes ...
Page 138: ...138 ...
Page 139: ...139 Notes ...
Page 140: ...140 ...
Page 141: ...141 Notes ...
Page 142: ...142 ...
Page 143: ...143 Notes ...
Page 144: ...144 ...

