8. Electronics assembly
112
Original Prusa i3 MK3S+ kit assembly
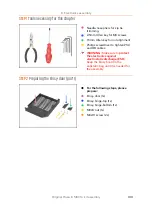
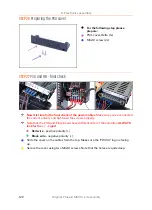
STEP 7
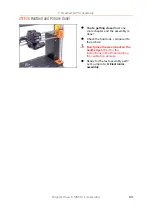
Wrapping X-axis cable
For the following step, please prepare:
Textile sleeve 5 x 300 mm (1x)
Zip tie (1x)
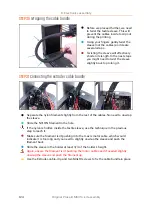
Wrap the sleeve around the X-axis motor cable. The sleeve is shorter, than the
motor cable.
Secure the sleeve using a zip tie, you have to tighten the zip tie firmly and it is only
a temporary fix until the Einsy case is assembled, but you can leave the zip tie in
place afterwards
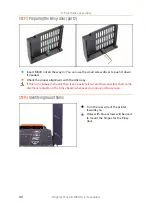
STEP 8
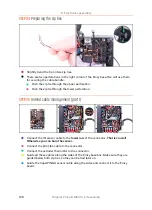
Preparing the Einsy-base (part 1)
For the following steps, please prepare:
Einsy-base (1x)
M3x10 screw (6x)
M3nS nut (4x)
M3n nut (4x)
EINSY RAMBo motherboard (1x) Keep the silver label for later!
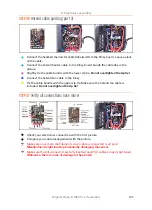
Einsy-base has a maintenance opening for the RPi Zero W. If you intend to use this
mini computer, you can carefully cut the piece of the plastic now. More details here:
help.prusa3d.com/octoprint-assembly
Note that the anti-static bag will be opened upon arrival. Each board is taken out
and tested before shipping.
Summary of Contents for i3 MK3S+
Page 6: ...6 ...
Page 7: ...Original Prusa i3 MK3S kit assembly 7 1 Introduction ...
Page 15: ...Original Prusa i3 MK3S kit assembly 15 2 Y axis assembly ...
Page 36: ...36 Original Prusa i3 MK3S kit assembly 3 X axis assembly ...
Page 44: ...44 Original Prusa i3 MK3S kit assembly 4 Z axis assembly ...
Page 51: ...Original Prusa i3 MK3S kit assembly 51 5 E axis assembly ...
Page 88: ...88 Original Prusa i3 MK3S kit assembly 6 LCD assembly ...
Page 94: ...94 Original Prusa i3 MK3S kit assembly 7 Heatbed PSU assembly ...
Page 108: ...108 Original Prusa i3 MK3S kit assembly 8 Electronics assembly ...
Page 132: ...132 Original Prusa i3 MK3S kit assembly 9 Preflight check ...
Page 137: ...137 Notes ...
Page 138: ...138 ...
Page 139: ...139 Notes ...
Page 140: ...140 ...
Page 141: ...141 Notes ...
Page 142: ...142 ...
Page 143: ...143 Notes ...
Page 144: ...144 ...

