


5. E-axis assembly
60
Original Prusa i3 MK3S+ kit assembly
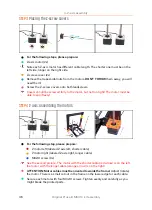
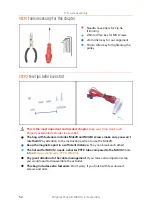
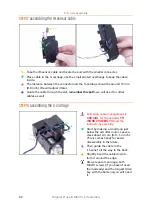
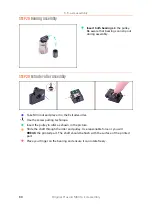
STEP 13
Hotend assembly
Take two M3x10 screws and insert them in the holes. Doing this now makes the
assembly slightly easier, but both holes are shallow and the screws might fall out. If
this happens, you can continue without them and put them back later on (you will
be notified later). Also note, that in few upcoming pictures the screws might be
missing.
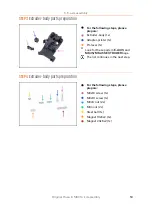
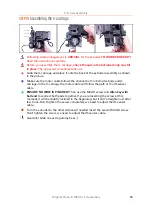
Place the hotend next to the Extruder-body, see the grooves in the printed part,
which are in the shape of the hotend.
Correctly placed hotend. The hotend cables should point to the left, we will align
them in the next step.
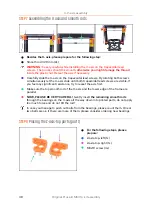
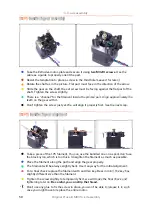
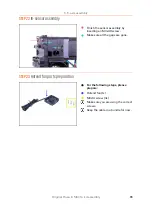
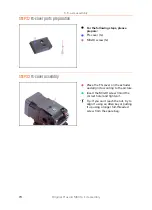
STEP 14
Extruder assembly
In order to protect the hotend cables and ensure proper orientation
, it is highly
recommended to use a box. Use the one provided in the kit.
Place the Extruder-body with the hotend on the box and make sure the cables are
on the left side and pointing down.
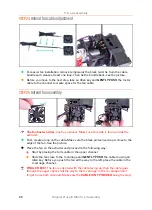
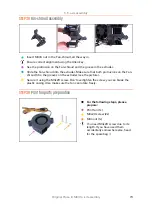
Place your finger temporarily on the longer magnet and place the extruder motor
assembly on the Extruder-body. The Bondtech gear might pull the magnet out
while assembling parts together.
Make sure both parts are aligned.
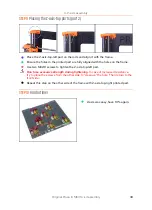
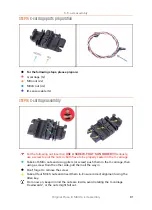
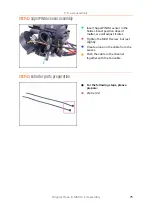
Place the Extruder-cover on the Extruder-body. Again, make sure that all three
parts are properly aligned.
Insert two M3x40 screws, you've prepared earlier. Tighten them, but be careful,
they are slightly longer (2-3 mm), than the thickness of the entire assembly.
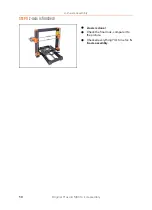
Place the extruder aside for few steps, we need to prepare another part. Leave it on
the box to prevent damaging the cables.
Summary of Contents for i3 MK3S+
Page 6: ...6 ...
Page 7: ...Original Prusa i3 MK3S kit assembly 7 1 Introduction ...
Page 15: ...Original Prusa i3 MK3S kit assembly 15 2 Y axis assembly ...
Page 36: ...36 Original Prusa i3 MK3S kit assembly 3 X axis assembly ...
Page 44: ...44 Original Prusa i3 MK3S kit assembly 4 Z axis assembly ...
Page 51: ...Original Prusa i3 MK3S kit assembly 51 5 E axis assembly ...
Page 88: ...88 Original Prusa i3 MK3S kit assembly 6 LCD assembly ...
Page 94: ...94 Original Prusa i3 MK3S kit assembly 7 Heatbed PSU assembly ...
Page 108: ...108 Original Prusa i3 MK3S kit assembly 8 Electronics assembly ...
Page 132: ...132 Original Prusa i3 MK3S kit assembly 9 Preflight check ...
Page 137: ...137 Notes ...
Page 138: ...138 ...
Page 139: ...139 Notes ...
Page 140: ...140 ...
Page 141: ...141 Notes ...
Page 142: ...142 ...
Page 143: ...143 Notes ...
Page 144: ...144 ...