5. E-axis assembly
56
Original Prusa i3 MK3S+ kit assembly
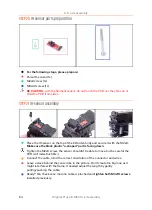
STEP 7
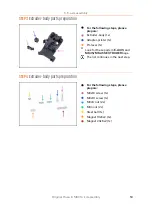
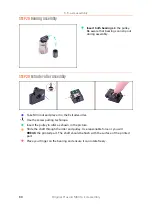
Steel ball assembly
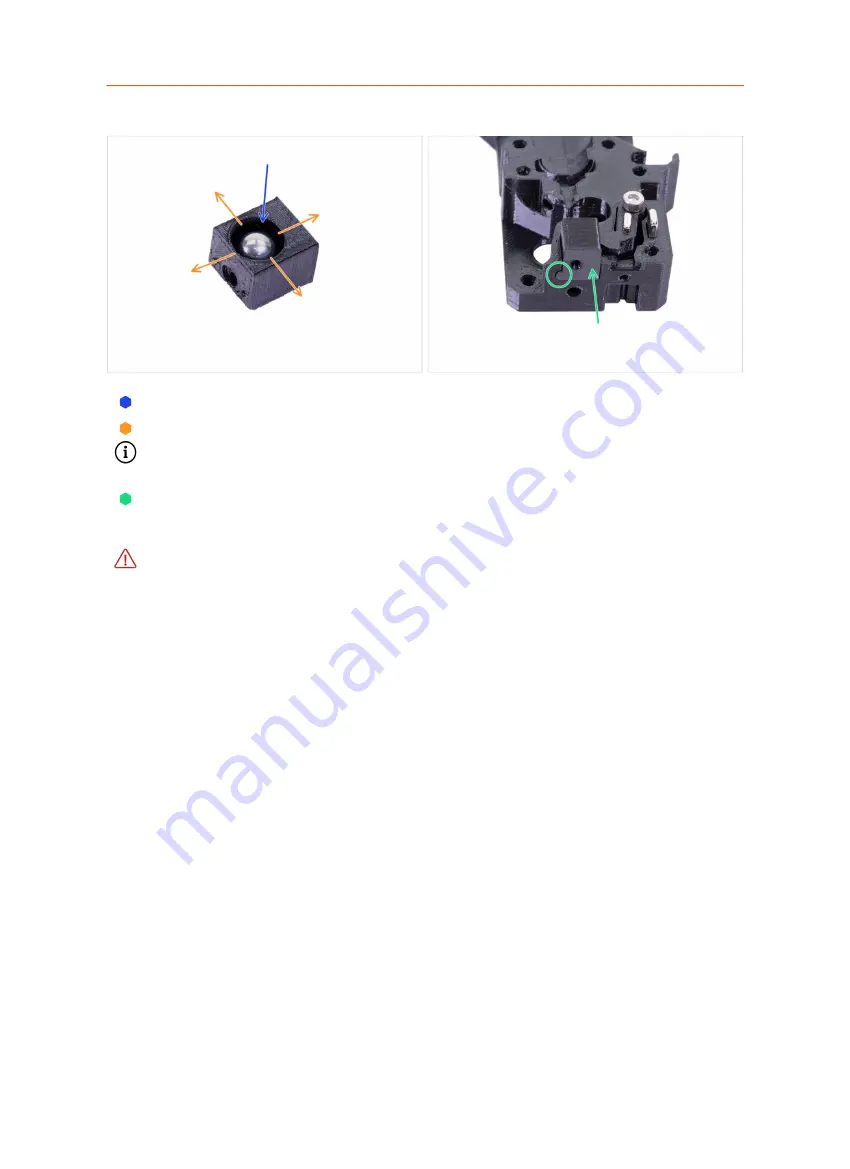
Take the printed part Adapter-printer and insert the steel ball in.
Roll with the ball to all sides to ensure smooth movement.
In case of any rough surface, remove the ball and clean the inside of the printed
part.
Place the printer part together with the steel ball in the Extruder-body. See the
rounded protrusion on the printed part. It must fit to the groove in the Extruder-
body. The surfaces of both parts should be almost aligned.
DON'T
use any screw to secure the Adapter-printer. It should hold inside the
Extruder-body by itself.
Summary of Contents for i3 MK3S+
Page 6: ...6 ...
Page 7: ...Original Prusa i3 MK3S kit assembly 7 1 Introduction ...
Page 15: ...Original Prusa i3 MK3S kit assembly 15 2 Y axis assembly ...
Page 36: ...36 Original Prusa i3 MK3S kit assembly 3 X axis assembly ...
Page 44: ...44 Original Prusa i3 MK3S kit assembly 4 Z axis assembly ...
Page 51: ...Original Prusa i3 MK3S kit assembly 51 5 E axis assembly ...
Page 88: ...88 Original Prusa i3 MK3S kit assembly 6 LCD assembly ...
Page 94: ...94 Original Prusa i3 MK3S kit assembly 7 Heatbed PSU assembly ...
Page 108: ...108 Original Prusa i3 MK3S kit assembly 8 Electronics assembly ...
Page 132: ...132 Original Prusa i3 MK3S kit assembly 9 Preflight check ...
Page 137: ...137 Notes ...
Page 138: ...138 ...
Page 139: ...139 Notes ...
Page 140: ...140 ...
Page 141: ...141 Notes ...
Page 142: ...142 ...
Page 143: ...143 Notes ...
Page 144: ...144 ...

