


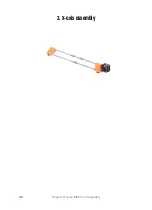
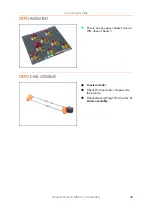


2. Y-axis assembly
Original Prusa i3 MK3S+ kit assembly
33
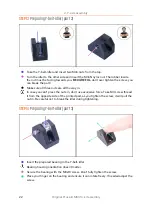
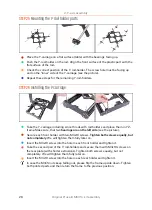
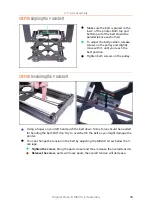
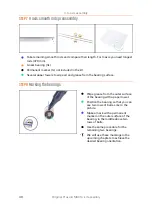
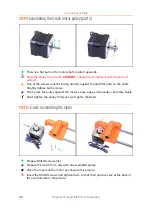
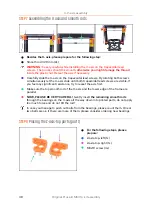
STEP 35
Aligning the Y-axis belt
Make sure the belt is placed in the
"axis" of the printer. Both top and
bottom part of the belt should be
parallel (above each other).
To adjust the belt position, release
screws on the pulley and slightly
move with it, until you reach the
best position.
Tighten both screws on the pulley.
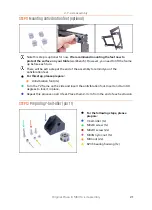
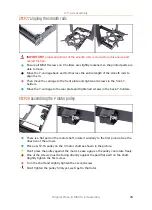
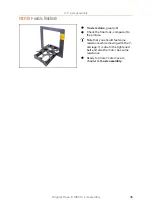
STEP 36
Tensioning the Y-axis belt
Using a finger on your left hand push the belt down. Some force should be needed
for bending the belt, BUT don't try to overstretch the belt as you might damage the
printer.
You can change the tension in the belt by adjusting the M3x30 screw below the Y-
carriage.
Tighten the screw
, bring the parts closer and thus increase the overall tension.
Release the screw
, parts will move apart, the overall tension will decrease.
Summary of Contents for i3 MK3S+
Page 6: ...6 ...
Page 7: ...Original Prusa i3 MK3S kit assembly 7 1 Introduction ...
Page 15: ...Original Prusa i3 MK3S kit assembly 15 2 Y axis assembly ...
Page 36: ...36 Original Prusa i3 MK3S kit assembly 3 X axis assembly ...
Page 44: ...44 Original Prusa i3 MK3S kit assembly 4 Z axis assembly ...
Page 51: ...Original Prusa i3 MK3S kit assembly 51 5 E axis assembly ...
Page 88: ...88 Original Prusa i3 MK3S kit assembly 6 LCD assembly ...
Page 94: ...94 Original Prusa i3 MK3S kit assembly 7 Heatbed PSU assembly ...
Page 108: ...108 Original Prusa i3 MK3S kit assembly 8 Electronics assembly ...
Page 132: ...132 Original Prusa i3 MK3S kit assembly 9 Preflight check ...
Page 137: ...137 Notes ...
Page 138: ...138 ...
Page 139: ...139 Notes ...
Page 140: ...140 ...
Page 141: ...141 Notes ...
Page 142: ...142 ...
Page 143: ...143 Notes ...
Page 144: ...144 ...