5
Step 27 - PSU and HB - final check
122
........................................................................
Step 28 - Cable management
122
...................................................................................
Step 29 - Connecting the extruder cable bundle
123
..................................................
Step 30 - Wrapping the cable bundle
123
.....................................................................
Step 31 - Connecting the extruder cable bundle
124
...................................................
Step 32 - Connecting the LCD cables
124
....................................................................
Step 33 - Connecting the motor cables
125
..................................................................
Step 34 - Preparing the zip ties
125
................................................................................
Step 35 - Hotend cable management (part 1)
126
.......................................................
Step 36 - Hotend cable guiding (part 2)
126
.................................................................
Step 37 - Verify all connections once more!
127
..........................................................
Step 38 - Finalizing the Einsy-case
127
.........................................................................
Step 39 - Mounting antivibration feet
128
.....................................................................
Step 40 - Assembling the double spool holder (part 1)
128
.......................................
Step 41 - Assembling the double spool holder (part 2)
129
........................................
Step 42 - Mounting the double spool holder
129
.........................................................
Step 43 - Gluing the silver label
130
..............................................................................
Step 44 - Haribo time!
130
...............................................................................................
Step 45 - Hooray!
131
.........................................................................................................
9. Preflight check
132
............................................................................................................
Step 1 - SuperPINDA adjustment (part 1)
133
...............................................................
Step 2 - SuperPINDA adjustment (part 2)
133
.............................................................
Step 3 - SuperPINDA adjustment (part 3)
133
.............................................................
Step 4 - Quick guide for your first prints
134
................................................................
Step 5 - Printable 3D models
134
...................................................................................
Step 6 - Prusa knowledge base
135
................................................................................
Step 7 - Join PrusaPrinters!
135
.......................................................................................
Step 8 - Haribo time!
135
..................................................................................................
Summary of Contents for i3 MK3S+
Page 6: ...6 ...
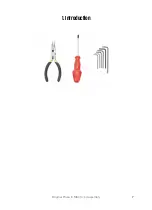
Page 7: ...Original Prusa i3 MK3S kit assembly 7 1 Introduction ...
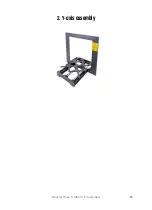
Page 15: ...Original Prusa i3 MK3S kit assembly 15 2 Y axis assembly ...
Page 36: ...36 Original Prusa i3 MK3S kit assembly 3 X axis assembly ...
Page 44: ...44 Original Prusa i3 MK3S kit assembly 4 Z axis assembly ...
Page 51: ...Original Prusa i3 MK3S kit assembly 51 5 E axis assembly ...
Page 88: ...88 Original Prusa i3 MK3S kit assembly 6 LCD assembly ...
Page 94: ...94 Original Prusa i3 MK3S kit assembly 7 Heatbed PSU assembly ...
Page 108: ...108 Original Prusa i3 MK3S kit assembly 8 Electronics assembly ...
Page 132: ...132 Original Prusa i3 MK3S kit assembly 9 Preflight check ...
Page 137: ...137 Notes ...
Page 138: ...138 ...
Page 139: ...139 Notes ...
Page 140: ...140 ...
Page 141: ...141 Notes ...
Page 142: ...142 ...
Page 143: ...143 Notes ...
Page 144: ...144 ...


