


8. Electronics assembly
Original Prusa i3 MK3S+ kit assembly
111
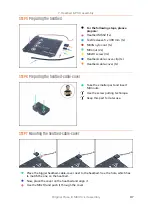
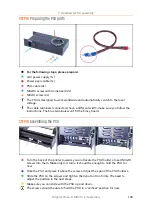
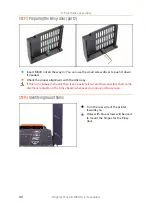
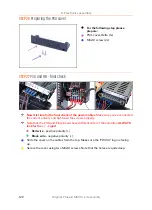
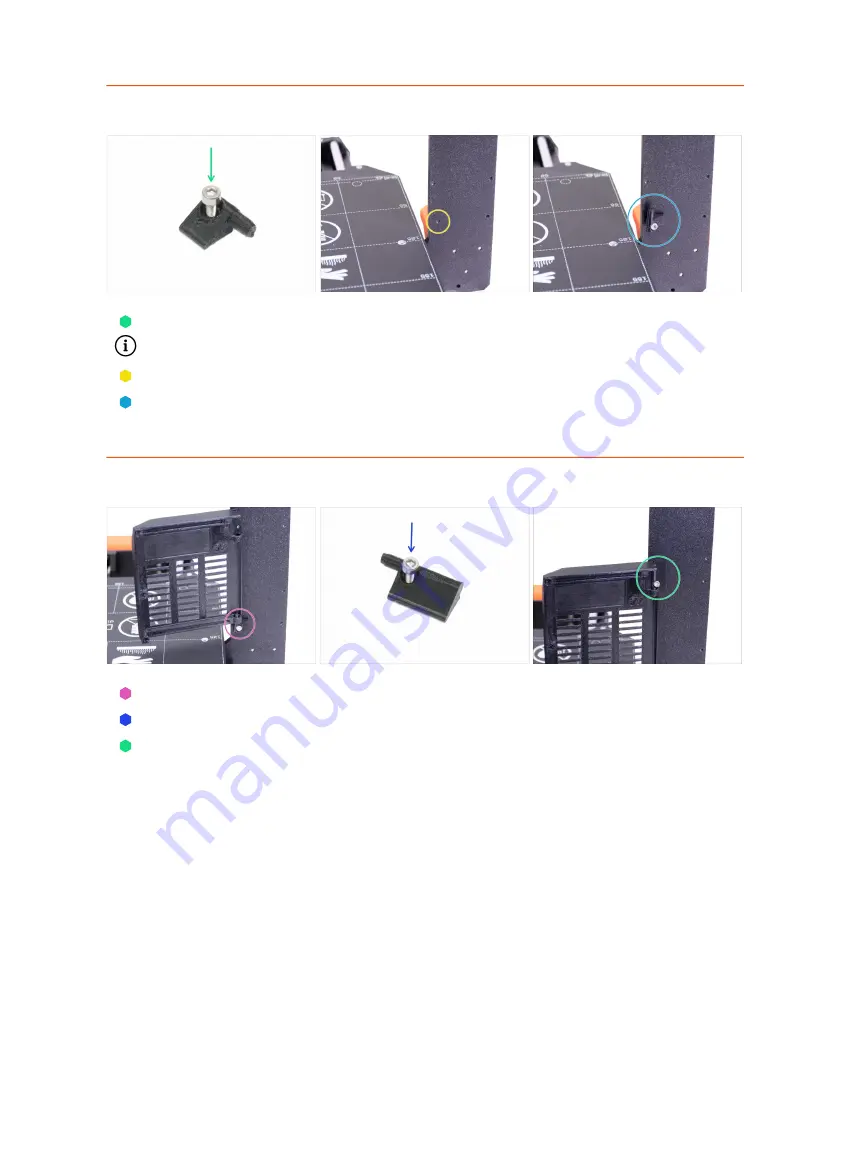
STEP 5
Preparing the lower hinge
Take the Einsy-hinge-bottom and push M3x10 screw through.
Note there is a cutout for the screw's head in the printed part.
Locate the hole for the lower hinge.
Place the hinge on the frame and tighten the screw. The hinge must be facing
upwards.
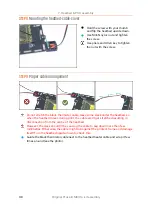
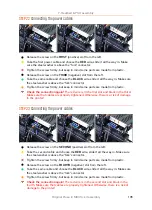
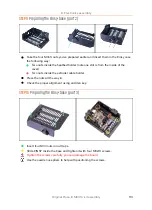
STEP 6
Einsy-door assembly
Place the Einsy-door on the lower hinge.
Take the Einsy-hinge-top and push M3x10 screw through.
Assemble the Einsy-hinge-top in the door and mount it to the frame.
Summary of Contents for i3 MK3S+
Page 6: ...6 ...
Page 7: ...Original Prusa i3 MK3S kit assembly 7 1 Introduction ...
Page 15: ...Original Prusa i3 MK3S kit assembly 15 2 Y axis assembly ...
Page 36: ...36 Original Prusa i3 MK3S kit assembly 3 X axis assembly ...
Page 44: ...44 Original Prusa i3 MK3S kit assembly 4 Z axis assembly ...
Page 51: ...Original Prusa i3 MK3S kit assembly 51 5 E axis assembly ...
Page 88: ...88 Original Prusa i3 MK3S kit assembly 6 LCD assembly ...
Page 94: ...94 Original Prusa i3 MK3S kit assembly 7 Heatbed PSU assembly ...
Page 108: ...108 Original Prusa i3 MK3S kit assembly 8 Electronics assembly ...
Page 132: ...132 Original Prusa i3 MK3S kit assembly 9 Preflight check ...
Page 137: ...137 Notes ...
Page 138: ...138 ...
Page 139: ...139 Notes ...
Page 140: ...140 ...
Page 141: ...141 Notes ...
Page 142: ...142 ...
Page 143: ...143 Notes ...
Page 144: ...144 ...