


5. E-axis assembly
74
Original Prusa i3 MK3S+ kit assembly
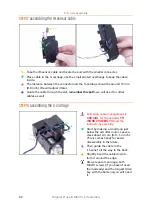
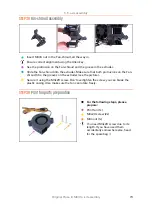
STEP 40
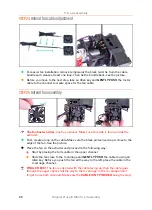
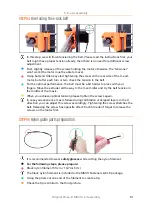
Print fan assembly
First, slide the fan in the Fan-shroud and make sure it is aligned properly.
Second, fix the fan in place using one M3x20 screw.
Tighten carefully
, or you will
damage the fan's casing.
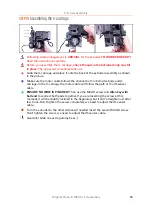
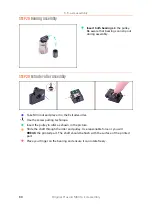
Turn the extruder around and insert the M3n nut. No need to pull it in, we will use
the screw.
Place the remaining M3x20 screw from the other side and tighten it,
but carefully,
or you will damage the fan's casing.
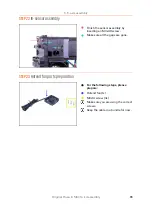
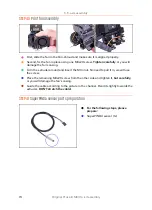
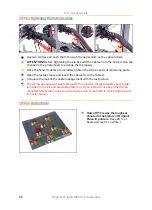
Guide the cable according to the picture in the channel. Bend it slightly towards the
extruder.
DON'T stretch the cable!
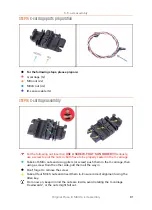
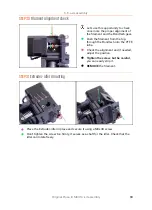
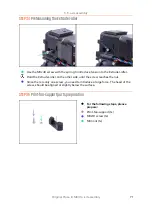
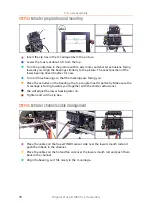
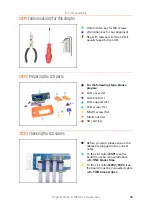
STEP 41
SuperPINDA sensor parts preparation
For the following steps, please
prepare:
SuperPINDA sensor (1x)
Summary of Contents for i3 MK3S+
Page 6: ...6 ...
Page 7: ...Original Prusa i3 MK3S kit assembly 7 1 Introduction ...
Page 15: ...Original Prusa i3 MK3S kit assembly 15 2 Y axis assembly ...
Page 36: ...36 Original Prusa i3 MK3S kit assembly 3 X axis assembly ...
Page 44: ...44 Original Prusa i3 MK3S kit assembly 4 Z axis assembly ...
Page 51: ...Original Prusa i3 MK3S kit assembly 51 5 E axis assembly ...
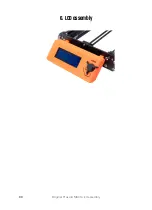
Page 88: ...88 Original Prusa i3 MK3S kit assembly 6 LCD assembly ...
Page 94: ...94 Original Prusa i3 MK3S kit assembly 7 Heatbed PSU assembly ...
Page 108: ...108 Original Prusa i3 MK3S kit assembly 8 Electronics assembly ...
Page 132: ...132 Original Prusa i3 MK3S kit assembly 9 Preflight check ...
Page 137: ...137 Notes ...
Page 138: ...138 ...
Page 139: ...139 Notes ...
Page 140: ...140 ...
Page 141: ...141 Notes ...
Page 142: ...142 ...
Page 143: ...143 Notes ...
Page 144: ...144 ...