


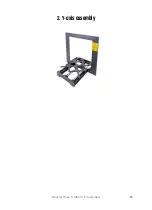


2. Y-axis assembly
18
Original Prusa i3 MK3S+ kit assembly
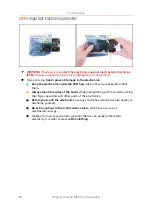
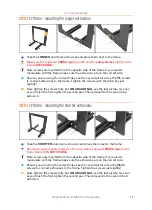
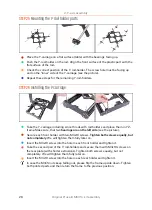
STEP 5
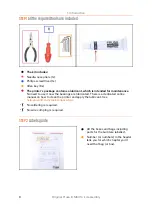
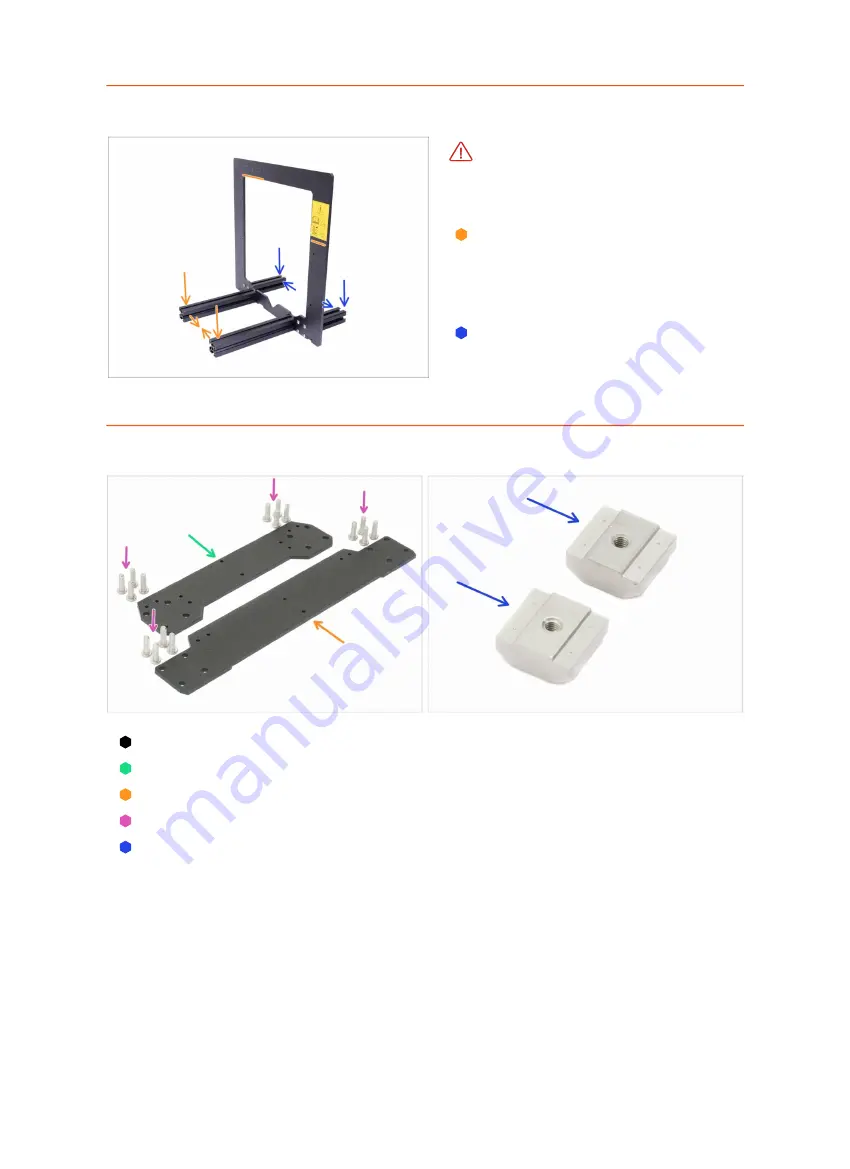
YZ frame - final check
Before we proceed further, let's
make a final check.
IT IS VERY
IMPORTANT
to have extrusions on
the correct side of the frame.
Long extrusions
- must be on the
side of the frame
with the Prusa
logo
and the
safety sticker
, also
ensure longer extrusions are
closer
together
.
Short extrusions
- must be on the
side of the frame
without the Prusa
logo
, also ensure shorter extrusions
are
further away from each other
.
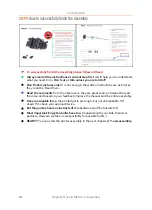
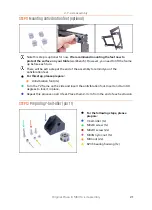
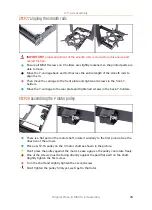
STEP 6
Y-axis: front and rear plate preparation
For the following steps, please prepare:
Front plate (1x)
Rear plate (1x)
M5x16r screw (16x)
PSU holders M3nE (2x)
Summary of Contents for i3 MK3S+
Page 6: ...6 ...
Page 7: ...Original Prusa i3 MK3S kit assembly 7 1 Introduction ...
Page 15: ...Original Prusa i3 MK3S kit assembly 15 2 Y axis assembly ...
Page 36: ...36 Original Prusa i3 MK3S kit assembly 3 X axis assembly ...
Page 44: ...44 Original Prusa i3 MK3S kit assembly 4 Z axis assembly ...
Page 51: ...Original Prusa i3 MK3S kit assembly 51 5 E axis assembly ...
Page 88: ...88 Original Prusa i3 MK3S kit assembly 6 LCD assembly ...
Page 94: ...94 Original Prusa i3 MK3S kit assembly 7 Heatbed PSU assembly ...
Page 108: ...108 Original Prusa i3 MK3S kit assembly 8 Electronics assembly ...
Page 132: ...132 Original Prusa i3 MK3S kit assembly 9 Preflight check ...
Page 137: ...137 Notes ...
Page 138: ...138 ...
Page 139: ...139 Notes ...
Page 140: ...140 ...
Page 141: ...141 Notes ...
Page 142: ...142 ...
Page 143: ...143 Notes ...
Page 144: ...144 ...