


5. E-axis assembly
86
Original Prusa i3 MK3S+ kit assembly
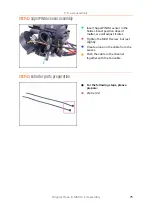
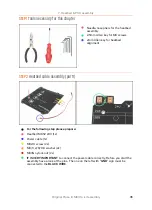
STEP 64
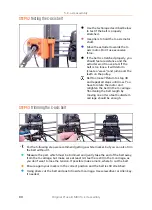
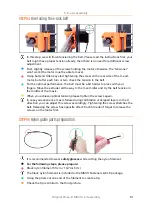
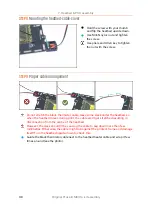
Tightening the hotend cables
Use two zip ties and push them through the upper slots on the cable-holder.
ATTENTION!
Before tightening the zip ties add the cables from the hotend. Use the
channel in the printed part to arrange them properly.
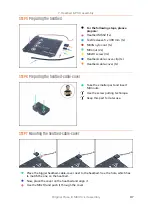
Once the hotend cables are included, tighten the zip ties and cut remaining parts.
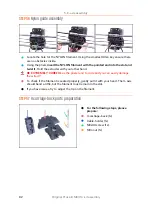
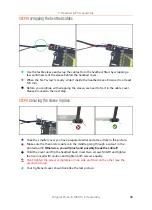
Open the textile sleeve and insert the cables from the hotend.
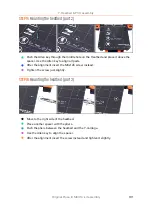
Compare the look of the cable management with the last picture.
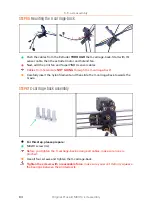
The zip tie arrangement was tested with the injection molded double spool holder
(provided in the kit and assembled later on). If you intend to use any other frame
mounted type holder, make sure the zip ties won't crash into it, which might result
in a print failure.
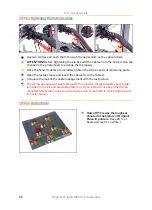
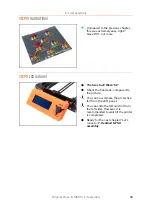
STEP 65
Haribo time!
Hats off! This was the toughest
chapter in the history of Original
Prusa i3 printers
. Have 20 % of
bears and rest for a while ;)
Summary of Contents for i3 MK3S+
Page 6: ...6 ...
Page 7: ...Original Prusa i3 MK3S kit assembly 7 1 Introduction ...
Page 15: ...Original Prusa i3 MK3S kit assembly 15 2 Y axis assembly ...
Page 36: ...36 Original Prusa i3 MK3S kit assembly 3 X axis assembly ...
Page 44: ...44 Original Prusa i3 MK3S kit assembly 4 Z axis assembly ...
Page 51: ...Original Prusa i3 MK3S kit assembly 51 5 E axis assembly ...
Page 88: ...88 Original Prusa i3 MK3S kit assembly 6 LCD assembly ...
Page 94: ...94 Original Prusa i3 MK3S kit assembly 7 Heatbed PSU assembly ...
Page 108: ...108 Original Prusa i3 MK3S kit assembly 8 Electronics assembly ...
Page 132: ...132 Original Prusa i3 MK3S kit assembly 9 Preflight check ...
Page 137: ...137 Notes ...
Page 138: ...138 ...
Page 139: ...139 Notes ...
Page 140: ...140 ...
Page 141: ...141 Notes ...
Page 142: ...142 ...
Page 143: ...143 Notes ...
Page 144: ...144 ...