
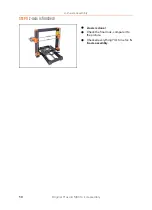


5. E-axis assembly
Original Prusa i3 MK3S+ kit assembly
59
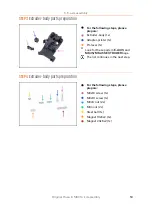
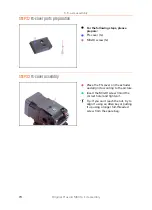
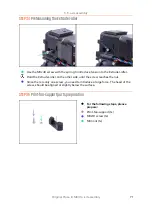
STEP 11
Extruder-cover part preparation
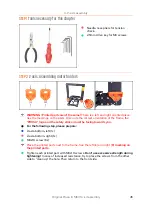
For this step, please prepare:
Extruder-cover (1x)
M3nS nut (1x)
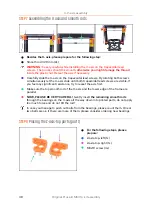
Slide the nut all the way in.
Ensure correct alignment using the Allen key.
Leave the hole on the "arm" empty for now. We will use it later, while assembling a
print fan.
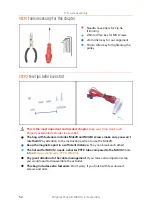
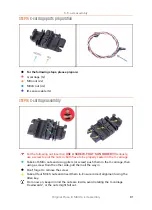
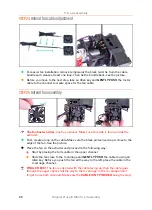
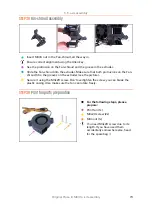
STEP 12
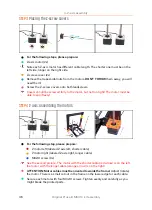
Hotend parts preparation
For the following steps, please prepare:
Hotend for the MK3S+ (1x)
M3x40 screw (2x)
M3x10 screw (2x)
We will use one M3x40 later on, keep it around.
Don't cut the main zip tie on the hotend cables, or remove the rubber band, it will
make the assembly easier.
Summary of Contents for i3 MK3S+
Page 6: ...6 ...
Page 7: ...Original Prusa i3 MK3S kit assembly 7 1 Introduction ...
Page 15: ...Original Prusa i3 MK3S kit assembly 15 2 Y axis assembly ...
Page 36: ...36 Original Prusa i3 MK3S kit assembly 3 X axis assembly ...
Page 44: ...44 Original Prusa i3 MK3S kit assembly 4 Z axis assembly ...
Page 51: ...Original Prusa i3 MK3S kit assembly 51 5 E axis assembly ...
Page 88: ...88 Original Prusa i3 MK3S kit assembly 6 LCD assembly ...
Page 94: ...94 Original Prusa i3 MK3S kit assembly 7 Heatbed PSU assembly ...
Page 108: ...108 Original Prusa i3 MK3S kit assembly 8 Electronics assembly ...
Page 132: ...132 Original Prusa i3 MK3S kit assembly 9 Preflight check ...
Page 137: ...137 Notes ...
Page 138: ...138 ...
Page 139: ...139 Notes ...
Page 140: ...140 ...
Page 141: ...141 Notes ...
Page 142: ...142 ...
Page 143: ...143 Notes ...
Page 144: ...144 ...


