


7. Heatbed & PSU assembly
Original Prusa i3 MK3S+ kit assembly
99
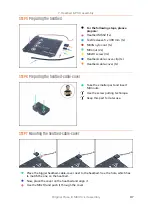
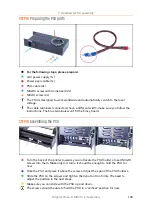
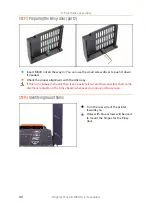
STEP 10
Wrapping the heatbed cables
Use the textile sleeve and wrap the cables from the heatbed. Start by wrapping a
few centimeters of the sleeve behind the heatbed cover.
When the first "wrap" is ready, slide it inside the heatbed cover. Ensure it is at least
5-6 mm.
Before you continue with wrapping the sleeve, we need to fix it in the cable cover.
Please proceed to the next step.
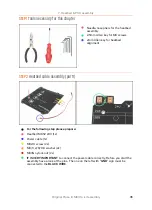
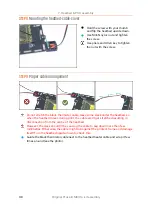
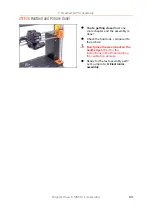
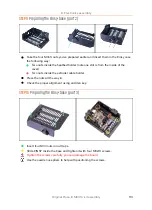
STEP 11
Securing the sleeve in place
Take the smaller cover you have prepared earlier and place it like in the picture.
Make sure the thermistor cable is in the middle going through a cutout in the
printed part!!!
Otherwise, you will pinch and possibly break the cable!!!
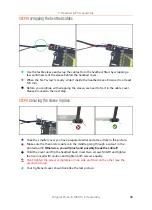
Hold the cover and flip the heatbed back. Insert two screws M3x10 and tighten
them, proceed with caution and tighten both screws equally.
Don't tighten the screw completely on one side and then on the other (see the
second picture)!
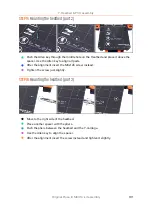
Your tightened cover should look like the last picture.
Summary of Contents for i3 MK3S+
Page 6: ...6 ...
Page 7: ...Original Prusa i3 MK3S kit assembly 7 1 Introduction ...
Page 15: ...Original Prusa i3 MK3S kit assembly 15 2 Y axis assembly ...
Page 36: ...36 Original Prusa i3 MK3S kit assembly 3 X axis assembly ...
Page 44: ...44 Original Prusa i3 MK3S kit assembly 4 Z axis assembly ...
Page 51: ...Original Prusa i3 MK3S kit assembly 51 5 E axis assembly ...
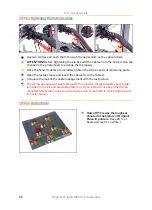
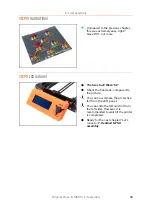
Page 88: ...88 Original Prusa i3 MK3S kit assembly 6 LCD assembly ...
Page 94: ...94 Original Prusa i3 MK3S kit assembly 7 Heatbed PSU assembly ...
Page 108: ...108 Original Prusa i3 MK3S kit assembly 8 Electronics assembly ...
Page 132: ...132 Original Prusa i3 MK3S kit assembly 9 Preflight check ...
Page 137: ...137 Notes ...
Page 138: ...138 ...
Page 139: ...139 Notes ...
Page 140: ...140 ...
Page 141: ...141 Notes ...
Page 142: ...142 ...
Page 143: ...143 Notes ...
Page 144: ...144 ...