7. Heatbed & PSU assembly
Original Prusa i3 MK3S+ kit assembly
101
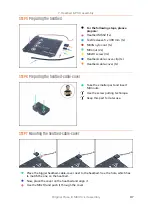
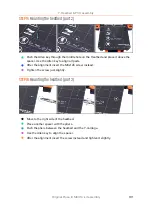
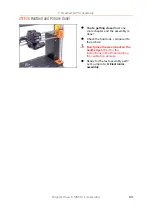
STEP 15
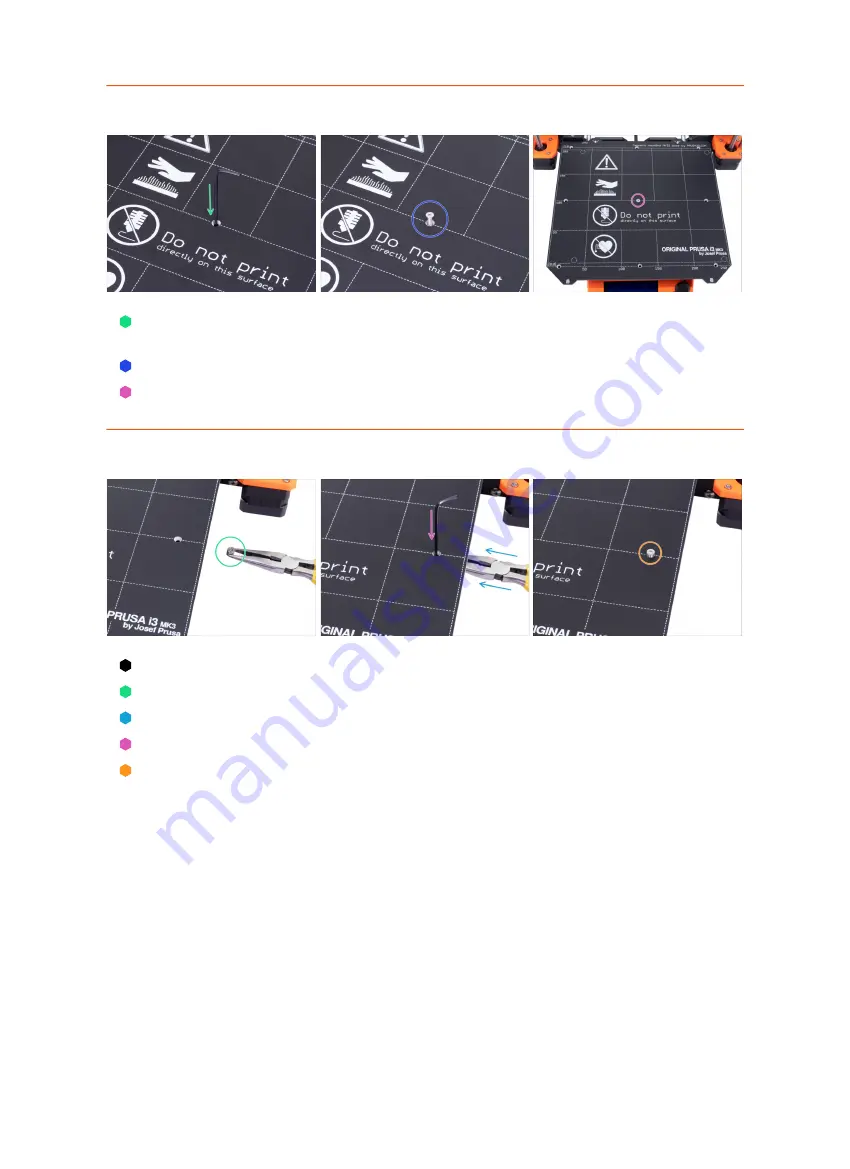
Mounting the heatbed (part 2)
Push the Allen key through the middle hole on the Heatbed and place it above the
spacer. Use the Allen key to align all parts.
After the alignment insert the M3x12b screw instead.
Tighten the screw just slightly.
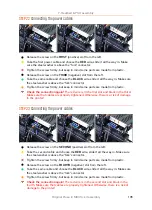
STEP 16
Mounting the heatbed (part 3)
Move to the right side of the heatbed.
Place another spacer with the pliers.
Push the pliers between the heatbed and the Y-carriage.
Use the Allen key to align the spacer.
After the alignment insert the screw instead and tighten it slightly.
Summary of Contents for i3 MK3S+
Page 6: ...6 ...
Page 7: ...Original Prusa i3 MK3S kit assembly 7 1 Introduction ...
Page 15: ...Original Prusa i3 MK3S kit assembly 15 2 Y axis assembly ...
Page 36: ...36 Original Prusa i3 MK3S kit assembly 3 X axis assembly ...
Page 44: ...44 Original Prusa i3 MK3S kit assembly 4 Z axis assembly ...
Page 51: ...Original Prusa i3 MK3S kit assembly 51 5 E axis assembly ...
Page 88: ...88 Original Prusa i3 MK3S kit assembly 6 LCD assembly ...
Page 94: ...94 Original Prusa i3 MK3S kit assembly 7 Heatbed PSU assembly ...
Page 108: ...108 Original Prusa i3 MK3S kit assembly 8 Electronics assembly ...
Page 132: ...132 Original Prusa i3 MK3S kit assembly 9 Preflight check ...
Page 137: ...137 Notes ...
Page 138: ...138 ...
Page 139: ...139 Notes ...
Page 140: ...140 ...
Page 141: ...141 Notes ...
Page 142: ...142 ...
Page 143: ...143 Notes ...
Page 144: ...144 ...


