


install - concepts - PixMaster - switcher - CG - clips - controls - team - appendix
FLINT
V1.1
5.9.7
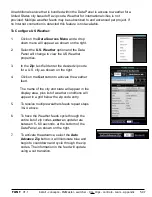
5.9.7 Data Panel
The Data Panel is the workspace to view custom data sources and to configure stock data
sources like: Clocks, Timers, Dates, Daktronics Feeds, RSS Feeds, Twitter Feeds and US
Weather. Custom data sources may be .XML, .MDB, .ACCDB (Microsoft Access
Database), .XLS, .XLSX, .XLSM or .XLSB (Excel) database files. The Clocks, Timers and
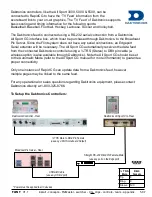
Dates are all based off the computer clock. Daktronics feeds are connected serially to a
Daktronics controller through a Daktronics All Sport CG. RSS (Really Simple Syndication
)
Feeds, Twitter Feeds and US Weather are web services that use an Internet connection to
retrieve information from websites. If no Internet connection is available these 3 services
will not function. Take proper caution when connecting the Server to the public Internet.
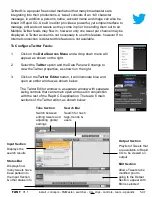
The Data Panel is used to setup the data sources, which are then linked to RTX Tags inside
the Editor Window.
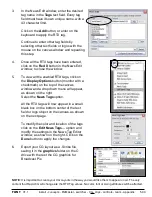
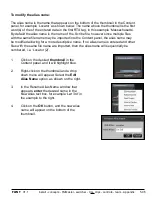
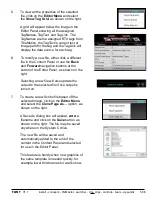
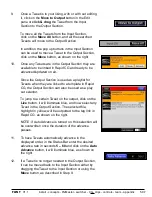
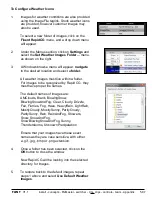
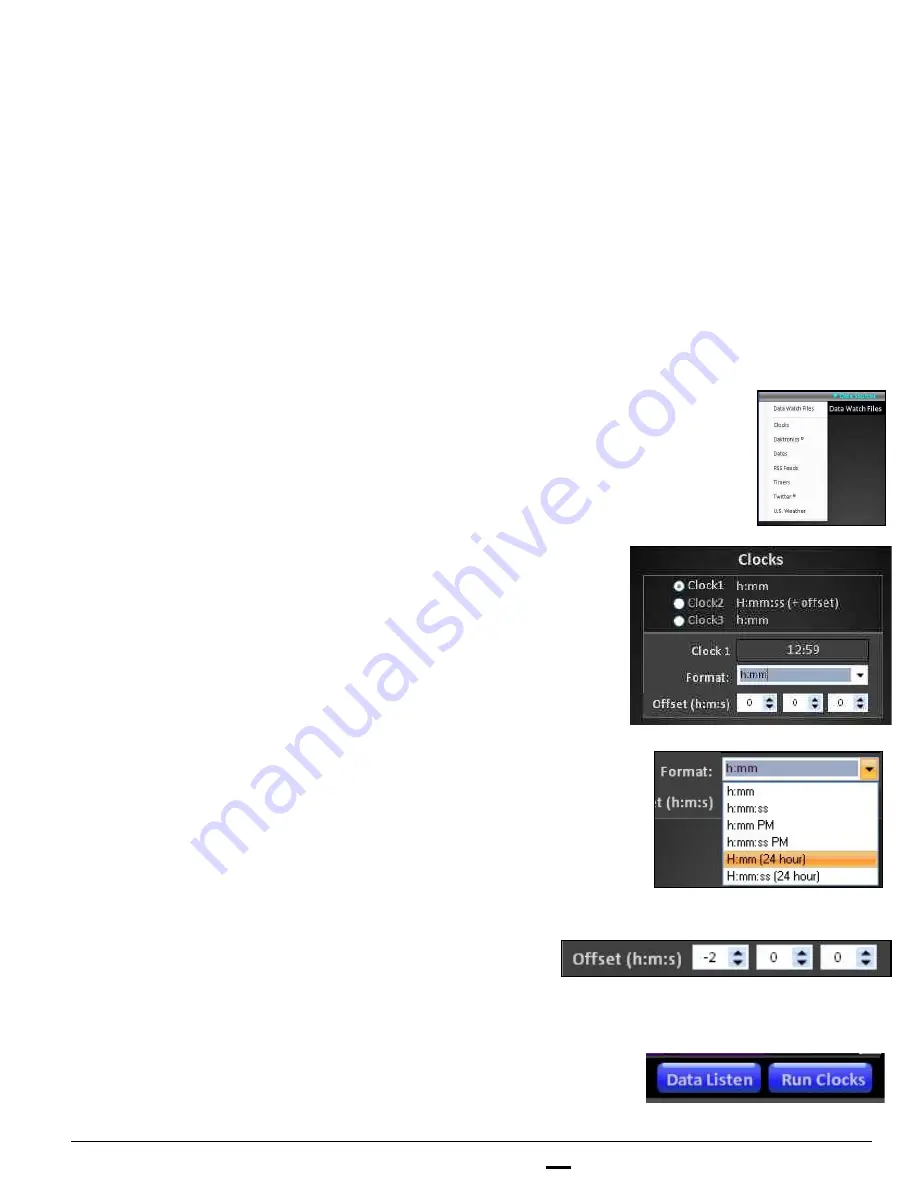
To Configure Clocks:
1.
Click on the
Data Sources Menu
and a drop down
menu will appear, as shown on the right.
2.
Select the
Clocks
option and the Data Panel will
change to view the Clocks properties.
3.
Click on the
Clock1
radio button, as shown on the right.
Up to 3 different clocks may be configured and linked to
files.
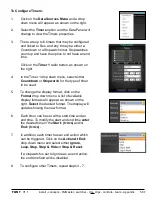
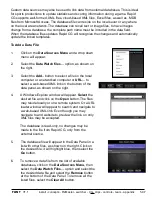
4.
To change the display format, click on the
Format
drop
down menu. A list of available display formats will
appear, as shown on the right.
Select
the desired
format. The Clock 1 display will update showing the new
format.
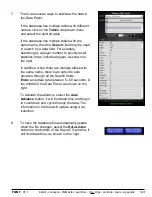
5.
Each clock may also be offset by hours, minutes and/or
seconds, useful for displaying different time zones.
In the
Offset (h:m:s)
entry field enter the desired offset,
as shown on the right. 0:0:0 will use the default
computer clock. The Clock 1 display will update showing
the new offset.
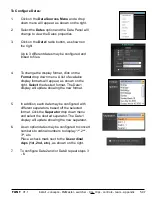
6.
To configure Clock2 and/or Clock3 repeat
steps 3 - 5.
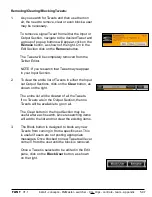
7.
To start running the clocks, click on the
Run Clocks
button on the bottom of the Rapid CG window, it will
illuminate blue, as shown on the right.


