93
Phonebook
Phonebook new entry
Adding entries into FOMA terminal phonebook
This section describes how to add phone numbers and mail addresses to the FOMA terminal
phonebook.
I
It is recommended that you keep a separate written record of all the data you saved in the phonebook.
The data can be forward and stored into your PC using data link software and the USB cable. If you are
a subscriber to Data Security Service, you can save the data in the Data Center.
I
The phonebook data that is saved in the FOMA terminal can be backed up to a microSD memory card.
I
Data may be lost due to failure, repair or modifications of FOMA terminal. DoCoMo assumes no
responsibility for accidentally erased data.
I
Note that, when changing the models at a sales outlet such as DoCoMo shop, data saved in FOMA
terminal may not be copied to a new model terminal due to its specifications.
I
Maximum number of saved items
→
P92
1
m
e
42
2
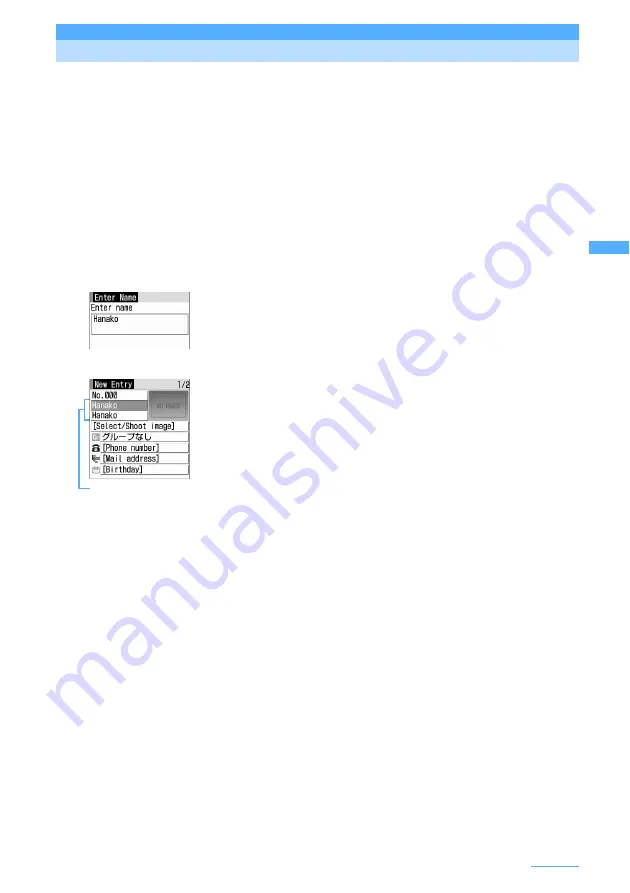
Enter a name.
・
Up to 16 two-byte or 32 one-byte characters can be entered.
・
The entry cannot be added into the phonebook without entering name.
3
Press
p
.
Check the name and reading.
■
Correcting the name :
Select the Name entry field
e
Correct the name
e
p
■
Correcting the reading :
Select the Reading entry field
e
Correct the
reading
e
g
・
Up to 32 one-byte characters can be entered.
・
If you correct the name, the reading of the name will not automatically
reflect changes made to the name.
4
Select and set the required items below
e
p
[Save]
Phonebook number (No.000-699)
: The lowest available phonebook number is assigned automatically.
・
When a phonebook number that has already been used is specified, a confirmation
screen is displayed asking whether to overwrite. When not overwriting, select "New
entry" and specify another phonebook number.
・
Zeroes before single- or double-digit phonebook numbers can be omitted.
Select/Shoot image
: Sets an image or movie/i-motion that is displayed when a call is received/made or the
phonebook data is checked. This item is displayed when the saved person calls with
the caller ID.
・
To restore the default setting, press
5
.
■
Setting image :
1
e
Select a folder
e
Select an image
Folders and reading list of images
→
P308
・
When an image with horizontal and vertical sizes (or vice versa) exceeding 640 x
480 is selected, a confirmation screen appears asking whether or not to reduce
the image. Select "Yes" and set an image to save the image reduced to the
phonebook size.
・
When a call is received/made or phonebook data is checked, the image during a play
is displayed for Animation and the first image is displayed for created animation.
■
Setting still image by shooting with camera :
2
e
Shoot still image
e
g
・
The size of a still image to be shot is set to Ph.Book (96 x 72) automatically.
Name and reading
Continue
e
Содержание F903i' 06.10
Страница 186: ......
Страница 301: ...299 Full Browser Viewing websites for PCs Full Browser 300 Setting for Full Browser 304 ...
Страница 412: ......
Страница 430: ......
Страница 485: ...483 INDEX Quick Reference Manual INDEX 484 Quick Reference Manual 490 ...
Страница 519: ...18 2 Select パケット通信 Packet communication and click 次へ Next 3 Select その他 Others and click 次へ Next 4 Click OK ...
Страница 563: ...Kuten Code List CA92002 4966 ...


