


install - concepts - PixMaster - switcher - CG - clips - controls - team - appendix
FLINT
V1.1
7.18
7.18 KiPro Control
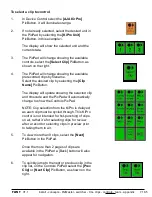
The Broadcast Pix switcher can also provide control of the full line of AJA KiPro
recorders, over a TCP/IP connection. Up to 12 KiPro units may be controlled by
Broadcast Pix, controllable functions include selecting recorded clips by clip name on the
PixPad to play/fast forward/reverse and starting and stopping new clip recordings. All
device configurations and record settings are done on the KiPro or through its
web interface. For more information on how to configure and operate the KiPro, please
refer to its manual.
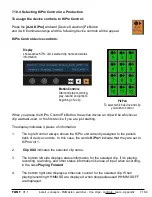
NOTE: Clip selection from the KiPro is delayed, as each clip must be cycled through. This
KiPro control is not intended for hot-punching of clips on air, rather it’s for selecting clips
for review after a record or selecting clips in preview prior to taking them to air.
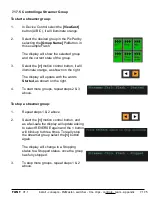
Clips appear on the PixPad in the order in which they are stored/recorded on the KiPro.
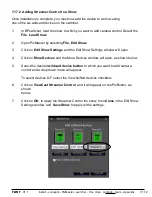
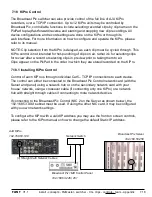
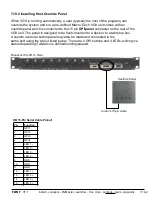
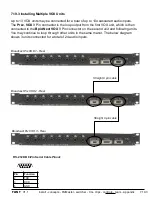
7.18.1 Installing KiPro Control
Control of each KiPro is through individual Cat5 – TCP/IP connections to each device.
The control can either be connected to the Broadcast Pix Control network card (with the
Server and panel) using a network hub or on the secondary network card with your
‘house’ network, using a crossover cable (if connecting only one KiPro) or a network
hub with straight through cables if connecting to more network devices.
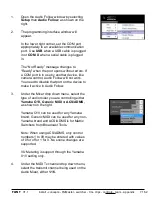
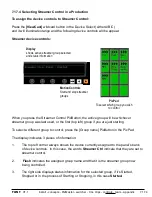
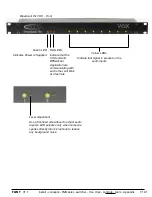
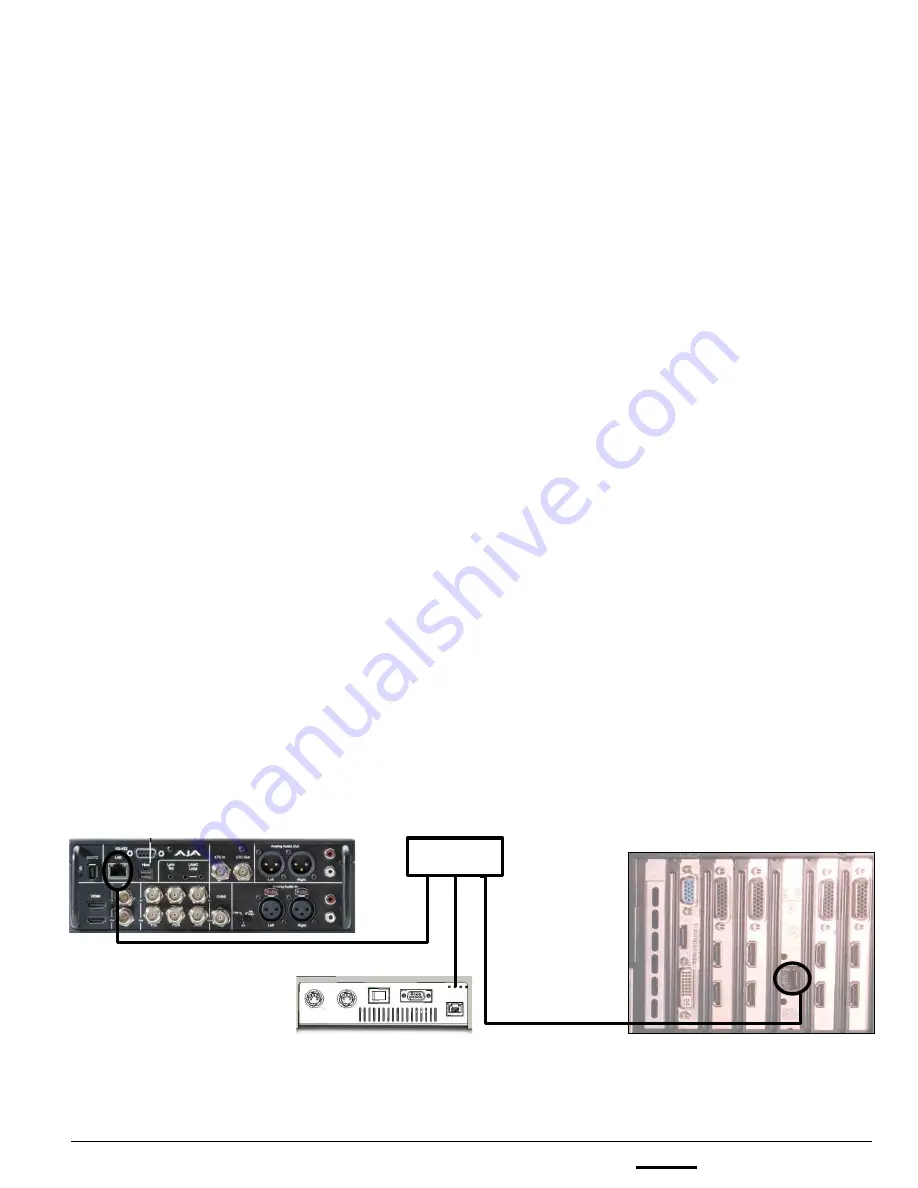
If connecting to the Broadcast Pix Control (NIC 2 on the Server as shown below), the
192.168.53.XXX subnet must be used. If using the other NIC card, it may be configured
with you own network settings.
To configure the KiPro with a valid IP address you may use the front on screen controls,
please refer to the KiPro manual on how to change the default Static IP address.
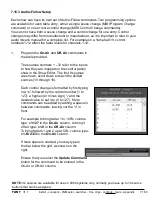
AJA KiPro
192.168.53.148
Broadcast Pix Server
192.168.53.250
Network Switch
(3) Straight Cat5 Network Cables
Broadcast Pix 1ME Control Panel
192.168.53.245 / 251


