


install - concepts - PixMaster - switcher - CG - clips - controls - team - appendix
FLINT
V1.1
5.9.6
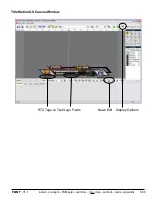
5.9.6 Editor Panel
The Editor Panel is the output of Rapid CG, and is what the RapidCG_A and RapidCG_B
files are outputting to Broadcast Pix Switcher. It displays a larger image of the selected file
from the Content panel and is an edit window to link the RTX tags assigned from
TitleMotion with data sources.
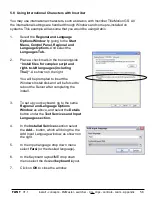
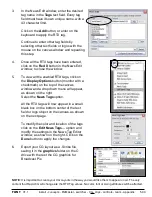
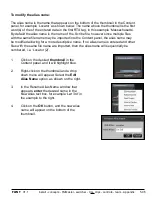
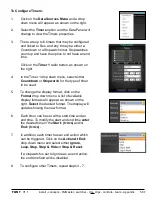
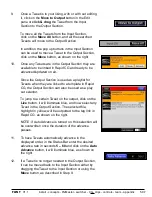
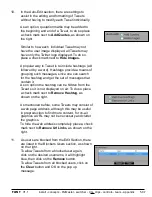
To Modify Content Manually:
1.
Click on a file in the Content Panel.
This will open the file in the Editor Panel
as shown on the right.
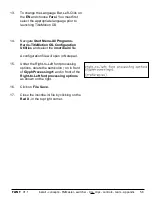
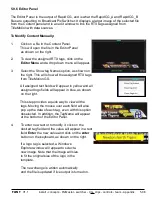
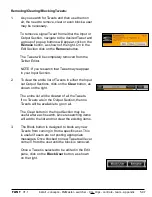
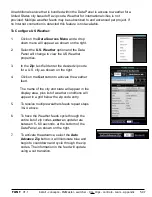
2.
To view the assigned RTX tags, click on the
Editor Menu
and a drop down menu will appear.
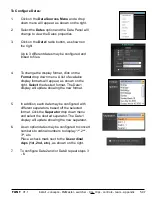
3.
Select the Show tag Names
option, as shown on
the right. This will show all the assigned RTX tags
from TitleMotion GS.
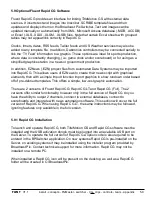
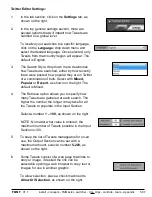
All assigned text fields will appear in yellow and all
assigned logo fields will appear in blue, as shown
on the right.
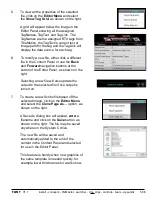
This step provides a quick way to view all the
tags. Moving the mouse over each field will also
pop up the data of each tag, even with this option
deselected. In addition, the TagName will appear
at the bottom of the Editor Panel.
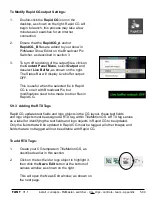
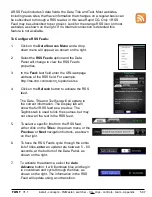
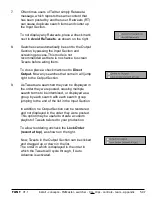
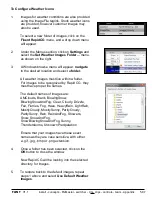
4.
To enter new text or to modify it, click on the
desired tag field and the value will appear in a text
field.
Enter
the new value and click on the
enter
button on the keyboard, as shown on the right.
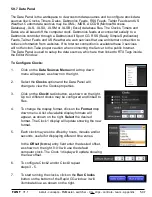
If a logo tag is selected, a Windows
Explorer window will appear to select a
new image. Note that the image will size
to fit the original size of the logo in the
template.
The new change is written automatically
and the file is updated if live output is turned on.