1:
E
le
me
nt
w
ith
S
tu
dio
En
gin
e:
S
et
up
&
C
on
ne
ct
io
ns
•
2
©2016 Axia Audio- Rev 1.8.1
Most folks that encounter problems setting up a new sys-
tem have not paid attention to this requirement. More
information on switches can be found at
https://www.
telosalliance.com/Axia/What-Ethernet-Switches-has-
Axia-Approved
. Information on specific configurations
is available in the user manuals section at
https://www.
telosalliance.com/Axia
.
Element with StudioEngine: Setup
If you haven’t done so yet, it’s time to get your
Element out of its packing crate. This is a two-person
job, so grab a partner.
Important: Like any electronic device, Element
can be affected by static electricity. Use of a
personal grounding device is strongly recom-
mended during transport.
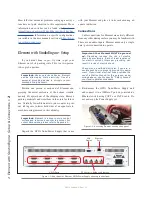
Position one person at each end of Element and,
grasping the metal enclosure at the bottom, simulta-
neously lift upward out of the shipping crate. Remove
packing materials and store them in the crate for future
use. Carefully lower Element into your counter top cut-
out, taking care to lower both sides at an equal rate to
avoid becoming jammed in the cabinetry.
Important: Element is a drop-in style control
surface and requires a counter top cutout. For
cutout dimensions, please refer to Appendix A.
Unpack the GPIO Node/Power Supply that came
with your Element and place it in its rack ensuring ad-
equate ventilation.
Connections
Cable connections for Element are entirely different
from any other mixing surface you may be familiar with.
There are no audio inputs; Element needs only a single
data / power connection to operate.
Important: Your Element MUST be ground-
ed. Grounding reduces the risk of electric
shock by providing a “path of least resistance”
for electric current. Improper grounding can
result in a risk of electric shock.
Check with a qualified electrician if you are in
doubt about how to properly ground this equip-
ment. If your local electrical code prohibits the
use of a Station Ground for this purpose, as de-
scribed above, use the specific “Safety Ground”
your local regulations mandate.
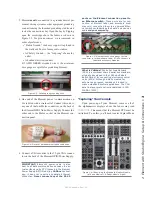
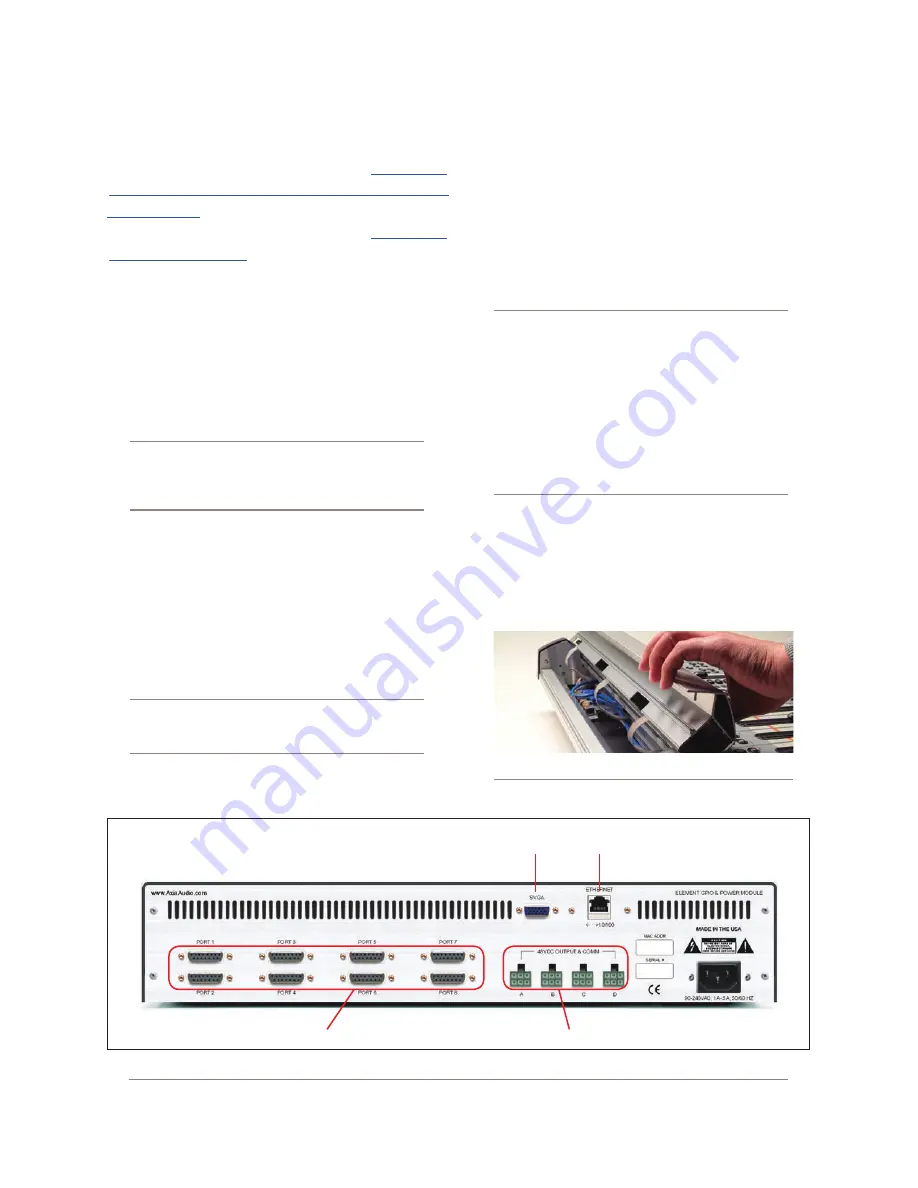
1. Rack-mount the GPIO Node/Power Supply unit
and connect it to a 100Base-T port on your studio’s
Ethernet switch using CAT.5e or CAT.6 cable. Do
not power up the Power Supply yet.
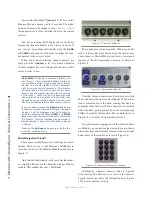
Figure 1-2: Accessing Element’s connection panel.
Figure 1-1: Rear panel of Element GPIO/Power Supply showing connections.
Ethernet
Port
GPIO Ports
DC Power - CANbus to Element
VGA
Display
Содержание element v.2.0
Страница 100: ...5 Element Operations 90 2016 Axia Audio Rev 1 8 1 Capital budget may you never decrease for we need new test gear...
Страница 149: ...Appendix A Specifications 139 2016 Axia Audio Rev 1 8 1...
Страница 183: ...Warranty 173 2016 Axia Audio Rev 1 8 1 TCP IP How did we live without thee Analogicly...
Страница 184: ...THIS PAGE INTENTIONALLY LEFT BLANK...
Страница 185: ...THIS PAGE INTENTIONALLY LEFT BLANK...


