6: S
ho
w P
ro
fil
es •
96
©2016 Axia Audio- Rev 1.8.1
•
SAVE CHANGES
button (also found at the top of
the screen) applies any changes made to the current
Channel Description. If you don’t click this button,
your changes won’t be saved!
•
BACK TO SHOW PROFILE
link takes you back to
the Show Profile Settings menu.
The Auxiliary Send And Return
Description Screen
Just as the Show Profile Channel Description screens
mirror Element’s
Channel Options
menus, the Auxil-
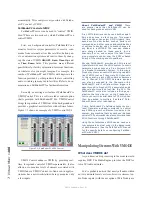
iary Send Description Screen captures the global Aux
Send settings that can be set using the
Global Options
Sends & Returns Key
located on the Master Module.
Note: Instead of the Retain Source Settings
option found in the Channel Descriptions pages,
the Auxiliary Send Descriptions Screen features
a new option: Retain Existing Settings. Us-
ing this option with any of the Aux Send/Return
settings allows the Show Profile to be loaded
without disturbing the Aux Send/Return master
settings in use by the board operator.
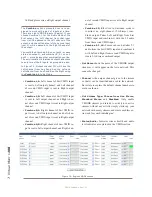
From the Show Profile Settings web page, choose the
Auxiliary Send/Return Data link. You’ll find the fol-
lowing options:
•
Aux Send A / B / C / D Master Gain:
Selecting
Off
turns off master gain adjustment for each
Aux
Send’s
outbound feed. Select
Use
and enter a gain
value between -25 dB and 10 dB to trim overall gain
if desired, or select
Retain Existing Setting.
•
Aux Send A / B / C / D On/Off Status:
Choose
Off
to turn the selected Aux Send 1 off completely,
On
to turn it on, or
Retain Existing Setting.
•
Aux Return A /B Master Gain:
Selecting
Off
turns
off master gain adjustment for the selected Aux Re-
turn bus. Select
Use
and enter a gain value between
-25 dB and 10 db to trim overall return gain if desired,
or select
Retain Existing Setting.
•
Aux Return A / B On/Off Status:
Choose
Off
to
turn the selected Aux Return off completely,
On
to
turn it on, or
Retain Existing Setting.
•
Aux Return A / B Signal Mode:
Choose from
Stereo, Left
(left channel fed to both sides),
Right
(right channel fed to both sides),
Sum
(sum L+R to
mono and feed to both sides) or
Retain Existing
Setting.
•
Aux Return A / B Panorama Setting:
Trim Pan/
Balance for the selected Aux Return, or
Retain Ex-
isting Setting.
• Aux Return A / B Assign to PGM1 / PGM2 / PGM3 /
PGM4
: Choose On to fold the selected Aux Return
into any of the four PGM buses, or choose
Retain
Existing Setting.
•
Aux A / B Source ID:
If this drop-down box looks
familiar, that’s because it’s just like the ones you
used earlier to construct Source Profiles and map I/O
to Axia Audio Nodes. Click in the box and select the
audio device that will be providing source audio for
the Aux 1 or Aux 2 Return.
•
Save Changes
button applies any changes made to
the Auxiliary Send Description and returns you to
the Show Profile Settings menu.
•
Back to Show Profile
link takes you back to Show
Profile Settings without saving changes.
Monitor Section Screen
The Monitor Section Data screen captures the Moni-
tor settings found in Element’s
Monitor Options
menus.
Since you’re working on a “captured” Show Profile, this
page will, of course, mirror the choices you made when
you set up Element in the beginning of this chapter.
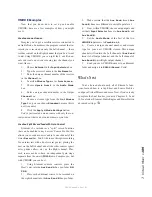
From the Show Profile Settings web page, choose the
Monitor Section Data link. You’ll find the page divided
into four sections: general options, Control Room Moni-
tor options, Control Room Headphone options, and Stu-
dio Monitor options.
Содержание element v.2.0
Страница 100: ...5 Element Operations 90 2016 Axia Audio Rev 1 8 1 Capital budget may you never decrease for we need new test gear...
Страница 149: ...Appendix A Specifications 139 2016 Axia Audio Rev 1 8 1...
Страница 183: ...Warranty 173 2016 Axia Audio Rev 1 8 1 TCP IP How did we live without thee Analogicly...
Страница 184: ...THIS PAGE INTENTIONALLY LEFT BLANK...
Страница 185: ...THIS PAGE INTENTIONALLY LEFT BLANK...

