1
Table of Contents
1. Introduction
7
.......................................................................................................................
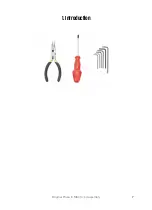
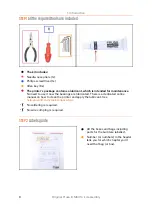
Step 1 - All the required tools are included
8
................................................................
Step 2 - Labels guide
8
.....................................................................................................
Step 3 - Use labels for reference
8
.................................................................................
Step 4 - Spare bag
9
.........................................................................................................
Step 5 - View high resolution images
9
........................................................................
Step 6 - Printed parts - versioning
10
.............................................................................
Step 7 - We are here for you!
10
......................................................................................
Step 8 - Pro tip: inserting the nuts
11
.............................................................................
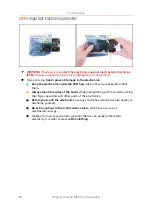
Step 9 - Important: Electronics protection
11
...............................................................
Step 10 - Reward yourself
12
...........................................................................................
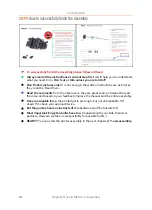
Step 11 - How to successfully finish the assembly
13
..................................................
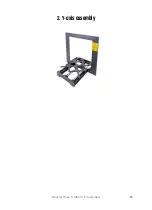
2. Y-axis assembly
15
............................................................................................................
Step 1 - Tools necessary for this chapter
16
..................................................................
Step 2 - YZ frame - preparing the components
16
......................................................
Step 3 - YZ frame - mounting the longer extrusions
16
..............................................
Step 4 - YZ frame - mounting the shorter extrusions
17
.............................................
Step 5 - YZ frame - final check
17
...................................................................................
Step 6 - Y-axis: front and rear plate preparation
18
.....................................................
Step 7 - Y-axis: front plate assembly
18
.........................................................................
Step 8 - Y-axis: preparation for the PSU
19
..................................................................
Step 9 - Y-axis: rear plate assembly
19
..........................................................................
Step 10 - Y-axis: geometry check
20
..............................................................................
Step 11 - Mounting antivibration feet (optional)
20
.....................................................
Step 12 - Preparing Y-belt-idler (part 1)
21
....................................................................
Step 13 - Preparing Y-belt-idler (part 2)
21
...................................................................
Step 14 - Preparing Y-belt-idler (part 3)
22
...................................................................
Step 15 - Mounting the Y-belt-idler
22
..........................................................................
Step 16 - Y-axis: motor and motor holder
23
................................................................
Step 17 - Preparing Y-motor-holder
23
..........................................................................
Step 18 - Mounting Y-motor-holder
24
..........................................................................
Step 19 - Y-axis: Y-carriage
24
........................................................................................
Step 20 - Correct bearing orientation
25
......................................................................
Step 21 - Installing bearings on the Y-carriage
25
.......................................................
Step 22 - Inserting smooth rods into Y-carriage
26
....................................................
Step 23 - Y-axis: smooth rods holders
26
.....................................................................
Step 24 - Preparing Y-rod-holder
27
..............................................................................
Step 25 - Mounting the Y-rod-holder parts
27
.............................................................
Step 26 - Installing the Y-carriage
28
............................................................................
Step 27 - Aligning the smooth rods
28
..........................................................................
Step 28 - Assembling the Y-motor pulley
29
...............................................................
Step 29 - Y-axis: Assembling the belt
29
......................................................................
Step 30 - Y-axis: Assembling the belt
30
......................................................................
Step 31 - Y-axis: Assembling the belt
30
.......................................................................
Step 32 - Y-axis: Assembling the belt
31
.......................................................................
Step 33 - Y-axis: Assembling the belt
31
.......................................................................
Step 34 - Y-axis: Assembling the belt
32
......................................................................
Step 35 - Aligning the Y-axis belt
32
.............................................................................
Step 36 - Tensioning the Y-axis belt
33
........................................................................
Step 37 - Testing the Y-axis belt
33
...............................................................................
Summary of Contents for i3 MK3S+
Page 6: ...6 ...
Page 7: ...Original Prusa i3 MK3S kit assembly 7 1 Introduction ...
Page 15: ...Original Prusa i3 MK3S kit assembly 15 2 Y axis assembly ...
Page 36: ...36 Original Prusa i3 MK3S kit assembly 3 X axis assembly ...
Page 44: ...44 Original Prusa i3 MK3S kit assembly 4 Z axis assembly ...
Page 51: ...Original Prusa i3 MK3S kit assembly 51 5 E axis assembly ...
Page 88: ...88 Original Prusa i3 MK3S kit assembly 6 LCD assembly ...
Page 94: ...94 Original Prusa i3 MK3S kit assembly 7 Heatbed PSU assembly ...
Page 108: ...108 Original Prusa i3 MK3S kit assembly 8 Electronics assembly ...
Page 132: ...132 Original Prusa i3 MK3S kit assembly 9 Preflight check ...
Page 137: ...137 Notes ...
Page 138: ...138 ...
Page 139: ...139 Notes ...
Page 140: ...140 ...
Page 141: ...141 Notes ...
Page 142: ...142 ...
Page 143: ...143 Notes ...
Page 144: ...144 ...


