


3-21
10. Receiving a Document
Ch
ap
ter
3
S
e
n
d
in
g an
d
R
e
ce
iv
in
g Doc
u
m
en
ts
Useful Tips
• The sizes of documents that can be received are ledger (11"
×
17"), legal (8-1/2"
×
14"), letter
and
letter
.
• If paper that is not the same size as the original document is installed in the copier, one size larger
paper is used or the document image is automatically reduced.
For example, if a ledger-size document is received by the copier where only letter-sized paper is
loaded, the document is reduced to the size of letter.
“Settings of Handling the Received Documents”
☞
p. 9-12
• When letter size documents are received, they are automatically rotated by 90° and can be printed
even though the documents were inserted in a different direction to the paper (Rotation Print).
• A received document cannot be printed on paper from the Manual Bypass Tray.
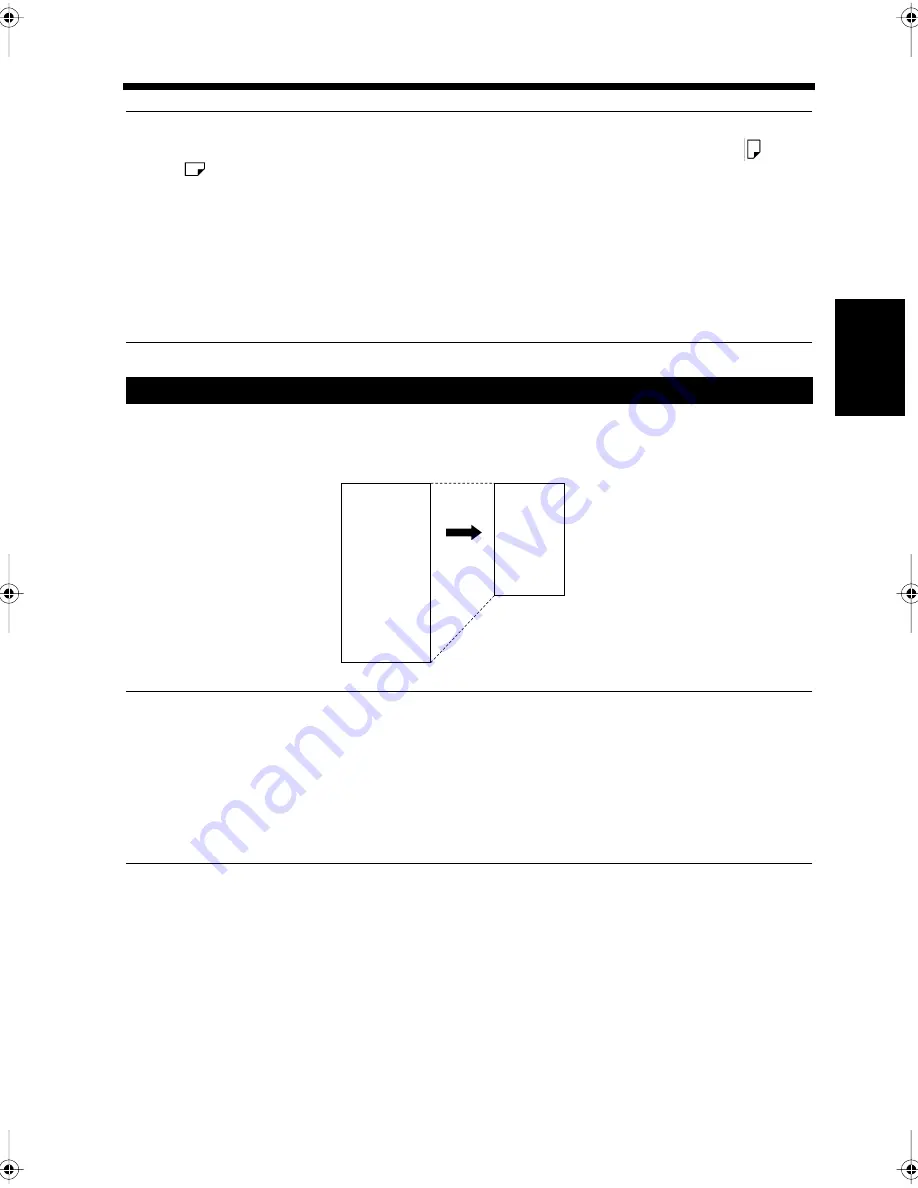
When a document is received that is longer than the normal paper sizes (letter or ledger (11"
×
17")), the
document image is reduced as shown below. In this case, the optimal reduction ratio is automatically
selected to fit the image onto the paper.
Useful Tip
If the received document is too long to be printed on the paper even when reduced by 60%, the image is
divided and printed on more than one page. In this case, the transition area (where the image is divided)
is printed on both pages. (If larger paper is installed, the image will be printed on it without being
divided.) The maximum reduction ratio can be changed. The “Cut off” mode can also be selected, in
which case the excess area is ignored when printing. When “Cut off” mode is selected, the maximum
length to be cut off can be set.
“Setting the Reception Mode”
☞
p. 9-25
When Receiving Long Documents
A
A
1166O359AA
Reduction
Paper
Received document (original size)
Chapter3.fm Page 21 Thursday, September 16, 1999 7:42 PM
Summary of Contents for Di250f
Page 1: ...Di250f Di350f 1166 7710 02 ...
Page 2: ......
Page 6: ......
Page 28: ...xxii Terms and Definitions ...
Page 29: ...1 1 Chapter 1 Introduction Chapter 1 Introduction ...
Page 58: ...1 30 10 Confirming the Settings Chapter 1 Introduction ...
Page 59: ...2 1 Chapter 2 Copying a Document Chapter 2 Copying a Document ...
Page 74: ...2 16 5 Copying Figures and Photos Chapter 2 Copying a Document ...
Page 75: ...3 1 Chapter 3 Sending and Receiving Documents Chapter 3 Sending and Receiving Documents ...
Page 98: ...3 24 11 Making and Receiving a Telephone Call Chapter 3 Sending and Receiving Documents ...
Page 99: ...4 1 Chapter 4 Advanced Copying Procedures Chapter 4 Advanced Copying Procedures ...
Page 137: ...5 1 Chapter 5 Transmission Methods Chapter 5 Transmission Methods ...
Page 169: ...6 1 Chapter 6 Reception Methods Chapter 6 Reception Methods ...
Page 175: ...7 1 Chapter 7 Before Registration and Setting Chapter 7 Before Registration and Setting ...
Page 187: ...8 1 Chapter 8 Basic Settings Chapter 8 Basic Settings ...
Page 190: ...8 4 2 Setting the Monitor Speaker and the Buzzer Volume Chapter 8 Basic Settings ...
Page 267: ...12 1 Chapter 12 Reports and Lists Chapter 12 Reports and Lists ...
Page 279: ...13 1 KDSWHU Routine Care Chapter 13 Routine Care ...
Page 295: ...14 1 Chapter 14 Troubleshooting Chapter 14 Troubleshooting ...
Page 320: ...14 26 7 When the Print is Faint Chapter 14 Troubleshooting ...
Page 321: ...15 1 Chapter 15 Miscellaneous Chapter 15 Miscellaneous ...
Page 332: ...15 12 Index Chapter 15 Miscellaneous ...
Page 333: ...MEMO ...
Page 334: ...MEMO ...
Page 335: ...MEMO ...
Page 336: ...MEMO ...
Page 337: ...MEMO ...
Page 338: ...MEMO ...


