


2-13
Ch
ap
ter
2
Copy
in
g a D
o
c
u
m
e
n
t
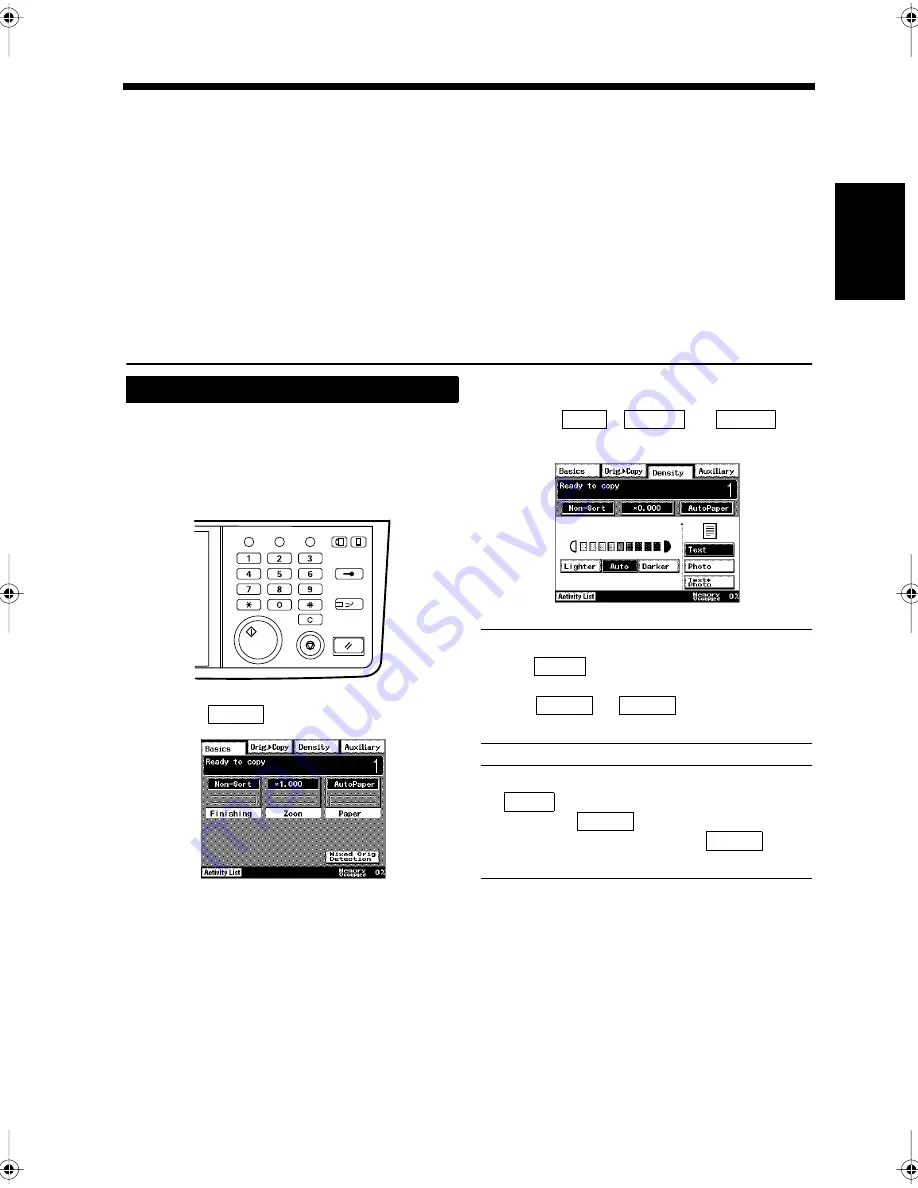
4. Adjusting the Density for Copying
Density
The density can be adjusted to suit the darkness of the text and the background of the document being
copied. For example, if the document is printed on dark colored paper, adjust the density so that the text
is clearly printed.
Density can be adjusted in the following ways. The document is copied in the same size as the original
regardless of the copy paper size.
• Automatic density:
Determines the density of the document, and automatically selects
the optimal density for printing.
• Manual density:
If the desired density is not realized by the automatic density
function, the density can be manually set at a 9 different levels.
Load the document in the unit.
“Handling Documents”
☞
p.1-20
Press the Copy key.
Touch
.
Touch
,
, or
to
select the density.
NOTE
When
is selected for the image quality,
the automatic density function cannot be used.
Touch
or
to adjust the
density manually.
Useful Tips
•
is highlighted when selected.
• Every time
is touched, the printing
is lightened, whereas touching
darkens it.
Press the Start key.
Copying starts.
Ajusting the Density
1
2
Utility
Mode Check
Pause
Fax
Interrupt
Panel Reset
Stop
Start
Access
Copy
1166O346AB
3
Density
1171P009EA
4
Auto
Lighter
Darker
1171P039EA
Photo
Lighter
Darker
Auto
Lighter
Darker
5
Chapter2.fm Page 13 Thursday, September 16, 1999 7:38 PM
Summary of Contents for Di250f
Page 1: ...Di250f Di350f 1166 7710 02 ...
Page 2: ......
Page 6: ......
Page 28: ...xxii Terms and Definitions ...
Page 29: ...1 1 Chapter 1 Introduction Chapter 1 Introduction ...
Page 58: ...1 30 10 Confirming the Settings Chapter 1 Introduction ...
Page 59: ...2 1 Chapter 2 Copying a Document Chapter 2 Copying a Document ...
Page 74: ...2 16 5 Copying Figures and Photos Chapter 2 Copying a Document ...
Page 75: ...3 1 Chapter 3 Sending and Receiving Documents Chapter 3 Sending and Receiving Documents ...
Page 98: ...3 24 11 Making and Receiving a Telephone Call Chapter 3 Sending and Receiving Documents ...
Page 99: ...4 1 Chapter 4 Advanced Copying Procedures Chapter 4 Advanced Copying Procedures ...
Page 137: ...5 1 Chapter 5 Transmission Methods Chapter 5 Transmission Methods ...
Page 169: ...6 1 Chapter 6 Reception Methods Chapter 6 Reception Methods ...
Page 175: ...7 1 Chapter 7 Before Registration and Setting Chapter 7 Before Registration and Setting ...
Page 187: ...8 1 Chapter 8 Basic Settings Chapter 8 Basic Settings ...
Page 190: ...8 4 2 Setting the Monitor Speaker and the Buzzer Volume Chapter 8 Basic Settings ...
Page 267: ...12 1 Chapter 12 Reports and Lists Chapter 12 Reports and Lists ...
Page 279: ...13 1 KDSWHU Routine Care Chapter 13 Routine Care ...
Page 295: ...14 1 Chapter 14 Troubleshooting Chapter 14 Troubleshooting ...
Page 320: ...14 26 7 When the Print is Faint Chapter 14 Troubleshooting ...
Page 321: ...15 1 Chapter 15 Miscellaneous Chapter 15 Miscellaneous ...
Page 332: ...15 12 Index Chapter 15 Miscellaneous ...
Page 333: ...MEMO ...
Page 334: ...MEMO ...
Page 335: ...MEMO ...
Page 336: ...MEMO ...
Page 337: ...MEMO ...
Page 338: ...MEMO ...


