


10-5
1. Amending User Data
Ch
ap
ter
10
Re
gi
st
ra
ti
on
s an
d
S
e
tt
in
gs
f
o
r Ea
ch
Us
e
r
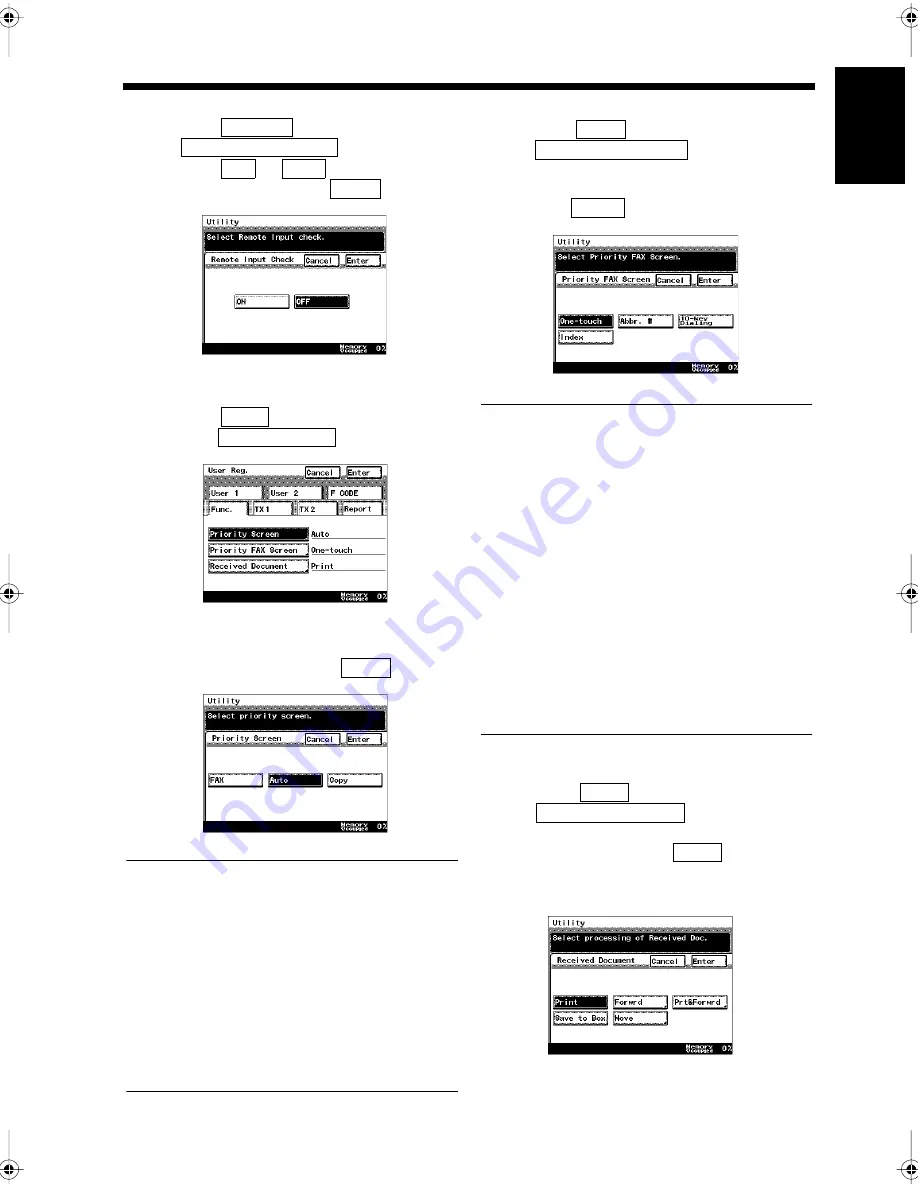
<Registration of the Remote Input Check>
• Select
and touch
.
• Select
or
for the remote
input check, and touch
.
•
<Setting for the Priority Screen>
• Select
and
touch
.
•
• Select the key for the screen to be
displayed first and touch
.
•
Useful Tips
• Fax:
Touch this to display the FAX Screen at first.
• Auto:
Touch this to display the Auto-mode Screen at
first.
• Copy:
Touch this to display the Copy Screen at first.
• Switching the screen priority, the screen will
be switched after resetting the user selection
or Auto-reset.
<Setting for the Priority FAX Screen>
• Select
and touch
.
• Select the key for the screen to be
displayed as the initial setting and
touch
.
•
Useful Tips
• One-touch:
Touch this to display the one-touch screen
first.
• Abbr.#:
Touch this to display the abbreviated dialing
screen first.
• 10-key Dialing:
Touch this to display the 10-key dialing screen
first.
• Index:
Touch this to display the index list screen first.
• Switching the facsimile screen priority, the
screen will be switched after resetting the user
selection or the automatic clearing, or after
pressing the Panel Reset key.
<Setting for the Received Documents>
• Select
and touch
.
• Select the handling method of the received
document and touch
.
“Setting of Handling the Received
Documents”
☞
p. 9-12
F CODE
Remote Input Check
ON
OFF
Enter
1171P223EA
Func.
Priority Screen
1171P300EA
Enter
1171P199EA
Func.
Priority FAX Screen
Enter
1171P201EB
Func.
Received Document
Enter
1171P203EA
Chapter10.fm Page 5 Thursday, September 16, 1999 8:14 PM
Summary of Contents for Di250f
Page 1: ...Di250f Di350f 1166 7710 02 ...
Page 2: ......
Page 6: ......
Page 28: ...xxii Terms and Definitions ...
Page 29: ...1 1 Chapter 1 Introduction Chapter 1 Introduction ...
Page 58: ...1 30 10 Confirming the Settings Chapter 1 Introduction ...
Page 59: ...2 1 Chapter 2 Copying a Document Chapter 2 Copying a Document ...
Page 74: ...2 16 5 Copying Figures and Photos Chapter 2 Copying a Document ...
Page 75: ...3 1 Chapter 3 Sending and Receiving Documents Chapter 3 Sending and Receiving Documents ...
Page 98: ...3 24 11 Making and Receiving a Telephone Call Chapter 3 Sending and Receiving Documents ...
Page 99: ...4 1 Chapter 4 Advanced Copying Procedures Chapter 4 Advanced Copying Procedures ...
Page 137: ...5 1 Chapter 5 Transmission Methods Chapter 5 Transmission Methods ...
Page 169: ...6 1 Chapter 6 Reception Methods Chapter 6 Reception Methods ...
Page 175: ...7 1 Chapter 7 Before Registration and Setting Chapter 7 Before Registration and Setting ...
Page 187: ...8 1 Chapter 8 Basic Settings Chapter 8 Basic Settings ...
Page 190: ...8 4 2 Setting the Monitor Speaker and the Buzzer Volume Chapter 8 Basic Settings ...
Page 267: ...12 1 Chapter 12 Reports and Lists Chapter 12 Reports and Lists ...
Page 279: ...13 1 KDSWHU Routine Care Chapter 13 Routine Care ...
Page 295: ...14 1 Chapter 14 Troubleshooting Chapter 14 Troubleshooting ...
Page 320: ...14 26 7 When the Print is Faint Chapter 14 Troubleshooting ...
Page 321: ...15 1 Chapter 15 Miscellaneous Chapter 15 Miscellaneous ...
Page 332: ...15 12 Index Chapter 15 Miscellaneous ...
Page 333: ...MEMO ...
Page 334: ...MEMO ...
Page 335: ...MEMO ...
Page 336: ...MEMO ...
Page 337: ...MEMO ...
Page 338: ...MEMO ...


