


9-24
15. Settings for Transmission
Ch
ap
ter
9
Re
gis
tr
a
ti
on
an
d S
ett
in
g Ope
rat
ion
s
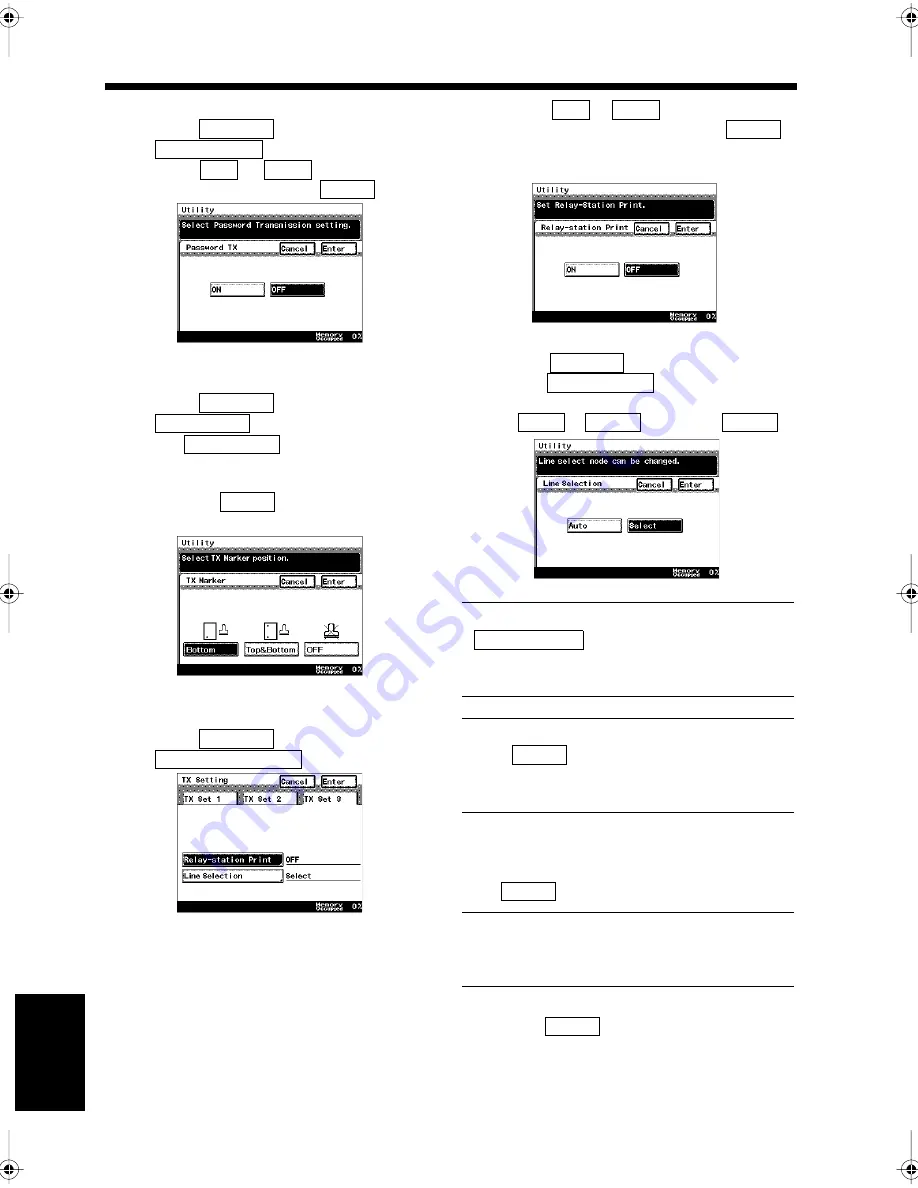
<Setting for Password Transmission>
• Select
, and touch
.
• Select
or
for the Password
Transmission, and touch
.
<Setting for the TX Marker (optional)>
• Select
, and touch
.
The
key is displayed only
when the optional TX Marker is used.
• Touch the key for the initial marking style,
and touch
.
“Printing a TX Marker”
☞
p. 5-16
<Setting for Printing at the Relay Station>
• Select
, and touch
.
• Select
or
for printing at the
relay station function, and touch
.
“Relaying a Document via Another
Facsimile”
☞
p. 5-9
<Setting for Line Selection>
• Select
, and
touch
.
• Select the selection method for the line
(
or
), and touch
.
NOTE
is displayed only when a
product that supports the G3 Multi-Port Model
is used.
Useful Tip
When
is selected, select the line to be
used for each transmission. “How to Select the
Communications Mode”
☞
p. 3-5
Confirm the setting details when the screen
returns to the same one as in step 2. Touch
if they are correct.
Useful Tip
Touch the key for the items to be modified to
change the setting.
Touch
repeatedly until the screen
returns to the initial screen.
TX Set 2
Password TX
ON
OFF
Enter
1171P233EA
TX Set 2
TX Marker
TX Marker
Enter
1171P234EA
TX Set 3
Relay-station Print
1171P235EB
ON
OFF
Enter
1171P236EA
TX Set 3
Line Selection
Auto
Select
Enter
1171P404EA
Line Selection
Select
3
Enter
4
Enter
Chapter9.fm Page 24 Thursday, September 16, 1999 8:08 PM
Summary of Contents for Di250f
Page 1: ...Di250f Di350f 1166 7710 02 ...
Page 2: ......
Page 6: ......
Page 28: ...xxii Terms and Definitions ...
Page 29: ...1 1 Chapter 1 Introduction Chapter 1 Introduction ...
Page 58: ...1 30 10 Confirming the Settings Chapter 1 Introduction ...
Page 59: ...2 1 Chapter 2 Copying a Document Chapter 2 Copying a Document ...
Page 74: ...2 16 5 Copying Figures and Photos Chapter 2 Copying a Document ...
Page 75: ...3 1 Chapter 3 Sending and Receiving Documents Chapter 3 Sending and Receiving Documents ...
Page 98: ...3 24 11 Making and Receiving a Telephone Call Chapter 3 Sending and Receiving Documents ...
Page 99: ...4 1 Chapter 4 Advanced Copying Procedures Chapter 4 Advanced Copying Procedures ...
Page 137: ...5 1 Chapter 5 Transmission Methods Chapter 5 Transmission Methods ...
Page 169: ...6 1 Chapter 6 Reception Methods Chapter 6 Reception Methods ...
Page 175: ...7 1 Chapter 7 Before Registration and Setting Chapter 7 Before Registration and Setting ...
Page 187: ...8 1 Chapter 8 Basic Settings Chapter 8 Basic Settings ...
Page 190: ...8 4 2 Setting the Monitor Speaker and the Buzzer Volume Chapter 8 Basic Settings ...
Page 267: ...12 1 Chapter 12 Reports and Lists Chapter 12 Reports and Lists ...
Page 279: ...13 1 KDSWHU Routine Care Chapter 13 Routine Care ...
Page 295: ...14 1 Chapter 14 Troubleshooting Chapter 14 Troubleshooting ...
Page 320: ...14 26 7 When the Print is Faint Chapter 14 Troubleshooting ...
Page 321: ...15 1 Chapter 15 Miscellaneous Chapter 15 Miscellaneous ...
Page 332: ...15 12 Index Chapter 15 Miscellaneous ...
Page 333: ...MEMO ...
Page 334: ...MEMO ...
Page 335: ...MEMO ...
Page 336: ...MEMO ...
Page 337: ...MEMO ...
Page 338: ...MEMO ...


