


2-10
3. Selecting the Zoom Ratio for Copying
Ch
ap
ter
2
Copy
in
g a D
o
c
u
m
e
n
t
<Setting the Full-Size>
• Touch
.
<Setting the Automatic Zoom Ratio>
• Touch
.
NOTE
Irregular size documents (any size other than
Letter or Legal) may be copied with an
inappropriate zoom ratio. In this case, the
appropriate zoom ratio should be selected
manually.
<Setting the Fixed Zoom Ratio>
• Select either an enlargement or a reduction
key for the desired zoom ratio.
NOTE
Select the key in accordance with the document
and copy paper sizes.
<Using the Zoom Up/Zoom Down key>
• Use
or
to select the zoom ratio.
Useful Tips
• Every time
is touched, the zoom ratio
decreases by 0.001 (0.1%).
• Every time
is touched, the zoom ratio
increases by 0.001 (0.1%).
• The zoom ratio can be changed more quickly
by holding down the key.
<Slightly Smaller Image Copies>
• Touch
.
Useful Tips
• The zoom ratio for slightly reduced copies can
be changed. “Registering the Zoom ratio”
☞
p. 2-11
• The factory setting is 93%.
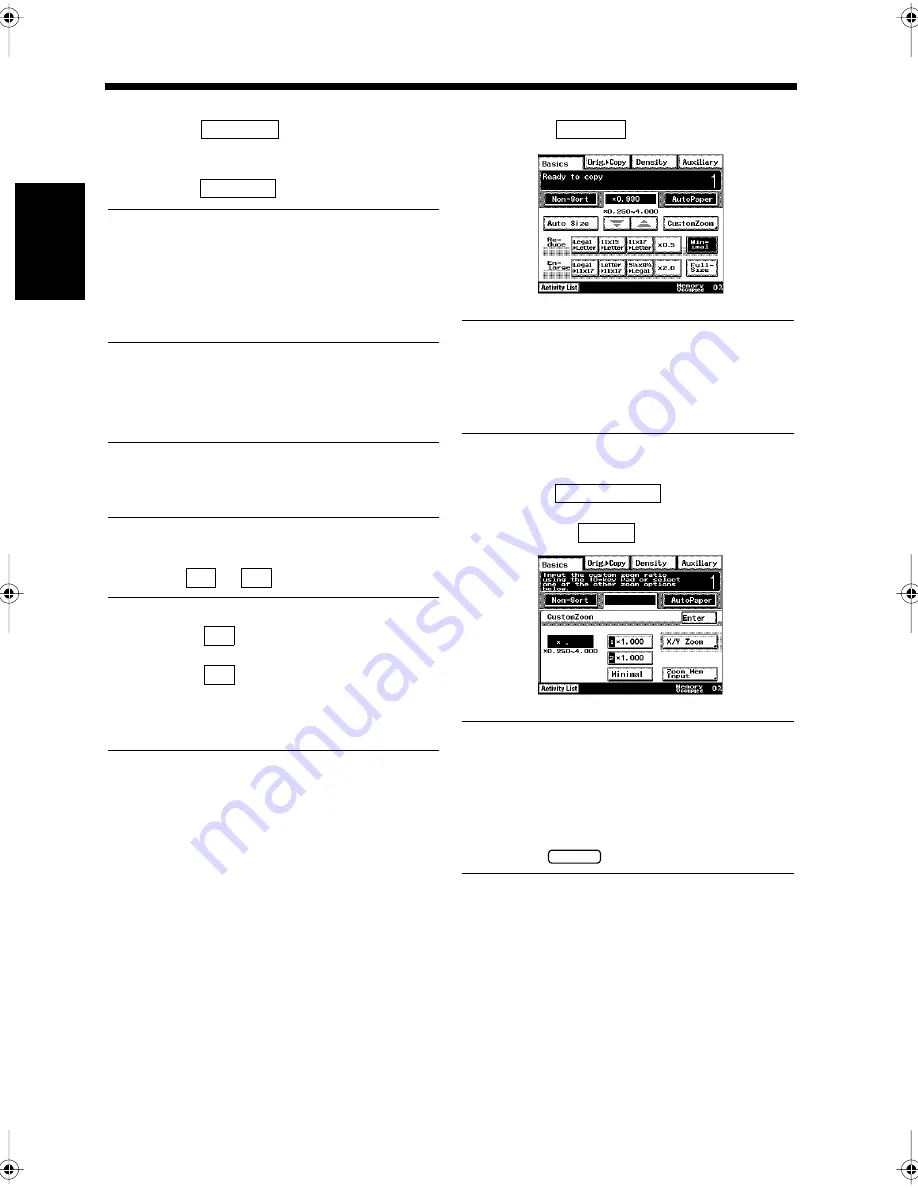
<Custom Zoom Ratio>
• Touch
.
• Use the 10-key Pad to enter the zoom ratio
and touch
.
Useful Tips
• Figures ranging from 0.250 (25%) to 4.000
(400%) can be selected as the zoom ratio. For
example, for 0.645 (64.5%), press <0>, <6>,
<4> and <5> in that order on the 10-key
Pad.
• Press the
key to clear the figure.
Full-Size
Auto Size
▼
▲
▼
▲
Minimal
1171P032EA
Custom Zoom
Enter
1171P033EA
C
Chapter2.fm Page 10 Thursday, September 16, 1999 7:38 PM
Summary of Contents for Di250f
Page 1: ...Di250f Di350f 1166 7710 02 ...
Page 2: ......
Page 6: ......
Page 28: ...xxii Terms and Definitions ...
Page 29: ...1 1 Chapter 1 Introduction Chapter 1 Introduction ...
Page 58: ...1 30 10 Confirming the Settings Chapter 1 Introduction ...
Page 59: ...2 1 Chapter 2 Copying a Document Chapter 2 Copying a Document ...
Page 74: ...2 16 5 Copying Figures and Photos Chapter 2 Copying a Document ...
Page 75: ...3 1 Chapter 3 Sending and Receiving Documents Chapter 3 Sending and Receiving Documents ...
Page 98: ...3 24 11 Making and Receiving a Telephone Call Chapter 3 Sending and Receiving Documents ...
Page 99: ...4 1 Chapter 4 Advanced Copying Procedures Chapter 4 Advanced Copying Procedures ...
Page 137: ...5 1 Chapter 5 Transmission Methods Chapter 5 Transmission Methods ...
Page 169: ...6 1 Chapter 6 Reception Methods Chapter 6 Reception Methods ...
Page 175: ...7 1 Chapter 7 Before Registration and Setting Chapter 7 Before Registration and Setting ...
Page 187: ...8 1 Chapter 8 Basic Settings Chapter 8 Basic Settings ...
Page 190: ...8 4 2 Setting the Monitor Speaker and the Buzzer Volume Chapter 8 Basic Settings ...
Page 267: ...12 1 Chapter 12 Reports and Lists Chapter 12 Reports and Lists ...
Page 279: ...13 1 KDSWHU Routine Care Chapter 13 Routine Care ...
Page 295: ...14 1 Chapter 14 Troubleshooting Chapter 14 Troubleshooting ...
Page 320: ...14 26 7 When the Print is Faint Chapter 14 Troubleshooting ...
Page 321: ...15 1 Chapter 15 Miscellaneous Chapter 15 Miscellaneous ...
Page 332: ...15 12 Index Chapter 15 Miscellaneous ...
Page 333: ...MEMO ...
Page 334: ...MEMO ...
Page 335: ...MEMO ...
Page 336: ...MEMO ...
Page 337: ...MEMO ...
Page 338: ...MEMO ...


