


3-9
Ch
ap
ter
3
S
e
n
d
in
g an
d
R
e
ce
iv
in
g Doc
u
m
en
ts
4. Using Facsimile Program Dialing for Transmission
Facsimile Program Dialing
If the various functions that can be used for communications (such as Image Quality settings and 2-to-1
Transmission) are registered as a facsimile program key in advance, just touching these keys will start
transmission without having to select the communications functions each time. It is easy to set up a
multiple transmission by registering multiple recipients in a single facsimile program key, and to set up a
transmission to be sent at the same time every day by registering the transmission time.
Useful Tip
Destination numbers and communications function must be registered as Facsimile Program keys in
advance. Up to 30 numbers can be registered as program keys. However, the total registered number of
Facsimile Program keys and One-touch keys cannot exceed 300.
“Registering Communication Conditions in Facsimile Program Keys”
☞
p. 11-12
Load the document in the unit.
“Handling Documents”
☞
p.1-20
Press the Fax key.
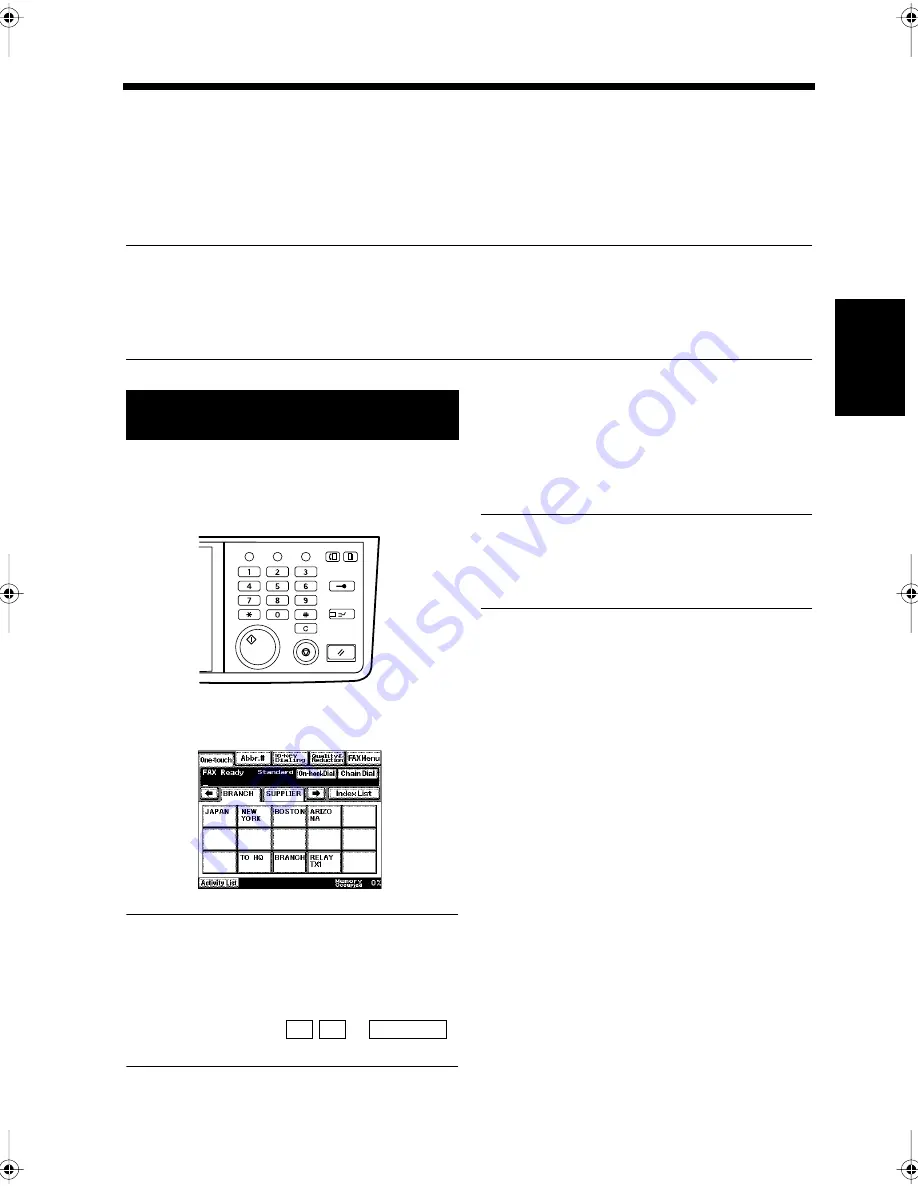
Touch the Facsimile Program key to be used.
Useful Tips
• Facsimile Program keys are those with
borders.
• The first index screen is automatically
displayed.
Touch the index tabs,
or
to find the desired Facsimile program key.
Press the Start key.
Transmission starts.
NOTE
If a time specification has been registered, the
document is stored in the memory and
transmission starts at the specified time.
Using a Facsimile Program for
Transmission
1
2
Utility
Mode Check
Pause
Fax
Interrupt
Panel Reset
Stop
Start
Access
Copy
1166O346AB
3
1171P004EA
← →
Index List
4
Chapter3.fm Page 9 Thursday, September 16, 1999 7:42 PM
Summary of Contents for Di250f
Page 1: ...Di250f Di350f 1166 7710 02 ...
Page 2: ......
Page 6: ......
Page 28: ...xxii Terms and Definitions ...
Page 29: ...1 1 Chapter 1 Introduction Chapter 1 Introduction ...
Page 58: ...1 30 10 Confirming the Settings Chapter 1 Introduction ...
Page 59: ...2 1 Chapter 2 Copying a Document Chapter 2 Copying a Document ...
Page 74: ...2 16 5 Copying Figures and Photos Chapter 2 Copying a Document ...
Page 75: ...3 1 Chapter 3 Sending and Receiving Documents Chapter 3 Sending and Receiving Documents ...
Page 98: ...3 24 11 Making and Receiving a Telephone Call Chapter 3 Sending and Receiving Documents ...
Page 99: ...4 1 Chapter 4 Advanced Copying Procedures Chapter 4 Advanced Copying Procedures ...
Page 137: ...5 1 Chapter 5 Transmission Methods Chapter 5 Transmission Methods ...
Page 169: ...6 1 Chapter 6 Reception Methods Chapter 6 Reception Methods ...
Page 175: ...7 1 Chapter 7 Before Registration and Setting Chapter 7 Before Registration and Setting ...
Page 187: ...8 1 Chapter 8 Basic Settings Chapter 8 Basic Settings ...
Page 190: ...8 4 2 Setting the Monitor Speaker and the Buzzer Volume Chapter 8 Basic Settings ...
Page 267: ...12 1 Chapter 12 Reports and Lists Chapter 12 Reports and Lists ...
Page 279: ...13 1 KDSWHU Routine Care Chapter 13 Routine Care ...
Page 295: ...14 1 Chapter 14 Troubleshooting Chapter 14 Troubleshooting ...
Page 320: ...14 26 7 When the Print is Faint Chapter 14 Troubleshooting ...
Page 321: ...15 1 Chapter 15 Miscellaneous Chapter 15 Miscellaneous ...
Page 332: ...15 12 Index Chapter 15 Miscellaneous ...
Page 333: ...MEMO ...
Page 334: ...MEMO ...
Page 335: ...MEMO ...
Page 336: ...MEMO ...
Page 337: ...MEMO ...
Page 338: ...MEMO ...


