


11-17
4. Registering Communication Conditions in Facsimile Program Keys
Ch
ap
ter
1
1
Re
gis
tr
a
ti
on
s
an
d
S
et
ti
n
gs
f
o
r
Co
n
ve
n
ie
n
t Us
ag
e
Useful Tips
• Up to 5 stations can be selected. Some models
cannot be specified as relay stations.
• Using a One-touch key, touch
and touch the One-touch key for the
destination.
•
Using abbreviated dialling, touch
to select the
destination.
Select the receiving station (final
destination), and touch
.
Useful Tips
• Select the number of relay groups registered
as the relay station.
• Up to 5 groups can be selected.
Touch
.
Touch
.
Touch
.
Select functions to be registered. Touch
after selecting all of them.
NOTES
• Timer and Real-Time Transmission cannot be
selected concurrently.
• If two or more destinations are selected and
the Real-Time Transmission is also selected,
the Real-Time Transmission setting is reset.
• When 2-to-1 Transmission is selected,
is selected as the zoom ratio.
Useful Tips
• The Image Quality, Reduction, Contrast, and
Scan Area can be selected on the
screen.
• When the
is touched, the
following functions can be selected.
• Real-Time Transmission
• TSI
• Priority Transmission
• Transmission Report
• Timer Transmission
• 2-to-1 Transmission
• 2-Sided Transmission
• TX Marker
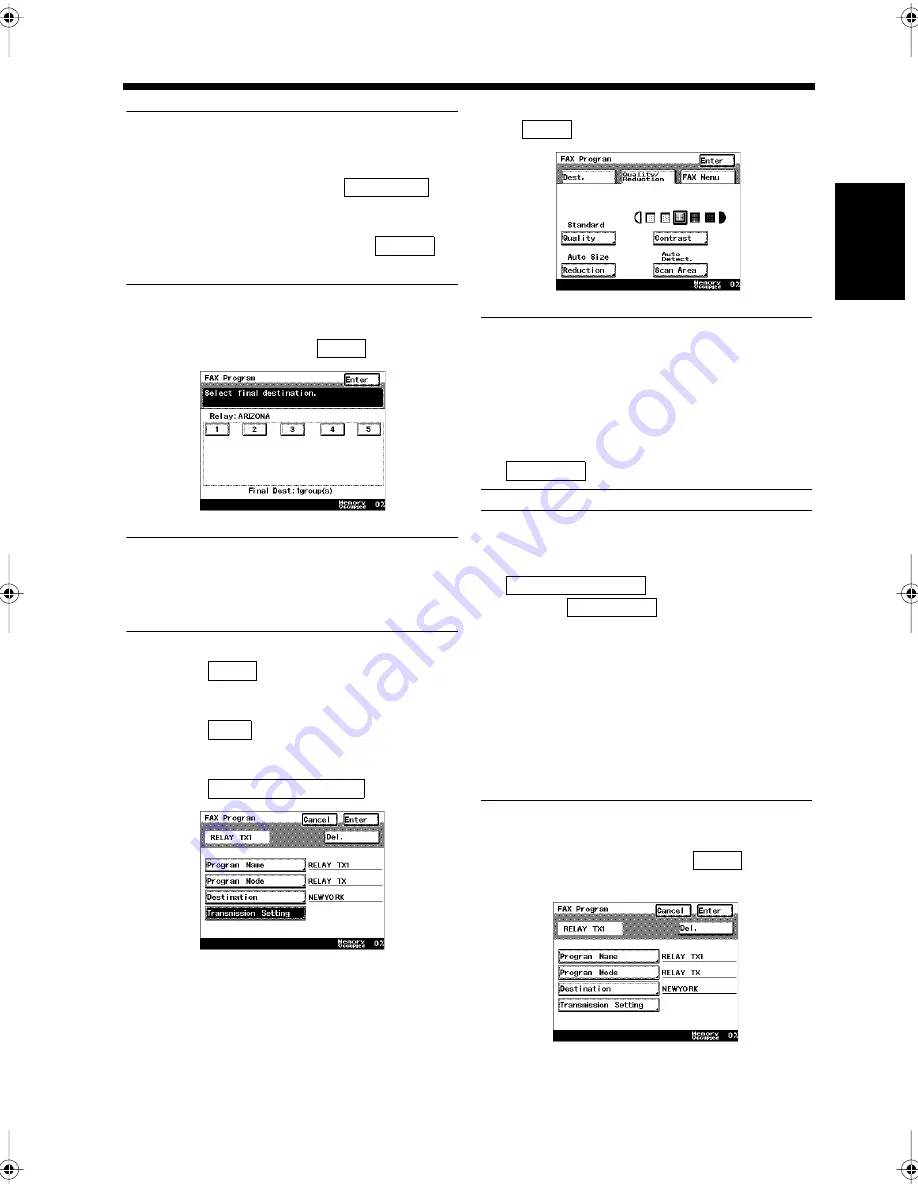
Confirm the details that have been registered
in the program key. Touch
if they
are correct.
One-touch
Abbr.#
4
Enter
1171P350EA
5
Enter
6
Next
7
Transmission Setting
1171P351EA
8
Enter
1171P340EA
Auto-Size
Quality/Reduction
FAX Menu
9
Enter
1171P352EA
Chapter11.fm Page 17 Thursday, September 16, 1999 8:16 PM
Summary of Contents for Di250f
Page 1: ...Di250f Di350f 1166 7710 02 ...
Page 2: ......
Page 6: ......
Page 28: ...xxii Terms and Definitions ...
Page 29: ...1 1 Chapter 1 Introduction Chapter 1 Introduction ...
Page 58: ...1 30 10 Confirming the Settings Chapter 1 Introduction ...
Page 59: ...2 1 Chapter 2 Copying a Document Chapter 2 Copying a Document ...
Page 74: ...2 16 5 Copying Figures and Photos Chapter 2 Copying a Document ...
Page 75: ...3 1 Chapter 3 Sending and Receiving Documents Chapter 3 Sending and Receiving Documents ...
Page 98: ...3 24 11 Making and Receiving a Telephone Call Chapter 3 Sending and Receiving Documents ...
Page 99: ...4 1 Chapter 4 Advanced Copying Procedures Chapter 4 Advanced Copying Procedures ...
Page 137: ...5 1 Chapter 5 Transmission Methods Chapter 5 Transmission Methods ...
Page 169: ...6 1 Chapter 6 Reception Methods Chapter 6 Reception Methods ...
Page 175: ...7 1 Chapter 7 Before Registration and Setting Chapter 7 Before Registration and Setting ...
Page 187: ...8 1 Chapter 8 Basic Settings Chapter 8 Basic Settings ...
Page 190: ...8 4 2 Setting the Monitor Speaker and the Buzzer Volume Chapter 8 Basic Settings ...
Page 267: ...12 1 Chapter 12 Reports and Lists Chapter 12 Reports and Lists ...
Page 279: ...13 1 KDSWHU Routine Care Chapter 13 Routine Care ...
Page 295: ...14 1 Chapter 14 Troubleshooting Chapter 14 Troubleshooting ...
Page 320: ...14 26 7 When the Print is Faint Chapter 14 Troubleshooting ...
Page 321: ...15 1 Chapter 15 Miscellaneous Chapter 15 Miscellaneous ...
Page 332: ...15 12 Index Chapter 15 Miscellaneous ...
Page 333: ...MEMO ...
Page 334: ...MEMO ...
Page 335: ...MEMO ...
Page 336: ...MEMO ...
Page 337: ...MEMO ...
Page 338: ...MEMO ...


