Store & Send Link
279
Sca
n
5
Store & Send Link
If an authenticated user scans a document, the machine temporarily saves the scanned
data, and automatically obtains the user’s e-mail address that was registered in advance.
Then, the machine sends an e-mail to the user to notify of two URLs: one is for the location
to retrieve the scanned data, and the other is for the location to delete the data.
Only the authenticated user who logs in to the machine can be the recipient of an e-mail
transmission. The machine cannot send e-mail to multiple recipients.
After receiving the e-mail on a computer, the user can retrieve the scanned data using a web
browser.
Important •
Scan files stored in the machine will be automatically deleted when the retention period expires. This
retention period can be specified in [URL File Expiration] by the System Administrator in the range of
1 to 168 hours. The default value is 3 hours. The files are to be always deleted automatically. For
more information, refer to "Store & Send Link - Maximum File Size" (P.505) and "URL File Expiration"
(P.505).
•
To strengthen security, after retrieving the scanned data, access the URL to delete the scanned data
stored in the machine.
Note
•
The Store & Send Link service does not provide features to manage documents, such as backing up/
restoring files, deleting all data at one time, listing files, and displaying available storage space.
•
The Store & Send Link service allows you to retrieve scanned data without specifying an e-mail
address from the Address Book or a folder for each scan job. However, the size of the data and its
retention period are restricted on the machine. If you want to avoid these restrictions, use the Scan
to PC or E-mail service.
For more information, refer to "Store & Send Link - Maximum File Size" (P.505) and "URL File Expiration" (P.505).
You can customize the layout of the features displayed on the [Store & Send Link] screen. For more information, refer to "1st
Tab - Features Allocation" (P.498).
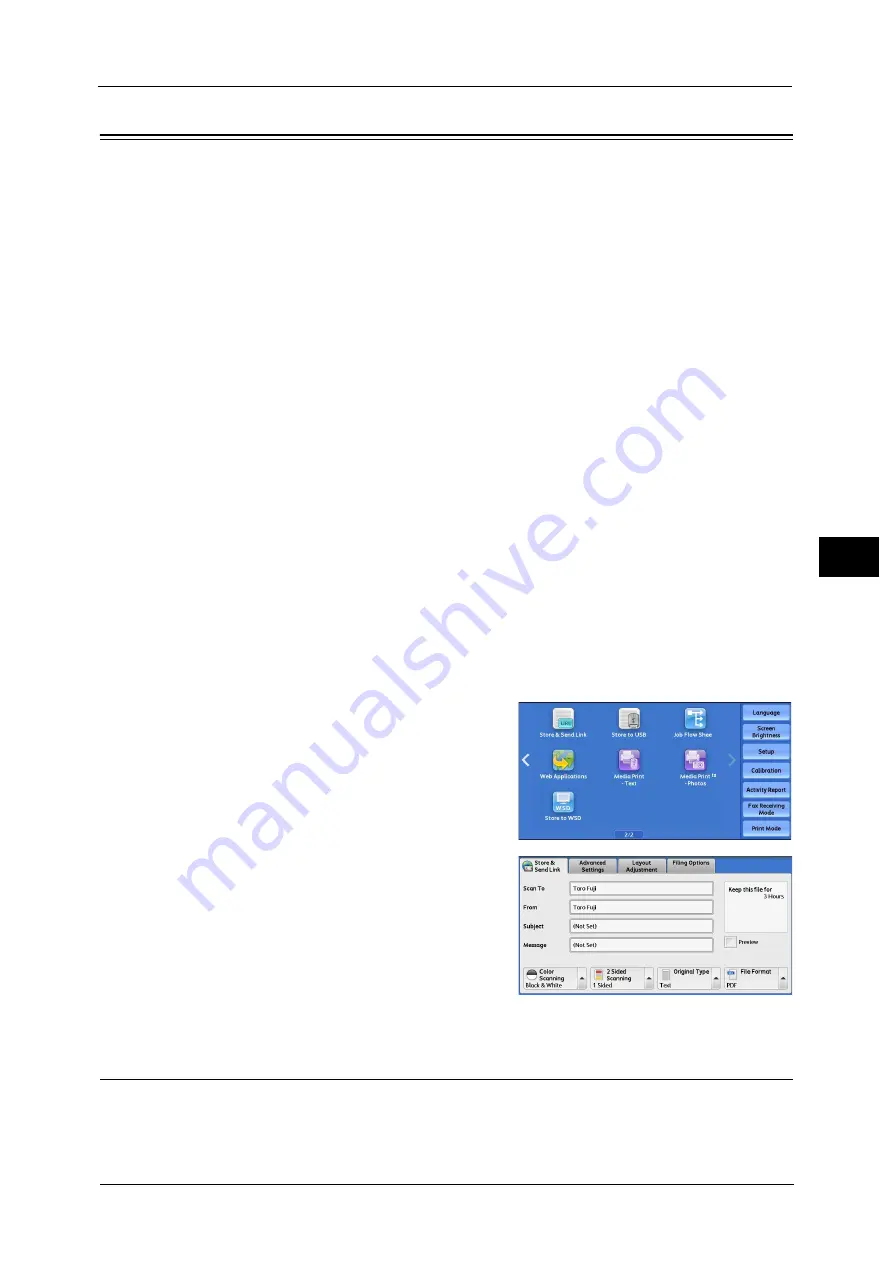
1
Press the <Log In/Out> button on the control panel or select the login information field on
the touch screen.
2
Enter the user ID.
3
Select [Store & Send Link] on the Services Home
screen.
Note
•
WSD stands for Web Services on Devices.
4
Select a feature on the [Store & Send Link]
screen.
Scan To (Displaying the E-mail Address of the Authenticated User)
Automatically obtains the pre-registered e-mail address of the authenticated user.
Summary of Contents for Versant 80 Press
Page 1: ...User Guide Versant 80 Press ...
Page 18: ...18 Index 1007 ...
Page 159: ...Image Quality 159 Copy 4 2 Select a button to adjust the color tone ...
Page 214: ...4 Copy 214 Copy 4 ...
Page 304: ...5 Scan 304 Scan 5 ...
Page 382: ...11 Job Status 382 Job Status 11 ...
Page 562: ...14 CentreWare Internet Services Settings 562 CentreWare Internet Services Settings 14 ...
Page 580: ...16 E mail Environment Settings 580 E mail Environment Settings 16 ...
Page 618: ...18 Encryption and Digital Signature Settings 618 Encryption and Digital Signature Settings 18 ...
Page 916: ...22 Problem Solving 916 Problem Solving 22 ...
Page 1018: ...1018 Index ...


