background image


4-25

Cisco TelePresence System Administration Guide

OL-21845-01

Chapter 4      Troubleshooting the CTS 500

  Managing CTS 500 Hardware Setup

Troubleshooting Microphones

Use the information in 

Table 4-5

 to troubleshoot microphones.

Table 4-5

Troubleshooting Microphones 

Problem

Possible Cause

Possible Solution

Sound is muffled.

Something near or on the 
microphone is distorting the 
sound.

  •

Move objects away from the microphone.

  •

Confirm the laptop is not open and in-between the 
user and the microphone

No sound registers.

Microphone cable is not 
connected or is only partially 
connected.

  •

Check that the system is plugged in and power is 
on.

  •

Check that the microphone plug is firmly seated in 
the correct connector on the primary codec. 

  •

Check that the mute light on each microphone is lit. 
An unlit light indicates that the microphone is not 
plugged in.

  •

Lightly tap the microphone to see if sound 
registers.

  •

Contact Cisco technical support if you are certain 
that the cabling is correct and power is applied to 
the system, but no sound registers on the 
microphone.

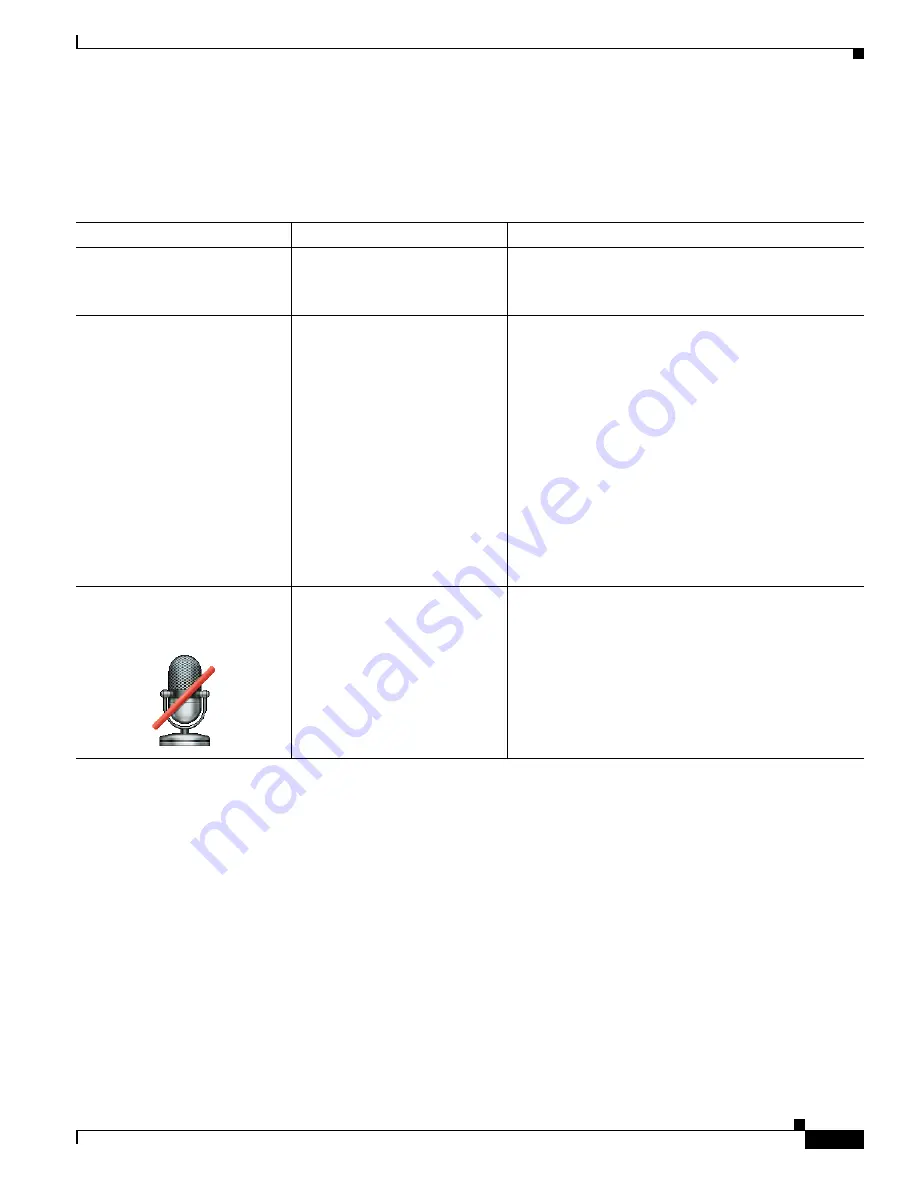
Microphone icon with red pipe 
displays. 

  •

Microphone is not 
connected.

  •

One of the microphones is 
unplugged.

Check that the microphone is properly plugged in.

Summary of Contents for CTS 1000 - TelePresence System 1000 Video Conferencing

Page 1: ... Inc 170 West Tasman Drive San Jose CA 95134 1706 USA http www cisco com Tel 408 526 4000 800 553 NETS 6387 Fax 408 527 0883 Cisco TelePresence System Administration Guide May 2011 CTS Software Release 1 7 x Text Part Number OL 21845 01 ...

Page 2: ...UDING WITHOUT LIMITATION THOSE OF MERCHANTABILITY FITNESS FOR A PARTICULAR PURPOSE AND NONINFRINGEMENT OR ARISING FROM A COURSE OF DEALING USAGE OR TRADE PRACTICE IN NO EVENT SHALL CISCO OR ITS SUPPLIERS BE LIABLE FOR ANY INDIRECT SPECIAL CONSEQUENTIAL OR INCIDENTAL DAMAGES INCLUDING WITHOUT LIMITATION LOST PROFITS OR LOSS OR DAMAGE TO DATA ARISING OUT OF THE USE OR INABILITY TO USE THIS MANUAL EV...

Page 3: ... 3 Determining Device Status Using the Troubleshooting Interface 1 4 Cisco Unified Communications Manager Status 1 5 In a Call Indicator 1 5 Navigation 1 5 Administration Window Header 1 7 Content Area 1 7 Typing and Selecting Information in Fields 1 7 Validating Information in Fields 1 7 Validating Information in Windows 1 7 Accessing Online Help 1 8 Navigating Online Help 1 8 Accessing this Admi...

Page 4: ... Address for Networks That Do Not Use DHCP 3 4 Configuring a Static IP Address Using the Cisco TelePresence System GUI 3 4 Configuring a Static IP Address Using Command Line Interface Commands 3 6 Command Example 3 6 Configuring an Alternate TFTP Server Optional 3 7 Configuring Your System After Initial Bootup 3 7 IP Settings 3 8 Viewing IP Settings 3 9 Network Settings 3 11 Operational VLAN ID 3 ...

Page 5: ...lated Information 4 21 Testing Speakers 4 22 Testing the Speakers 4 22 Troubleshooting Speakers 4 23 Related Information 4 23 Testing Microphones 4 24 Testing Microphones on the CTS 500 4 24 Troubleshooting Microphones 4 25 Related Information 4 26 Testing Presentation Devices 4 26 Checking External Presentation Devices 4 27 Checking the Test Pattern 4 28 Checking the VGA 4 29 Checking the Documen...

Page 6: ...ng Configuration Issues 4 45 Related Information 4 46 Initiating System Restart 4 47 Troubleshooting Video Quality Settings 4 47 Troubleshooting Network Cabling 4 48 CTS 500 32 Troubleshooting 4 49 Where to Go Next 4 49 Troubleshooting the CTS 500 32 5 1 Adjusting the Camera 5 2 Testing the Display 5 2 Verifying Speaker Function 5 3 Verifying Microphone Function 5 4 Testing the Light Fixture 5 5 T...

Page 7: ...ophones 6 20 Testing the CTS 1000 Microphone 6 20 Troubleshooting the CTS 1000 Microphone 6 21 Related Information 6 22 Testing the External Presentation Display 6 22 Testing Presentation Devices 6 22 Checking the Test Pattern 6 24 Checking the VGA 6 24 Checking the Document Camera 6 25 Resetting the Projector 6 25 Troubleshooting Presentation Devices 6 25 Related Information 6 27 Testing Other De...

Page 8: ...1 Contents 7 1 Managing CTS 1100 Hardware Setup 7 2 Managing Displays 7 3 Selecting the Light Level 7 4 Adjusting Your Display 7 4 Troubleshooting Displays 7 5 Related Information 7 6 Testing Cameras 7 6 Testing the CTS 1100 Camera 7 6 Understanding Camera Setup Choices for Room Lighting 7 17 Troubleshooting Cameras 7 18 Related Information 7 18 Testing Speakers 7 19 Testing the Speakers 7 19 Trou...

Page 9: ...ing Log Files 7 32 Sysop Log 7 32 Log Files 7 32 SIP Messages 7 34 Generate Detailed Message Reports 7 34 Related SIP Messages 7 35 Navigating Long Lists 7 36 Related Information 7 36 Testing Audio 7 37 Related Information 7 37 Testing the Network Connection 7 37 Related Information 7 38 Managing Configuration Issues 7 38 Related Information 7 39 Initiating System Restart 7 39 Troubleshooting Vide...

Page 10: ...48 Troubleshooting Speakers 8 49 Related Information 8 50 Testing Microphones 8 50 Testing Microphones on the CTS 1300 8 50 Troubleshooting Microphones 8 52 Related Information 8 53 Testing the External Presentation Display 8 53 Testing Presentation Devices 8 54 Checking the Test Pattern 8 55 Checking the VGA 8 56 Resetting the Projector 8 56 Troubleshooting Presentation Devices 8 56 Related Infor...

Page 11: ...ng the CTS 3000 and CTS 3200 9 1 Contents 9 1 Managing CTS 3000 and CTS 3200 Hardware Setup 9 2 Managing Displays 9 3 Selecting the Light Level 9 4 Adjusting Your Display 9 5 Troubleshooting Displays 9 6 Related Information 9 6 Testing Cameras 9 7 Testing the CTS 3000 and CTS 3200 Cameras 9 7 Troubleshooting Cameras 9 14 Related Information 9 15 Testing Speakers 9 15 Testing the Speakers 9 15 Trou...

Page 12: ...op Log 9 39 Log Files 9 39 SIP Messages 9 41 Generate Detailed Message Reports 9 42 Related SIP Messages 9 42 Navigating Long Lists 9 43 Related Information 9 43 Testing Audio 9 44 Related Information 9 44 Testing the Network Connection 9 44 Related Information 9 45 Managing Configuration Issues 9 46 Related Information 9 46 Initiating System Restart 9 47 Troubleshooting Video Quality Settings 9 4...

Page 13: ...Testing Microphones 10 19 Testing Microphones on the CTS 3010 and CTS 3210 10 19 Troubleshooting Microphones 10 21 Related Information 10 22 Testing the External Presentation Display 10 22 Testing Presentation Devices 10 23 Checking the Test Pattern 10 25 Troubleshooting the Presentation Display 10 25 Checking the VGA 10 27 Troubleshooting Presentation Devices 10 28 Related Information 10 30 Testi...

Page 14: ...bleshooting Network Cabling 10 41 Where to Go Next 10 43 Monitoring the Cisco TelePresence System 11 1 Contents 11 1 Call Statistics 11 2 Network Statistics 11 5 Where to Go Next 11 7 Satellite Licenses for the Cisco TelePresence System A 1 Contents A 1 Cisco TelePresence over Satellite Networks A 1 Supported CTS Devices A 2 Supported CTS Software A 2 Supported Satellite Bandwidth A 2 Satellite Se...

Page 15: ... and Submitting a Service Request page vii What s New For a complete list of features for this release see the following documentation on Cisco com Release Notes for Cisco TelePresence System Cisco TelePresence System Software Feature Guide For supported software compatibility across all releases see the following documentation Cisco TelePresence Administration Software Compatibility Before You Be...

Page 16: ...lePresence Personal Endpoints TelePresence Office Cisco TelePresence System 1100 Cisco TelePresence System 1000 Cisco TelePresence System 500 Series CTS Software Download Make sure you have downloaded supported CTS software Navigate to your CTS device on Cisco com 1 Navigate to your device Product Support TelePresence TelePresence Immersive Endpoints Cisco TelePresence System 3200 Series Cisco Tel...

Page 17: ...mbedded in the software files that are available when you click Download Software on the Cisco Unified Communications Manager Support page at the following URL http www cisco com en US products sw voicesw ps556 tsd_products_support_series_home html Or navigate to Products Voice and Unified Communications IP Telephony Call Control Cisco Unified Communications Manager CallManager Cisco Unified Commu...

Page 18: ...device you are installing is known or available The MAC address comprises a unique 12 character hexadecimal number that identifies a Cisco Unified IP phone or other hardware device Locate the MAC address number on a label on the back of the Cisco TelePresence system primary codec for example 000B6A409C405 Cisco Unified CM makes the MAC address a required field for Cisco Unified IP phone device con...

Page 19: ...elePresence System T Series Products TelePresence TelePresence Personal Endpoints TelePresence Office Cisco TelePresence System 1100 Cisco TelePresence System 1000 Cisco TelePresence System 500 Series CTS Administration and User Guides Configuration maintenance and monitoring tasks using Cisco TelePresence administration software Products TelePresence TelePresence Immersive Endpoints TelePresence ...

Page 20: ...nce and monitoring tasks using Cisco TelePresence administration software Products TelePresence TelePresence Immersive Endpoints TelePresence System Cisco TelePresence Administration Software http www cisco com en US products ps8332 tsd_products_ support_series_home html Cisco TelePresence administration software download page Download Software Select a Product page on Cisco com http www cisco com...

Page 21: ...vice and Cisco currently supports RSS version 2 0 Complete guide to the CTS software and hardware documentation Cisco TelePresence System Documentation Roadmap Cisco Unified CM documentation types and locations Cisco Unified Communications Manager CallManager Documentation Roadmaps Cisco Unified Communications Manager Support page Cisco Unified Communications Manager Support Cisco Unified IP Phone...

Page 22: ...viii Cisco TelePresence System Administration Guide OL 21845 01 What s in This Guide ...

Page 23: ...ration interface to maintain the Cisco TelePresence System CTS software Note No more than one administrator should access the CTS Administration interface at one time Administration tasks include the following Viewing device information and detailed system status information Configuring system settings Monitoring the status of Cisco TelePresence system equipment Troubleshooting the system For firs...

Page 24: ...co TelePresence System 1100 Cisco TelePresence System 1000 Cisco TelePresence System 500 Series Figure 1 1 shows an example of the Cisco TelePresence System Administration window Click the task name or the arrows in the left panel to navigate to tasks Figure 1 1 Main Cisco TelePresence System Administration Window System Status This section contains the following system status information System S...

Page 25: ...Status box Step 1 Move your mouse over the colored icons in the System Status box to display dialog boxes containing the state of each piece of equipment For example rolling your mouse over the green check mark icons in Figure 1 2 will show the detailed state of the equipment Figure 1 2 System Status Window Or Step 2 Click the magnifying glass icon in the upper right corner of the System Status bo...

Page 26: ...ng the CTS 1100 Ellipses or Black Dot Microphone is not expected or microphone is not connected Green check mark Device is configured and operational Hourglass Device status is unknown or is being determined Question Mark Microphone is not expected or microphone is not connected Red X with a broken pipe Device in inaccessible This icon is seen if the primary codec cannot communicate with a seconda...

Page 27: ...rity Yes Encrypted Active call with both the signaling and the media encrypted Yes Authenticated Active call with encryption on the call signaling only Yes Non Secure Active call with no authentication or encryption Yes Not Available Active call but the security level of that call is unavailable No Not actively in a call Navigation In the navigation pane at the left side of the Cisco TelePresence ...

Page 28: ...em Administration Tasks The following sections describe objects functions and information that is displayed in the windows associated with the Cisco TelePresence System Administration interface Administration Window Header page 1 7 Content Area page 1 7 Typing and Selecting Information in Fields page 1 7 Validating Information in Fields page 1 7 Validating Information in Windows page 1 7 ...

Page 29: ...ly disabled Once you change or add settings in these windows both buttons become enabled Use the Apply button to apply new or modified information When you click Apply validation is performed for all fields in that window and a message is displayed if there is invalid data in the fields Use the Reset button to discard changes and restore the values shown when the window was first displayed Other C...

Page 30: ... online help screens Navigating Online Help page 1 8 Accessing this Administration Guide From Online Help page 1 9 Navigating Online Help To access online help Step 1 In the Cisco TelePresence Administration window click the Help button or click Help in the toolbar in the upper right corner of the Cisco TelePresence System Administration screen The Cisco TelePresence System Administration Online H...

Page 31: ...co TelePresence System Administration Guide this document from the menu bar on the Cisco TelePresence System Administration screen To access the Cisco TelePresence System Administration Guide from Online Help Step 1 Choose Help View PDF Step 2 Save or open the file when prompted Note For the most up to date information including detailed testing and troubleshooting procedures see the Cisco TelePre...

Page 32: ...1 10 Cisco TelePresence System Administration Guide OL 21845 01 Chapter 1 Using the Cisco TelePresence System Administration Interface Where to Go Next ...

Page 33: ...CTS as well as view information about the devices installed on your system Before You Begin To access the Cisco TelePresence System Administration interface for the first time complete the steps in Logging into the Cisco Unified CM Administrator section of Cisco Unified Communications Manager Configuration Guide for the Cisco TelePresence System To view information about the Cisco TelePresence dev...

Page 34: ...own to the IP Address listing and copy the address Figure 2 1 Cisco TelePresence System Administration Login Screen b In the Admin field type admin c In the Password field type cisco Note You can change the default password in Cisco Unified CM See the Cisco Unified Communications Manager Configuration Guide for the Cisco TelePresence System d Click Login The Device Information window appears as sh...

Page 35: ...tion Fields Hardware Software Versions System Information and Status Tabs Device Information Fields The Device Information area contains details about the settings that were configured in the CTS and the Cisco Unified CM The information in Table 2 1 describes setting descriptions in the Device Information fields Note The Cisco TelePresence System device type must be specifically selected before yo...

Page 36: ...the IP phone as defined in Cisco Unified CM Meeting Room Name of the meeting room in which this particular CTS is located as defined in Cisco Unified CM TelePresence MAC Address MAC address of the primary CTS codec TelePresence Host Name Host name of the primary CTS codec TelePresence IP Address IP address of the primary CTS codec IP Phone MAC Address MAC Address of the IP phone as entered in Cisc...

Page 37: ... Status Details Step 4 Click Close to close the window System Information Details Detailed system information is displayed per codec One codec For systems with one codec all information displayed is for the system s single codec Three codecs For systems with three codecs hardware and software information is displayed for left center and right codecs Presentation codec For systems that include a pr...

Page 38: ...al number 2 Document_Camera_Hardware_Ver Document camera hardware version number 2 Document_Camera_Model Document camera model number 2 Display_Serial Serial number of the display Display_Hardware_Ver Display hardware version number Display_Model Display model number Display_BootCode_Ver Version number of the boot loader for AppCode BootCode also provides upgrade feature for AppCode Display_AppCod...

Page 39: ...eams Audio_PCB_S N CTS 500 and CTS 1300 only Unique device identification UDI containing serial numbers unique to that printed circuit board PCB Audio_PCB_P N CTS 500 and CTS 1300 only Unique device UDI containing part numbers unique to that PCB Audio_PCB_Rev CTS 500 and CTS 1300 only Unique UDI containing hardware revision information unique to that PCB PoE_Reset_Available Indicates whether Power...

Page 40: ...right corner of the Status pane which is in the lower left corner of the screen See Figure 2 3 for an example of the magnifying glass icon and the Status pane Figure 2 3 CTS 1300 System Status Table 2 4 contains descriptions of the Status Details fields CTS displays a red X next to devices that are not operational or in error Projector_Model Projector model number if projector is installed Present...

Page 41: ...2 9 Cisco TelePresence System Administration Guide OL 21845 01 Chapter 2 Device Information System Information and Status Tabs ...

Page 42: ... Right cameras Displays Status Microphones Status Note CTS 1300 displays information for the following microphones Positional Center Left and Right Table Center Left and Right Not used ellipses Document Camera Video Cable Connection Power Status Cisco Unified CM Configuration Ethernet Connection Note The document camera is not available on the CTS 1300 Projector LCD Video Cable Connection Power St...

Page 43: ...the hardware troubleshooting interface for your system See Where to Go Next to locate the troubleshooting support document for your Cisco TelePresence system System Status Cisco Unified CM In a call Audio Video Expansion Box Auxiliary Control Unit Presentation Codec Cisco Unified CM Configuration Status Note Further status information is located in the Time Since Last Update and Microphone Status ...

Page 44: ... Information window Configure Configuring the Cisco TelePresence System page 3 1 Troubleshoot Platform specific troubleshooting Troubleshooting the CTS 500 Troubleshooting the CTS 500 32 Troubleshooting the CTS 1000 Troubleshooting the CTS 1100 Troubleshooting the CTS 1300 Troubleshooting the CTS 3000 and CTS 3200 Troubleshooting the CTS 3010 and CTS 3210 Monitor Monitoring the Cisco TelePresence ...

Page 45: ...Manager Settings page 3 12 Address Book page 3 14 Telephony Settings page 3 15 SNMP Settings page 3 17 System Settings page 3 19 Troubleshooting Your Configuration page 3 21 Upgrading CTS Codec Firmware page 3 24 Managing Passwords page 3 25 Where to Go Next page 3 27 First Time Setup Wizard for the CTS 500 32 Because the CTS 500 32 uses a first time setup wizard the configuration process is somew...

Page 46: ...rver Optional page 3 7 Configuring Your System After Initial Bootup page 3 7 Loading CTS Administration Software CTS Administration Software is factory installed on each codec and loads during initial bootup To boot up CTS Administration Software Step 1 Power on the PDU that is on the bottom of the CTS cabinet by turning the switch to the On position Step 2 Turn on the codecs that are associated w...

Page 47: ...ays is 192 168 100 2 the CTS device could not contact the DHCP server or your system does not use DHCP Do one of the following 1 If your network does not use DHCP navigate to Configuration IP Settings change the DHCP Enabled setting to No and specify a static IP address subnet mask gateway and DNS server Remember to reboot your codec after you configure a static IP address 2 Set up a Cisco TelePre...

Page 48: ...dmin field type admin Step 5 In the Password field type cisco Step 6 Click Login Step 7 Make network and DHCP changes to the CTS configuration as required Tip If your network does not use DHCP navigate to Configuration IP Settings change the DHCP Enabled setting to No and specify a static IP address subnet mask gateway and DNS server You must reboot your codec after you configure a static IP addre...

Page 49: ...le if your determine that the Cisco Telepresence system provided an IP address of 10 1 0 2 enter the address 10 1 0 1 By default the username is admin and the password is cisco Step 4 Network services are started automatically If needed enter the following command to start network services utils service start Calling_Services Step 5 Using a supported Internet browser log in to the Cisco TelePresen...

Page 50: ...Cisco TelePresence provided for your session For example if your determine that the Cisco Telepresence system provided an IP address of 10 1 0 2 enter the address 10 1 0 1 By default the username is admin and the password is cisco Step 4 Enter the following command to configure a static network IP address set network IP static ip address ip subnet ip gateway dns address1 dns address2 domain name W...

Page 51: ...up after initial installation or after a factory reset Note The telephone displays a directory number of 7000 but the telephone is not yet registered and does not function Before You Begin If you have not already done so configure Cisco Unified Communications Manager See the Cisco Unified Communications Manager Configuration Guide for the Cisco TelePresence System To continue your initial setup St...

Page 52: ...ndow appears as shown in Figure 3 4 Figure 3 4 Device Information Screen Note See the Upgrading CTS Codec Firmware section on page 3 24 for information about upgrading to new CTS firmware releases Step 6 Navigate to the following to continue configuring your system IP Settings page 3 8 Network Settings page 3 11 Cisco Unified Communications Manager Settings page 3 12 Address Book page 3 14 Telepho...

Page 53: ...P Settings window displays the Cisco TelePresence System CTS MAC address and hostname and you can view and manage the following DHCP Select a static IP address which allows the Cisco IP phone to be configured so that the system recognizes it as a device in the network rather than a router Domain name IP Address Default gateway DNS servers To view and manage IP settings Step 1 Choose Configuration ...

Page 54: ...servers and other options like Option 150 for the Cisco Unified CM TFTP servers Tip When you make a change in any of the Configuration IP Settings fields the Apply and Reset buttons are activated Step 3 Click Apply to register new or modified settings Step 4 Click Reset to restore the original settings Note All codecs on the system must be connected and enabled for the factory reset to complete To...

Page 55: ...you click the Yes radio button to Use Static IP Address Domain Name Indicates the domain name for the primary codec This field is configurable only if you select the No radio button for DHCP Enabled Use Static IP Address Indicates whether the CTS primary codec is configured to use a static IP address Static IP address is disabled by default Click the Yes radio button to update the following fields...

Page 56: ...k Reset to restore the administrative VLAN ID setting displayed when you opened this window Syslog Address This field shows the display only syslog address that is standard for networks with a Cisco Unified IP phone as shown in Figure 3 7 Figure 3 7 Network Settings Syslog Address Note You must also configure the External Syslog Address in the Product Specific Configuration Layout field for your C...

Page 57: ...t of TFTP servers that indicate to endpoints in the network where to find Cisco Unified CM configuration files Click Specify to manually supply IP addresses of TFTP servers in the interactive fields provided TFTP Server 1 through 5 Click Specify at Use Configuration TFTP Server to activate interactive fields that are provided for entering TFTP server IP addresses Cisco Unified Communications Manag...

Page 58: ...Cisco Unified Communications Manager Configuration Guide for the Cisco TelePresence System Cisco Unified Communications Manager CallManager Documentation Roadmaps Address Book The Address Book window displays read only entries that have been set during Cisco Unified Communications Manager Cisco Unified CM configuration You can create listings for up to 40 meeting rooms To view the phone list of Ci...

Page 59: ... CTS Telephony Settings Step 2 View the telephony settings described in Table 3 3 Table 3 3 Telephony Settings Field Settings Auto Answer Displays the automatic answering capability on the phone Yes indicates that automatic answering has been enabled No indicates that automatic answering has been disabled Maximum Call Length mins Displays the defined limit to the number of minutes allowed for a ca...

Page 60: ...deo traffic AF11 DSCP 001010 AF12 DSCP 001100 AF13 DSCP 001110 AF21 DSCP 010010 AF22 DSCP 010100 AF23 DSCP 010110 AF31 DSCP 011010 AF32 DSCP 011100 AF33 DSCP 011110 AF41 DSCP 100010 Recommended value AF42 DSCP 100100 AF43 DSCP 100110 CS1 precedence 1 DSCP 001000 CS2 precedence 2 DSCP 010000 CS3 precedence 3 DSCP 011000 CS4 precedence 4 DSCP 100000 CS5 precedence 5 DSCP 101000 CS6 precedence 6 DSCP...

Page 61: ...otocol SNMP Settings window displays read only information about the SNMP settings for the Cisco TelePresence System that were set in Cisco Unified CM configuration To view SNMP settings Step 1 Choose Configuration SNMP Settings The SNMP Settings window appears as shown in Figure 3 11 Figure 3 11 Verify SNMP Settings Step 2 View the SNMP settings fields described in Table 3 4 ...

Page 62: ...mote agent SNMP engine ID and user password are used to compute authentication and privacy digests SNMP Configuration Parameters that access the SNMP server associated with this Cisco TelePresence System Cisco Unified CM for CTS supports SNMP Version 2c and Version 3 SNMP fields displayed in this window reflect the configured SNMP version The following fields are included SNMP Enabled User ID Secu...

Page 63: ...em Settings window appears as shown in Figure 3 12 Figure 3 12 CTS System Settings Step 2 View the system settings information described in Table 3 5 Table 3 5 System Settings Field Description or Setting Username Password Configuration User ID New Password New Password verify Displays username and password Note Usernames and passwords must be at least 4 characters but not more than 64 characters ...

Page 64: ...ale Configuration Time Zone Displays the configured time zone for your area of the world from the drop down menu Language Displays the configured language for CTS Cisco TelePresence System Configuration System Type Identifies the CTS model Choose from the following Cisco TelePresence 500 Cisco TelePresence 1000 Cisco TelePresence 1100 Cisco TelePresence 1300 Cisco TelePresence 3000 Cisco TelePrese...

Page 65: ... are displayed in a 24 hour format where 00 00 indicates 12 00 midnight and 23 59 indicates 11 59 pm Default is 07 30 If you clear the default value so that the field is blank the display s will turn off after the completion of each call Display On Duration Specifies the length of time the Cisco TelePresence system display s will remain on if a Display On Time value is defined Times are displayed ...

Page 66: ...terface Click on the IP address and verify phone registration The Cisco Unified IP Phone 7975 does not register Phone could be unknown Cisco Unified CM does not know about it CTS is not registered because it is unplugged CTS MAC address is entered incorrectly The incorrect device type was configured in Cisco Unified CM Verify Phone Registration Log in to the Cisco Unified CM administration interfa...

Page 67: ...tion 7 Reset the device See the Cisco Unified Communications Manager Configuration Guide for Cisco TelePresence System for more information Call terminates prematurely DSP failure due to incompatible CTS software version CTS devices are backward compatible up to two CTS Software Releases You may want to upgrade your software Conference room is deleted from future meeting schedule in CTS Manager Lo...

Page 68: ...ce System for complete instructions To download CTS firmware Step 1 Log into the Download Software Select a Product page on Cisco com http www cisco com cisco software navigator html The Tools Resources Download Software appears Step 2 Expand the Cisco TelePresence System folder and open the Cisco TelePresence System sub folder A list of CTS devices appears Step 3 Select your CTS device Step 4 Upl...

Page 69: ...o long and will exit If you encounter any difficulty open a case with Technical Assistance Center TAC via the Internet at http tools cisco com ServiceRequestTool create or contact your Cisco technical support representative and provide the representative with the information you have gathered about the problem Before You Begin Make sure that the CTS is not in a call and that there is only one inst...

Page 70: ...Sorry that was an invalid passcode Logging off Connection to 10 00 00 100 closed dhcp 249 When you enter the correct passcode the CTS will then reset the administration account name and password to the system defaults The following example shows successful password reset information Example 3 3 Successful Password Reset Request Please enter the passcode 507530 resetting admin name and password sto...

Page 71: ...ts TelePresence TelePresence Personal Endpoints TelePresence Office Cisco TelePresence System 1100 Cisco TelePresence System 1000 Cisco TelePresence System 500 Series Where to Go Next Proceed to the following chapters to troubleshoot your CTS Chapter 4 Troubleshooting the CTS 500 Chapter 5 Troubleshooting the CTS 500 32 Chapter 6 Troubleshooting the CTS 1000 Chapter 7 Troubleshooting the CTS 1100 ...

Page 72: ...3 28 Cisco TelePresence System Administration Guide OL 21845 01 Chapter 3 Configuring the Cisco TelePresence System Where to Go Next ...

Page 73: ...Manual more Info Note If you have more options on your phone touch the more softkey until you reach the end of the selections 2 Make a note of the IP address 3 Enter the IP address in your laptop s browser window 4 Click Yes to accept all security connection messages Note You cannot perform diagnostics during an active Cisco TelePresence system call Proceed to the following sections to troubleshoo...

Page 74: ...4 33 Before You Begin Before you begin testing and troubleshooting your system check the system displays All of the Cisco TelePresence System Administration interface Hardware Setup features require the use of the displays in the meeting room Therefore we recommend the following 1 Verify that the displays work by using the Hardware Setup Displays tests in this section 2 If the displays are showing...

Page 75: ...successfully when the color on the display has been adjusted for the lighting in the meeting room Note Each display must be adjusted individually Use the information in the following sections to adjust the display for your system Selecting the Light Level page 4 3 Adjusting Your Display page 4 4 Troubleshooting Displays page 4 6 Related Information page 4 6 Selecting the Light Level When adjusting...

Page 76: ...ble to ascertain the type and color temperature of light bulbs in the meeting room experiment with color temperature settings until the color and images on the display screen look lifelike Tip It is OK to try a few different color temperatures to see what looks best in the room Remember the Color Temperature setting only effects how the local participants see the display it does not effect the way...

Page 77: ...ubleshooting the CTS 500 Managing CTS 500 Hardware Setup Figure 4 2 Color Temperature Test Screen Step 5 Select the color temperature of the lighting in the meeting room from the drop down menu The Apply button is activated Step 6 Click Apply Step 7 Click Stop to stop the test ...

Page 78: ... See the Auto Adjusting the Camera section on page 4 13 Use the information in the following sections to test and troubleshoot the camera for your system Testing the CTS 500 Camera page 4 7 Troubleshooting Cameras page 4 21 Related Information page 4 21 Table 4 1 Troubleshooting Displays Problem Possible Cause Action No image Power cable is not plugged in Power switch on the back of the display is...

Page 79: ...hment comes off in one piece To remove the camera hood Step 1 Pull the top of the hood towards you until that portion of the hood snaps open Step 2 Pull the bottom of the hood until the entire unit snaps off of the camera Setting up the Camera Targets To set up the camera target Step 1 Prepare the large camera target and place it on the easel Step 2 Set the easel and large target in the position t...

Page 80: ...Prepare the large camera target and place it on the easel Step 7 Set the easel and large target in the position that the user will occupy Use the distance measured from the camera to the head of the user to position the target If the distance is unknown use 1 5 meters 5 feet Note The user must be at least 4 feet 1 2 meters away from the display for all CTS 500 installations Figure 4 5 shows a pede...

Page 81: ...plays on the screen is at the approximate eye level of the CTS 500 user Note If you have a wall mounted CTS 500 skip this step Use the following guidelines when raising and lowering the stand see Figure 4 6 and Figure 4 7 Do not grasp the light reflector or any part of the CTS 500 but the monitor Use two hands Do not lift using only one side Apply equal pressure from each side 205016 5 ft 1 5 m He...

Page 82: ...Cisco TelePresence System Administration Guide OL 21845 01 Chapter 4 Troubleshooting the CTS 500 Managing CTS 500 Hardware Setup Figure 4 6 Height Adjustment Guidelines Pedestal Stand Mounted CTS 500 205650 ...

Page 83: ...the CTS 500 Managing CTS 500 Hardware Setup Figure 4 7 Height Adjustment Guidelines Table Stand Mounted CTS 500 Note If the user is available use them to position the CTS 500 If the user is not available or if the CTS 500 will be used by multiple people use an average eye level height 205651 ...

Page 84: ...ed to the top of the table Tip You can raise and lower the large target by adjusting the legs of the easel or move the target slightly from side to side However do not move the easel from the position that the user will occupy If possible move the camera to accommodate the position of the easel Figure 4 8 shows a camera correctly adjusted Figure 4 8 Camera Adjustment Step 11 Loosen the thumbscrew ...

Page 85: ...xed Artificial Lighting page 4 13 Outside Lighting page 4 15 Understanding Camera Setup Choices for Room Lighting page 4 16 Note For more information about room lighting see the Testing the CTS 500 Camera section on page 4 7 Fixed Artificial Lighting If the room uses fixed artificial lighting Step 1 Click the Disable radio button for the following Camera Auto Brightness Camera Auto Color Balance S...

Page 86: ... color balance Note Make sure that the large target is still in place and that nothing is between the large target and the camera The camera calibrates and saves the settings This process takes approximately 20 seconds Note If the test fails you may need to add more light to the room Step 4 Click Show Focus Target Red and green targets appear on the test screen as shown in Figure 4 10 Note To remo...

Page 87: ...d making adjustments Step 7 If you require further adjustments to the room brightness click the Enable radio button for the Camera Auto Brightness and Camera Auto Color Balance choices then select a choice from the Luminance drop down list until the brightness and contrast are at acceptable levels Outside Lighting If the room uses outside lighting or has any other conditions that could cause varia...

Page 88: ...ra Setup Choices for Room Lighting If your room has windows that contribute a significant amount of natural light you can set your CTS to automatically compensate for variable lighting conditions This compensation is an average adjustment and will not be as accurate as the color settings you select for a room that uses fixed artificial room lighting Table 4 2 contains recommendations for desirable...

Page 89: ...ing the following steps a Lean the large target against a chair or other surface so that it is taller than it is wide b Move the large target 6 to 8 feet 1 8288 to 2 4384 meters from the camera so that the red box encloses some of the patterns on the large target when you view the display as shown in Figure 4 11 c Use the easel to support the small target as shown in Figure 4 11 d Place the small ...

Page 90: ...Presence System Administration Guide OL 21845 01 Chapter 4 Troubleshooting the CTS 500 Managing CTS 500 Hardware Setup Figure 4 11 Setting Up Focus Targets 205019 3 ft 0 9 m Easel Small target Large target 5 ft 1 5 m ...

Page 91: ...us ring counter clockwise until the red and green bars extend all the way to the right Step 8 Continue to twist the focus ring until the red and green bars are approximately the same length See Figure 4 12 to view the approximate horizontal bar alignment When the bars are roughly the same length the camera is focused Note The red and green bars do not have to be exactly the same length Get them as...

Page 92: ...out testing and troubleshooting the CTS 500 camera see the Setting Up the Cameras section in the First Time Setup chapter of the Cisco TelePresence System 500 Assembly Use Care and Field Replaceable Unit Guide Reattaching the Camera Haze and Replacing the Hood Step 1 Attach the camera haze cover to the front of the camera lens The haze cover is the cover with the square edges that goes over the le...

Page 93: ...ed Color settings are not correct Tug on the plug to see if it is fully plugged in See the Routing Power and Signal Cables section in the Cisco TelePresence System 500 Assembly Use Care and Field Replacement Unit Guide No image Lens cap is in place Camera is not plugged in or is plugged in incorrectly Remove the lens cap Check power connections and switches on each display Verify that the video an...

Page 94: ...hooting Speakers page 4 23 Related Information page 4 23 Testing the Speakers To test the speakers Step 1 Log in to the Cisco TelePresence System Administration interface Step 2 Choose Troubleshooting Hardware Setup Step 3 Click the Speakers radio button Step 4 Click Start to begin the speaker test The speaker test screen appears as shown in Figure 4 14 Figure 4 14 Speaker Test Screen Step 5 Click...

Page 95: ...he speaker Check that the speaker cable is plugged into the correct receptor on the primary codec Tug on the plug to see if it is fully plugged in Push the plug in firmly until a click is heard Sound is not synchronized with video Contact Cisco technical support Choppy audio during double talk when both sides are talking simultaneously Audio Echo Canceller AEC very briefly mistakes one of the spee...

Page 96: ...the number of microphones available for testing CTS 500 1 microphone with a single audio meter displayed on a single test screen Testing Microphones Go to the following sections to test microphones Testing Microphones on the CTS 500 page 4 24 Troubleshooting Microphones page 4 25 Related Information page 4 26 Testing Microphones on the CTS 500 To test microphones on the CTS 500 Step 1 Log in to th...

Page 97: ...nd registers Microphone cable is not connected or is only partially connected Check that the system is plugged in and power is on Check that the microphone plug is firmly seated in the correct connector on the primary codec Check that the mute light on each microphone is lit An unlit light indicates that the microphone is not plugged in Lightly tap the microphone to see if sound registers Contact ...

Page 98: ... not acoustically treated or has many hard surfaces Adjust the position of the CTS 500 Add acoustic treatment to the walls and windows in the room Choppy audio during double talk when both sides are talking simultaneously Audio Echo Canceller AEC very briefly mistakes one of the speech patterns for noise and cancels it resulting in choppy audio The audio from the remote side is slightly attenuated...

Page 99: ... PiP on the main display screen You can optionally add an external presentation display screen that displays the presentation instead of displaying it as PiP This external display is attached to the External Presentation Display HD video connection on the codec See the Cisco TelePresence System 500 Assembly Use Care and Field Replaceable Unit Guide for more information Note If the video works for ...

Page 100: ...to test presentation devices Checking the Test Pattern page 4 28 Checking the VGA page 4 29 Checking the Document Camera page 4 30 Checking the Test Pattern To check the test pattern Step 1 Choose Troubleshooting Hardware Setup Step 2 Click Start to begin the test In Presentation Source window the Test Pattern radio button is selected by default Step 3 Click Test The test pattern displays as shown...

Page 101: ...id If the green border is not visible for systems with an Auxiliary Control Unit do the following a Click Set LCD Projector Defaults A dialog box opens alerting you that setting projector defaults may take up to 45 seconds A menu will appear from the projector to select settings For systems without the Auxiliary Control Unit use the projector remote control to change the following settings on the ...

Page 102: ...he projector to the default settings if necessary Step 7 Click Stop in the Testing box to end all testing Checking the Document Camera To test input from the document camera Step 1 Choose Troubleshooting Hardware Setup Step 2 Click the Presentation Devices radio button Step 3 Click Start in the Testing box The Presentation Source buttons are activated Step 4 Select Document Camera and click Test I...

Page 103: ... is not being seen on the projector screen try the following VGA devices Unplug the device from the VGA cable wait 5 seconds and then plug the device back in Document cameras Turn the camera off wait 5 seconds and restart the device Presentation Devices Use the information in Table 4 6 to troubleshoot presentation devices Table 4 7 Troubleshooting Presentation Devices Problem Possible Cause Possib...

Page 104: ...s in the Routing Power and Signal Cables section in the Cisco TelePresence System Assembly Use Care and Field Replacement Unit Guide for your system on Cisco com Product Support TelePresence TelePresence Immersive Endpoints Cisco TelePresence System 3200 Series Cisco TelePresence System 3000 Series Cisco TelePresence System 1300 Series Cisco TelePresence System T Series Products TelePresence TeleP...

Page 105: ...x 768 60 Hz See the Optional Hardware section of the Cisco Unified Communications Manager Configuration Guide for the Cisco TelePresence System for more information There is no image and a Bulb icon appears on the CTS main display The projector bulb has burned out Replace the projector bulb Tip Presentation devices automatically shut off when there is no longer a video signal to that presentation ...

Page 106: ...ting Hardware Setup Step 3 Click the Other Devices radio button Step 4 Click Start in the Testing box The Auxiliary Control Unit Current Status is displayed by default Individual light units correspond to the five port numbers of the Auxiliary Control Unit Ports 1 through 5 as shown in Figure 4 17 Figure 4 17 CTS 500 ACU Testing Step 5 Check a box to select a specific port number Or Step 6 Click S...

Page 107: ...tration interface Step 2 Choose Troubleshooting Hardware Setup Step 3 Click the Other Devices radio button Step 4 Select the LEDs tab Step 5 Click Start in the Testing box The LED status is displayed as shown in Figure 4 18 Figure 4 18 CTS 500 LED Status If the LED feature is enabled the LED State On button is highlighted If the LED feature is disabled the LED State Off button is highlighted Step ...

Page 108: ...is enabled the Light State On button will be highlighted If the shroud light feature is disabled the Light State Off button will be highlighted Step 6 Click the Light State On or Light State Off button to change the current state of the shroud light Step 7 Click Stop to end the test The state of the light reverts to its default setting as it was configured in the Cisco Unified CM Digital Media Pla...

Page 109: ...udio Input Source PC button is highlighted When Secondary Audio Input Source is set to PC the audio input is active while the presentation source is active both in and out of a call If you have a DMP attached the Secondary Audio Input Source DMP button is highlighted When set to DMP audio input is only active outside of a call if DMP is active during business hours defined by Cisco Unified CM Note...

Page 110: ...n taken off hold and the presentation will be shown when the meeting resumes If it was not the active presenter it will not ask to present and the presentation will not be shown when the meeting resumes Administration login can be slow when presenting during point to point secure calls This is expected behavior Administration CLI login can take as much as 60 seconds during point to point secure ca...

Page 111: ...m the Cisco TelePresence system Click the appropriate tab at the top of the window to view the following information Sysop Log page 4 39 Log Files page 4 40 SIP Messages page 4 41 Sysop Log To manage System Operation Sysop Log messages Step 1 Choose Troubleshooting Log Files Step 2 Select the Sysop Files tab to view system operation messages including call information call statistics and call erro...

Page 112: ...p down menu contains the following Audio speakers microphones Video displays cameras Projector or alternate display LCD document camera Phone Recording Other Unknown Figure 4 21 shows the problem types that you can select when downloading log files Figure 4 21 Select Problem Type Drop Down Menu Step 3 Choose from one of the following options None Default No log files will be captured unless a down...

Page 113: ...w log files Capture New Log Files radio button The following message appears Collecting Cisco TelePresence system log files This may take several minutes Please wait Step 7 The File Download window appears prompting you to open or save the file Click Save to send the gzip file to Cisco technicians to help solve the problem SIP Messages Use SIP Messages to view the current Session Initiation Protoc...

Page 114: ...to open the SIP Message Details dialog box The SIP Message Details dialog box opens containing the message details and Related SIP Messages Or Step 2 Highlight the SIP message and click the Details button The SIP Message Details dialog box opens containing the message details and Related SIP Messages Related SIP Messages The bottom portion of the SIP Message Details window lists SIP messages that ...

Page 115: ...s that a user or service is being invited to participate in a call session 3265 NOTIFY Immediately upon successful accepting or refreshing of a subscription a NOTIFY message is sent to communicate the current resource state to the subscriber This NOTIFY message is sent in the same dialog as that created by the SUBSCRIBE message 3261 OPTIONS Queries the capabilities of servers 3262 PRACK Provides r...

Page 116: ...ting room and send the results to Cisco Systems technical support for analysis Note Audio recordings can be made only while the CTS system is in a call To record audio Step 1 Choose Troubleshooting Audio Step 2 Click Start Recording Audio to start recording all audio in the local meeting room including audio from remote meeting rooms Recording will continue up to a maximum of two minutes unless yo...

Page 117: ...he Apply and Reset buttons are activated as shown in Figure 4 23 Figure 4 23 Auto Negotiate On Note When Auto Negotiation is enabled the Duplex and Speed settings are read only Step 3 Click Apply to save your settings or click Reset to restore the original settings Related Information For more system troubleshooting information see the Cisco TelePresence System Troubleshooting Guide on Cisco com M...

Page 118: ...eck the Cisco IP telephone for messages during the reset procedure Data in bold blue text indicates where the current system image is located for each codec in the system Locations of the factory image are listed To reset the system image to the factory default Step 1 Choose Troubleshooting Configuration Issues The Hardware Software Versions page appears listing the current hardware and software v...

Page 119: ...on the displays Table 4 11 Troubleshooting Cisco TelePresence Screen Resolution Problem Possible Cause Action Video picture is good but experiences repeated interruptions Video quality setting is set too high 1 Log into the Cisco Unified CM administration interface 2 Verify that the required settings have been made for configuring the video quality See the Cisco Unified Communications Manager Conf...

Page 120: ...narios and troubleshooting solutions for network cabling Table 4 12 Troubleshooting Cisco TelePresence Network Cabling Problem Possible Cause Actions Cisco Unified IP Phone is off Power to the primary unit is off Phone is not connected to the phone port on the primary unit The system does not recognize the phone or it is unregistered The network is down Check the power connection to the Cisco Tele...

Page 121: ...unications Manager is down or disabled The network is down Check the cable connection from the primary unit to the network See the assembly guide for your Cisco TelePresence system for correct cabling Restart Cisco Unified Communications Manager See the Cisco Unified Communications Manager Configuration Guide for the Cisco TelePresence System for Cisco Unified Communications Manager configuration ...

Page 122: ...4 50 Cisco TelePresence System Administration Guide OL 21845 01 Chapter 4 Troubleshooting the CTS 500 Where to Go Next ...

Page 123: ...n your phone touch the more softkey until you reach the end of the selections 2 Make a note of the IP address 3 Enter the IP address in your laptop s browser window 4 Click Yes to accept all security connection messages Note You cannot perform diagnostics during an active Cisco TelePresence system call Proceed to the following sections to troubleshoot system components Adjusting the Camera page 5 ...

Page 124: ... bulb Note If you are unable to determine the type and color temperature of light bulbs in the meeting room experiment with color temperature settings until the color and images on the display screen look lifelike Each time you change the setting and click Apply the color temperature in the display changes You cannot see these changes until you enter loopback mode for the camera See Verifying Spea...

Page 125: ... from the drop down menu The Apply button is activated Step 6 Click Apply Step 7 Click Stop to stop the test Verifying Speaker Function To verify that the speakers are working properly and that the left and right speakers are not switched Step 1 Log in to the Cisco TelePresence System Step 2 Navigate to Troubleshooting Hardware Setup Speakers Step 3 Click Start to begin the speaker test The speake...

Page 126: ...move close to the display to determine the source of the sound Step 7 Click Stop to end testing Verifying Microphone Function Tip During a call the CTS 500 32 microphone can transmit ambient noise in the surrounding area such as other people talking in or near the same area Make every effort to reduce or eliminate background noise before you begin the test call To verify that the CTS 500 32 microp...

Page 127: ...lick Stop When you end the testing the state of the light reverts to its default setting as specified in Cisco Unified Communications Manager Testing Digital Media Player Audio When you are not in a Cisco TelePresence call the DMP feature allows you to use the DMP audio as the secondary audio input source To configure and test the DMP audio Step 1 Connect the DMP to the codec and display as follow...

Page 128: ...ed Communications Manager server for your system To fix this problem complete the following steps 1 Run the first time setup wizard until you reach the System Verification Complete Screen 2 Click the CTS Admin UI button to go to the Cisco TelePresence Administration interface 3 Enter your username and password Tip By default the username is admin and the password is cisco 4 Navigate to Unified CM ...

Page 129: ...sages that may appear on the Cisco TelePresence system see the Cisco TelePresence System Message Guide on the Cisco TelePresence Administration Software Error and System Messages home page on Cisco com See the First Time Setup chapter of the Cisco TelePresence System 500 32 Assembly Use Care and Field Replaceable Unit Guide for complete information about the CTS 500 32 ...

Page 130: ...5 8 Cisco TelePresence System Administration Guide OL 21845 01 Chapter 5 Troubleshooting the CTS 500 32 Where to Go Next ...

Page 131: ...1 Obtain your IP address from the CTS Cisco Unified IP phone by touching the following softkeys Manual more Info Note If you have more options on your phone touch the more softkey until you reach the end of the selections 2 Make a note of the IP address 3 Enter the IP address in your laptop s browser window 4 Click Yes to accept all security connection messages Note You cannot perform diagnostics ...

Page 132: ...Presentation Devices page 6 22 Testing Other Devices page 6 27 Before You Begin Before you begin testing and troubleshooting your system check the system displays All of the Cisco TelePresence System Administration interface Hardware Setup features require the use of the displays in the meeting room Therefore we recommend the following 1 Verify that the displays work by using the Hardware Setup Di...

Page 133: ... fields For information on how to configure CTS for the first time see the Cisco TelePresence System 1000 Assembly Use Care and Field Replacement Unit Guide Managing Displays A display is set up successfully when the color on the display has been adjusted for the lighting in the meeting room Note Each display must be adjusted individually Use the information in the following sections to adjust the...

Page 134: ...d using terms such cool warm or daylight but can be expressed more precisely in kelvins K as a numeric value The following temperatures can be selected for adjusting the image on the Cisco TelePresence display screens 3500 K 4000 4100 K recommended 5000 K 6500 K 7500 K Tip In many cases the color temperature is printed on the light bulb If you are unable to ascertain the type and color temperature...

Page 135: ...rs on the screen Step 4 Click Start in the Testing box to start the adjustment process The Current Color Temperature test screen appears as shown in Figure 6 2 Note Each display in the meeting room should be showing a set of horizontal grey bars and that display s relative position The current color temperature setting is displayed Figure 6 2 Color Temperature Test Screen Step 5 Select the color t...

Page 136: ...mera See the Tuning the Camera section on page 6 13 Use the information in the following sections to test and troubleshoot the camera for your system Testing the CTS 1000 Camera page 6 7 Understanding Camera Setup Choices for Room Lighting page 6 17 Troubleshooting Cameras page 6 18 Related Information page 6 18 Table 6 1 Troubleshooting Displays Problem Possible Cause Action No image Power cable ...

Page 137: ...until these procedures are complete Testing the CTS 1000 Camera The following sections describe how to set up the CTS 1000 camera for testing Removing the Camera Hood page 6 8 Assembling and Setting Up the Camera Targets page 6 8 Aligning the Camera page 6 10 Setting the Field Depth page 6 15 Calibrating the CTS 1000 Camera page 6 16 Saving Your Settings page 6 17 Attaching the Camera Hood page 6 ...

Page 138: ...t up the camera targets Step 1 Carefully open the box containing the two targets and the target frame components The frame elements are in the bottom of the box Note Take care not to damage the box When you are finished with the camera adjustment procedure you can disassemble and store the target in the box for future use Step 2 Lay the two metal frames on the floor Step 3 Attach the two frame pie...

Page 139: ...the frame until the two registration marks on the upper right and left edges match the ends of the top metal frame See Figure 6 3 Tip To identify the corresponding point on the table you can measure the distance from a side wall to the center point in the frame then from the same wall apply the measurement to the table Step 9 On the edge of the table across from the wall align the vertical line in...

Page 140: ...the zoom ring on the lens until the curved lines on the left and right are just touching the left and right borders of the screen Tighten the thumbscrew when the adjustment is complete Step 7 If required align the camera so that the target is centered in the picture by using the screw and spring mechanisms on the camera mounting plate that is shown in Figure 6 4 You can adjust the pan the panorami...

Page 141: ... TelePresence System Administration Guide OL 21845 01 Chapter 6 Troubleshooting the CTS 1000 Managing CTS 1000 Hardware Setup Figure 6 4 Location of Adjustment Screws 200914 Tilt screw Pan screws Yaw screws Lens ...

Page 142: ...TS 1000 Hardware Setup Step 8 Click Remove Camera Target to stop the test as shown in Figure 6 5 Figure 6 5 Remove Camera Target Step 9 Proceed to the following sections Tuning the Camera page 6 13 Setting the Camera Yaw page 6 14 Adjusting the Pan of the Camera page 6 14 Adjusting the Tilt of the Camera page 6 15 ...

Page 143: ...the following Camera Auto Brightness Camera Auto Color Balance Note Auto Color Balance can produce undesirable results if the colors of the walls in your room are not white or gray Step 5 To make additional adjustments to the camera brightness and contrast levels select a choice from the Luminance drop down menu Note Make sure that the large target is still in place and that nothing is between the...

Page 144: ...e 4 feet radio button for the Focus Distance radio choice If the user is farther than 1 5 meters five feet away click the 6 feet choice Step 12 Click Apply Setting the Camera Yaw The yaw indicates how level the picture is as it is projected on the display Objects on the display appear to slant to viewers A yaw error occurs when the camera is positioned at an angle Yaw can be adjusted by pivoting t...

Page 145: ...sert the Allen wrench into the head of the screw below the camera and turn it clockwise to lower the image Setting the Field Depth This section describes how to set the field depth This is the area in which a conference participant can move forward and backward and remain in focus The process for setting the field depth is partially automated and requires the use of targets The process is also lig...

Page 146: ...y completing the following steps a Slowly zoom out until the green and red lines move to the edge of the left side of the screen b Slowly zoom in until the green and red lines move to and touch the right edge and move back Step 7 Slowly turn the zoom ring back to center until the ends of the red and green lines come as close to aligning as you can get them Note The closest alignment will most like...

Page 147: ...screw holes align in the bottom of the hood with threaded holes in the camera support bracket and secure with two M4 x 10 mm screws Understanding Camera Setup Choices for Room Lighting If your room has windows that contribute a significant amount of natural light you can set your CTS to automatically compensate for variable lighting conditions This compensation is an average adjustment and will no...

Page 148: ...Cameras Problem Possible Cause Action Image not positioned correctly Camera is not aligned correctly Adjust and focus the camera using the targets Image colors are incorrect Video cable is only partially connected Color settings are not correct Tug on the plug to see if it is fully plugged in See the Routing Power and Signal Cables section in the Cisco TelePresence System 1000 Assembly Use Care an...

Page 149: ...speaker cable are securely fastened under their corresponding connectors on the speaker Check that the speaker cable is plugged into the correct receptor on the primary codec Tug on the plug to see if it is fully plugged in Push the plug in firmly until a click is heard Sound is not synchronized with video Contact Cisco technical support Choppy audio during double talk when both sides are talking ...

Page 150: ...ified CM and the version of Cisco Unified CM that you are running The Microphone Troubleshooting screen displays the number of microphones available for testing CTS 1000 1 microphone with a single audio meter displayed on a single test screen Testing Microphones Go to the following sections to test microphones Testing the CTS 1000 Microphone page 6 20 Troubleshooting the CTS 1000 Microphone page 6...

Page 151: ...see if sound registers Contact Cisco technical support if you are certain that the cabling is correct and power is applied to the system but no sound registers on the microphone Microphone icon with red pipe displays Microphone is not connected One of the microphones is unplugged Check that the microphone is properly plugged in Choppy audio during double talk when both sides are talking simultaneo...

Page 152: ...he video works for a few minutes and then stops working your presentation device might use an unsupported video protocol To see the list of displays that the CTS 1000 supports see the release notes for your CTS software version on Cisco com A PiP softkey will be displayed on the phone only if a PiP is active Pip is not available for audio only calls To test an external presentation device Step 1 L...

Page 153: ...e projector is set up correctly and then proceed through VGA and document camera input tests as necessary Use the information in the following sections to test presentation devices Checking the Test Pattern page 6 24 Checking the VGA page 6 24 Checking the Document Camera page 6 25 Resetting the Projector page 6 25 Troubleshooting Presentation Devices page 6 25 Related Information page 6 27 Table ...

Page 154: ...ts may take up to 45 seconds A menu will appear from the projector to select settings For systems without the Auxiliary Control Unit use the projector remote control to change the following settings on the projector b Picture adj Overscan should be set to 0 c Screen Normal Step 6 Click Stop Test to end the test Step 7 Click Set Projector Defaults to reset the projector to the default settings Step...

Page 155: ... default settings Step 8 Click Stop in the Testing box to end all testing Resetting the Projector To reset the projector Step 1 Log in to the Cisco TelePresence System Administration interface Step 2 Choose Troubleshooting Hardware Setup Step 3 Click the Presentation Devices radio button Step 4 Click Start in the Testing box The Presentation Source buttons are activated Step 5 Click Set Projector ...

Page 156: ... cable connector Use the projector remote control to configure the projector for HD Video input If your system includes an Auxiliary Control Unit click Set Projector Defaults Object is blocking the path of the projector Remove any objects blocking the projector lens HD Video connector is not securely seated in the projector Seat the HD Video connector securely HD Video connector is not securely se...

Page 157: ...ts To test the ACU Step 1 Log in to the Cisco TelePresence System Administration interface Step 2 Choose Troubleshooting Hardware Setup There is no image and a Bulb icon appears on the CTS main display The projector bulb has burned out Replace the projector bulb Tip Presentation devices automatically shut off when there is no longer a video signal to that presentation device An on screen timer cou...

Page 158: ...liary Control Unit to power cycle the Auxiliary Control Unit Step 6 Click Stop to end the test Note When you end the testing the state of the light reverts to its default setting Digital Media Player The Digital Media Player DMP feature lets you select a secondary audio input source when you are not in a TelePresence call To test the DMP Step 1 Log in to the Cisco TelePresence System Administratio...

Page 159: ...rly CTS software releases a CTS with its presentation device plugged in would always ask to present when it did a resume Presentation device functionality is changed When a CTS goes on hold the presentation device takes note whether or not it was the active presenter If the presentation device was the active presenter when it went on hold it will ask to present again when taken off hold and the pr...

Page 160: ...e Cisco TelePresence system There can be up to 20 individual files saved on the CTS and each file can contain up to 100 000 characters Step 3 Click the Download Sysop Files button at the bottom of the page to download the sysop log files CTS Administration software then prompts you to do one of the following a Open to view the sysop log files The last 100 000 bytes of the log are shown When you do...

Page 161: ...s a download option is selected Figure 6 7 shows the log download radio button options Download existing log files You must select this radio button to download logs Capture New Log Files The system will capture but not download the log files Note You must disable Internet Explorer Pop up Blocker to capture new log files with the Capture New Log Fils button Figure 6 7 Downloading Log Files Step 4 ...

Page 162: ...endpoints Table 6 9 and Table 6 10 describe the SIP requests and message types To manage SIP messages Step 1 Choose Troubleshooting Log Files Step 2 Select the SIP Messages tab The SIP Messages window appears Step 3 View a specific type of message in the SIP log file by doing the following a Enter the filter where the SIP Message Type is by typing the name in the field provided The Filter button i...

Page 163: ...lumn lists the RFC that describes the SIP request messages or method Table 6 9 Supported SIP Requests and Methods RFC Request Method Description 3261 ACK Confirms that the client has received a final response to an INVITE request 3261 BYE Terminates a call Can be sent by either the caller or the called party 3261 CANCEL Cancels any pending searches but does not terminate any call currently in prog...

Page 164: ...le entry and then click Clear to delete a single error message Step 5 Click Clear All to delete all error messages displayed Related Information For more information see the following documentation Session Initiation Protocol SIP home page on Cisco com Cisco TelePresence System Message Guide 3265 SUBSCRIBE Requests current state and state updates from a remote node 3311 UPDATE Allows a client to u...

Page 165: ...p 3 Click Stop Audio Recording to stop recording Step 4 After you complete the recording and download the results send the results to Cisco Systems technical support Related Information For more system troubleshooting information see the Cisco TelePresence System Troubleshooting Guide on Cisco com Testing the Network Connection Use the Network Connection window to view and modify the duplex and au...

Page 166: ...reset you will have to reconfigure the system You will be asked twice to confirm your choice to revert to the factory image before software will carry out this request Resetting the system can take over two hours to complete A system reset results in the following The CTS is reset to the software image as originally shipped All configuration settings are reset to the factory defaults If you select...

Page 167: ...starts Troubleshooting Video Quality Settings Use the information in Table 6 11 to troubleshoot the video picture on the displays Table 6 11 Troubleshooting Cisco TelePresence Screen Resolution Problem Possible Cause Action Video picture is good but experiences repeated interruptions Video quality setting is set too high 1 Log into the Cisco Unified CM administration interface 2 Verify that the re...

Page 168: ...ble connection from the primary unit to the Cisco Unified IP Phone For cabling instructions see the Cisco TelePresence System 1000 Assembly Use Care and Field Replacement Unit Guide Log into the Cisco Unified Communications Manager administration interface Click on the IP address and verify phone registration Restore network operation See the Cisco Unified Communications Manager Configuration Guid...

Page 169: ...Telepresence phone idle screen does not appear Device configuration has not been done or has been done incorrectly 1 Log into the Cisco Unified Communications Manager administration interface 2 Verify that the required settings have been made for configuring the Cisco TelePresence system and Cisco Unified IP Phone See the Cisco Unified Communications Manager Configuration Guide for the Cisco TeleP...

Page 170: ...6 40 Cisco TelePresence System Administration Guide OL 21845 01 Chapter 6 Troubleshooting the CTS 1000 Where to Go Next ...

Page 171: ... Manual more Info Note If you have more options on your phone touch the more softkey until you reach the end of the selections 2 Make a note of the IP address 3 Enter the IP address in your laptop s browser window 4 Click Yes to accept all security connection messages Note You cannot perform diagnostics during an active Cisco TelePresence system call Proceed to the following sections to troublesho...

Page 172: ...ces page 7 28 Before You Begin Before you begin testing and troubleshooting your system check the system displays All of the Cisco TelePresence System Administration interface Hardware Setup features require the use of the displays in the meeting room Therefore we recommend the following 1 Verify that the displays work by using the Hardware Setup Displays tests in this section 2 If the displays ar...

Page 173: ...med using the Hardware Setup fields For information on how to configure CTS for the first time see the Cisco TelePresence System 1100 Assembly Use Care and Field Replacement Unit Guide Managing Displays A display is set up successfully when the color on the display has been adjusted for the lighting in the meeting room Use the information in the following sections to adjust the display for your sy...

Page 174: ...any cases the color temperature is printed on the light bulb If you are unable to ascertain the type and color temperature of light bulbs in the meeting room experiment with color temperature settings until the color and images on the display screen look lifelike Tip It is OK to try a few different color temperatures to see what looks best in the room Remember the Color Temperature setting only ef...

Page 175: ...button is activated Step 6 Click Apply Note Each time you change the setting and click Apply the color temperature in the display changes You cannot see these changes until you turn on the camera for testing thereby creating a self view or mirror image of the objects in the camera s focus See the Testing Cameras section on page 7 6 Step 7 Click Stop to stop the test Troubleshooting Displays Use th...

Page 176: ...ully when the image is centered and in focus on the display screen and the white balance is configured The hardware setup software provides a camera Auto Adjust feature and uses targets to adjust the camera zoom and fine tune the camera focus To set up the CTS 1100 camera for testing complete the tasks in the following sections Removing the Camera Cover and Leveling the Camera Table 7 1 Troublesho...

Page 177: ...ing the Camera Cover and Leveling the Camera The camera cluster must be perfectly level for you to properly configure the camera To level the camera complete the following steps Step 1 Turn the four black plastic screws on the top and bottom of the camera assembly 1 4 turn then remove the camera cover as shown in Figure 7 3 Figure 7 3 Removing the Camera Cover Step 2 Place the small spirit level o...

Page 178: ...mall camera target from their packaging Step 2 Unlock and slide the telescoping legs of the easel until the legs are at their full height Step 3 Separate the three legs Step 4 Raise the front legs until they are 29 inches 74 cm high Step 5 Raise the rear leg until it is 31 inches 79 cm high Step 6 Lock the legs into place using the leg locks Step 7 Attach the large camera target to the clip on top...

Page 179: ...position the table and configure the Cisco TelePresence software for use with the CTS 1100 camera Step 1 Position the table so that it fulfills the following requirements The front edge of the table is a minimum of 44 inches 112 cm away from the display The sides of the table are evenly positioned on each side of the CTS 1100 The rear edge of the table is between eight and 12 feet 244 and 366 cm a...

Page 180: ...edure Step 1 Place the large camera target with the easel in the position where the two participants will sit with the front legs of the easel touching the edge of the table Step 2 Measure the distance between the corners of the easel and the corners of the display to make sure that the target is parallel to the display as shown in Figure 7 7 Figure 7 7 Measuring the Distance between the Easel and...

Page 181: ... the addition of a red plus sign in the center of the display Step 8 Automatically adjust the camera by completing the following steps a In the Auto Brightness field perform one of the following actions If the room uses outside lighting or has any other conditions that could cause variable room lighting click the Enable radio button If your room lighting is not variable leave the default value b I...

Page 182: ...e fluorescent lights at your installation After you change the ballast for the fluorescent lights you can click the Disable radio button in the 50 Hz Flicker Reduction field d Click Apply to apply your changes Step 9 Focus the camera by completing the following steps a Loosen the focus ring thumbscrew on lens of the camera b Rotate the focus ring until the black plus sign on the target is clearly ...

Page 183: ...he middle adjust the camera rotation Use a 3 mm Allen wrench for these screws Step 11 Adjust the camera zoom by completing the following steps a Loosen the thumbscrew for the zoom ring on the camera lens Note The zoom ring is labeled W T b Adjust the camera zoom so that the black curved lines on each side of the target touch the edge of the display screen c After you adjust the zoom make any requi...

Page 184: ...the Auto Adjust button The auto adjust procedure completes This procedure takes several seconds Note If there is sufficient light for the system to operate the gain will be greater than 1 and less than 7 and the process completes normally If there is insufficient light the auto adjust procedure terminates in this case add more light to the room to bring the gain value below 7 Then repeat the auto ...

Page 185: ...rees c Have another person hold the target upright Note If another person is not available clamp the top of the target into the clamp at the top of the easel d Place the top of the easel five feet 1 5 meters behind the top of the small target e Position the target so that the top two patterns are enclosed in the red box Figure 7 12 Positioning the Small and Large Targets Step 6 Adjust the focus by...

Page 186: ...tep 1 Click Apply to register new or modified settings Step 2 Click Reset to restore the original settings For more information about testing and troubleshooting the CTS 1000 see the Setting Up the Camera section in the Cisco TelePresence 1100 Assembly Use Care and Field Replacement Unit Guide Attaching the Camera Lens and Hood To attach the camera lens and hood Step 1 Place the foam lens cover on...

Page 187: ...t be as accurate as the color settings you select for a room that uses fixed artificial room lighting Table 7 2 contains recommendations for desirable display and camera settings when you set up the display and camera See the Testing the CTS 1100 Camera section on page 7 6 for more information 206624 Cover release screws Cover release screws Table 7 2 Room Configuration and Camera Setup Choices Ph...

Page 188: ... camera into the left secondary codec Plug the participant s right camera into the right secondary codec Image not positioned correctly Camera is not aligned correctly Adjust and focus the camera using the targets Image colors are incorrect Video cable is only partially connected Color settings are not correct Tug on the plug to see if it is fully plugged in See the Routing Power and Signal Cables...

Page 189: ...k Cycle Through Speakers to have sound cycled automatically for 5 seconds on each speaker Step 6 Click Manually Step Through Speakers to test sound on each speaker Step 7 Click Stop to end testing Troubleshooting Speakers Use the information in Table 7 4 to troubleshoot speakers Table 7 4 Troubleshooting Speakers Problem Possible Cause Possible Solution No sound is heard Speaker cable is not conne...

Page 190: ...shooting Microphones page 7 21 Related Information page 7 22 Testing Microphones on the CTS 1100 To set up the microphones for testing on the CTS 1100 Step 1 Choose Troubleshooting Hardware Setup Sound is not synchronized with video Contact Cisco technical support Choppy audio during double talk when both sides are talking simultaneously Audio Echo Canceller AEC very briefly mistakes one of the sp...

Page 191: ...ne No sound registers Microphone cable is not connected or is only partially connected Check that the system is plugged in and power is on Check that the microphone plug is firmly seated in the correct connector on the primary codec Check that the mute light on each microphone is lit An unlit light indicates that the microphone is not plugged in Lightly tap the microphone to see if sound registers...

Page 192: ... for your CTS software version on Cisco com A PiP softkey will be displayed on the phone only if a PiP is active Pip is not available for audio only calls To test an external presentation device Step 1 Log in to the Cisco TelePresence System Step 2 Navigate to Troubleshooting Hardware Setup Presentation Devices Step 3 Click the Test Pattern radio button Microphone icon with question mark displays ...

Page 193: ...resentation devices listed by system The projector is set up successfully when the test pattern is displayed on the projection surface in the meeting room while running the test Tip When troubleshooting presentation devices start with the projector test pattern to see if the projector is set up correctly and then proceed through VGA and document camera input tests as necessary Use the information ...

Page 194: ...s may take up to 45 seconds A menu will appear from the projector to select settings For systems without the Auxiliary Control Unit use the projector remote control to change the following settings on the projector b Picture adj Overscan should be set to 0 c Screen Normal Step 6 Click Stop Test to end the test Step 7 Click Set Projector Defaults to reset the projector to the default settings Step ...

Page 195: ... default settings Step 8 Click Stop in the Testing box to end all testing Resetting the Projector To reset the projector Step 1 Log in to the Cisco TelePresence System Administration interface Step 2 Choose Troubleshooting Hardware Setup Step 3 Click the Presentation Devices radio button Step 4 Click Start in the Testing box The Presentation Source buttons are activated Step 5 Click Set Projector ...

Page 196: ...o image is displayed Projector is set up to receive PC input instead of input from its video cable connector Use the projector remote control to configure the projector for HD Video input If your system includes an Auxiliary Control Unit click Set Projector Defaults Object is blocking the path of the projector Remove any objects blocking the projector lens HD Video connector is not securely seated...

Page 197: ... shut off when there is no longer a video signal to that presentation device An on screen timer counts down the remaining time to shut down The amount of time that it takes a device to shut down depends on your Cisco Unified CM configuration Most CTS devices that support PiP shut down in 10 to 15 seconds after the video signal is removed Devices on the CTS 3000 and CTS 3200 series that have black ...

Page 198: ... button Step 4 Click Start in the Testing box The Auxiliary Control Unit Current Status is displayed Individual light units correspond to the five port numbers of the Auxiliary Control Unit Ports 1 through 5 a Check a box to select a specific port number Or b Click Select All to select all ports and all light units or Select None c Click the Refresh On Off Status button to update the on off status...

Page 199: ...e System for more information about using the Cisco Unified CM administration interface To troubleshoot the lights Step 1 Log in to the Cisco Unified Communications Manager administration interface Step 2 Choose Device Phone Step 3 Find the Cisco Unified IP Phone that controls your Cisco TelePresence system by clicking Find Step 4 Click the hypertext link next to the phone that controls your Cisco...

Page 200: ...4 Click Stop to end the test Troubleshooting Other Devices Use the information in Table 7 8 to troubleshoot problems in Other Devices Table 7 8 Troubleshooting Other Devices Problem Possible Cause Possible Solution Digital Media Player DMP audio is playing during a call Secondary Audio Input Source setting may be wrong Check to see that the Secondary Audio Input Source setting matches the physical...

Page 201: ...ministration CLI login can take as much as 60 seconds during point to point secure calls when a hold resume is performed while presenting CTS 1100 Light CTS 1100 light does not function properly The Auxiliary Control Unit option is not checked in the Optional Hardware Devices box of the Cisco Unified Communications Manager configuration interface The Auxiliary Control Unit checkbox must be selecte...

Page 202: ...s for the Cisco TelePresence system There can be up to 20 individual files saved on the CTS and each file can contain up to 100 000 characters Step 3 Click the Download Sysop Files button at the bottom of the page to download the sysop log files CTS Administration software then prompts you to do one of the following a Open to view the sysop log files The last 100 000 bytes of the log are shown Whe...

Page 203: ...is radio button to download logs Capture New Log Files The system will capture but not download the log files Note You must disable Internet Explorer Pop up Blocker to capture new log files with the Capture New Log Fils button Figure 7 16 Downloading Log Files Step 4 If you select Download existing log files or Capture new log files select a problem from the Select Problem Type drop down menu Audi...

Page 204: ...cations between components in the network and ultimately to establish a call or session between two or more endpoints Table 7 9 and Table 7 10 describe the SIP requests and message types To manage SIP messages Step 1 Choose Troubleshooting Log Files Step 2 Select the SIP Messages tab The SIP Messages window appears Step 3 View a specific type of message in the SIP log file by doing the following a...

Page 205: ... Methods Table 7 9 summarizes the SIP requests and methods supported by the Cisco TelePresence System Administration software The first column lists the RFC that describes the SIP request messages or method Table 7 9 Supported SIP Requests and Methods RFC Request Method Description 3261 ACK Confirms that the client has received a final response to an INVITE request 3261 BYE Terminates a call Can b...

Page 206: ...ingle error message Step 5 Click Clear All to delete all error messages displayed Related Information For more information see the following documentation Session Initiation Protocol SIP home page on Cisco com Cisco TelePresence System Message Guide 3261 REGISTER Registers the address listed in the To header field with a SIP server 3265 SUBSCRIBE Requests current state and state updates from a rem...

Page 207: ... 3 Click Stop Audio Recording to stop recording Step 4 After you complete the recording and download the results send the results to Cisco Systems technical support Related Information For more system troubleshooting information see the Cisco TelePresence System Troubleshooting Guide on Cisco com Testing the Network Connection Use the Network Connection window to view and modify the duplex and aut...

Page 208: ...reset you will have to reconfigure the system You will be asked twice to confirm your choice to revert to the factory image before software will carry out this request Resetting the system can take over two hours to complete A system reset results in the following The CTS is reset to the software image as originally shipped All configuration settings are reset to the factory defaults If you select...

Page 209: ...s Troubleshooting Video Quality Settings Use the information in Table 7 11 to troubleshoot the video picture on the displays Table 7 11 Troubleshooting Cisco TelePresence Screen Resolution Problems Problem Possible Cause Action Video picture is good but experiences repeated interruptions Video quality setting is set too high 1 Log into the Cisco Unified CM administration interface 2 Verify that th...

Page 210: ...ble connection from the primary unit to the Cisco Unified IP Phone For cabling information see the Cisco TelePresence System 1100 Assembly Use Care and Field Replacement Unit Guide Log into the Cisco Unified Communications Manager administration interface Click on the IP address and verify phone registration Restore network operation See the Cisco Unified Communications Manager Configuration Guide...

Page 211: ... Telepresence phone idle screen does not appear Device configuration has not been done or has been done incorrectly Log into the Cisco Unified Communications Manager administration interface Verify that the required settings have been made for configuring the Cisco TelePresence system and Cisco Unified IP Phone See the Cisco Unified Communications Manager Configuration Guide for the Cisco TelePres...

Page 212: ...7 42 Cisco TelePresence System Administrator Guide OL 21845 01 Chapter 7 Troubleshooting the CTS 1100 Where to Go Next ...

Page 213: ...Info Note If you have more options on your phone touch the more softkey until you reach the end of the selections 2 Make a note of the IP address 3 Enter the IP address in your laptop s browser window 4 Click Yes to accept all security connection messages Note You cannot perform diagnostics during an active Cisco TelePresence system call Proceed to the following sections to troubleshoot system com...

Page 214: ...er Devices page 8 59 Before You Begin Before you begin testing and troubleshooting your system check the system displays All of the Cisco TelePresence System Administration interface Hardware Setup features require the use of the displays in the meeting room Therefore we recommend the following 1 Verify that the displays work by using the Hardware Setup Displays tests in this section 2 If the disp...

Page 215: ...lePresence System 1300 CTS 1300 conference room the Cisco TelePresence System CTS software needs to know the size and shape of the table in the room A drop down menu is provided that allows you to specify the shape of the table in the room and where participants will be seated Note The CTS 1300 is designed to be used in any type of multipurpose room However to ensure that you have the best confere...

Page 216: ...et wide and 9 feet long Figure 8 2 Cisco CTS 1300 Table Configuration Menu Note If you log out of the Cisco TelePresence System Administration interface at any time during the camera testing procedure you must re select the table type See the following sections to configure your table type Configuring the CTS 1300 for Use With a Long Straight Table Wide Rectangular Table or Long Racetrack table pa...

Page 217: ...tungsten filaments Each of these light sources and the amount of light in terms of lumens or watts produces a different color temperature This color temperature is sometimes expressed using terms such cool warm or daylight but can be expressed more precisely in kelvins K as a numeric value The following temperatures can be selected for adjusting the image on the Cisco TelePresence display screens ...

Page 218: ...rs on the screen Step 4 Click Start in the Testing box to start the adjustment process The Current Color Temperature test screen appears as shown in Figure 8 3 Note Each display in the meeting room should be showing a set of horizontal grey bars and that display s relative position The current color temperature setting is displayed Figure 8 3 Color Temperature Test Screen Step 5 Select the color t...

Page 219: ...e camera for your system Testing the CTS 1300 Cameras page 8 8 Configuring the CTS 1300 for Use With a Conference Room Table page 8 12 Arranging the Seat Alignment Guides page 8 45 Understanding Camera Setup Choices for Room Lighting page 8 47 Troubleshooting Cameras page 8 47 Related Information page 8 48 Note The camera cover comes off It should be removed and left off until these procedures are...

Page 220: ...e at any time during the camera testing procedure you must re select the table type To select the correct table type complete the steps in the Positioning the Table and Starting the Calibration Procedure section on page 8 13 Use the information in the following sections to set up the CTS 1300 camera for testing Removing the Camera Cover and Leveling the Cameras page 8 8 Attaching the Large Camera ...

Page 221: ...ce System Administration Guide OL 21845 01 Chapter 8 Troubleshooting the CTS 1300 Managing CTS 1300 Hardware Setup Figure 8 4 Removing the Camera Cover 206129 Cover release screws Cover release screws Cover release screws ...

Page 222: ...ging CTS 1300 Hardware Setup Step 2 Place the small spirit level on top of the camera assembly and adjust the leveling screws behind the camera cluster until the camera assembly is level as shown in Figure 8 5 Figure 8 5 Leveling the Camera Assembly Cluster rotation screw Cluster rotation screw 206132 Level ...

Page 223: ... Separate the three legs Step 4 Raise the front legs until they are 29 inches 74 cm high Step 5 Raise the rear leg until it is 31 inches 79 cm high Step 6 Lock the legs into place using the leg locks Step 7 Attach the large camera target to the clip on top of the easel Step 8 Raise the target supports on the front legs until they touch the lower part of the large camera target Step 9 Raise and low...

Page 224: ...ting table in your conference room Perform the tasks in the section that describes your table type Configuring the CTS 1300 for Use With a Long Straight Table Wide Rectangular Table or Long Racetrack table page 8 13 Configuring the CTS 1300 for Use With a Short Racetrack Table page 8 33 Note Use the short racetrack camera procedure when two of the six participants directly face the display and the...

Page 225: ...raight table wide rectangular table or wide racetrack table and includes the following topics Positioning the Table and Starting the Calibration Procedure page 8 13 Calibrating the Center Camera page 8 20 Calibrating the Right Camera page 8 24 Calibrating the Left Camera page 8 26 Focusing the Center Camera page 8 28 Focusing the Right Camera page 8 30 Focusing the Left Camera page 8 30 Positionin...

Page 226: ...ware Setup Figure 8 8 Long Straight Table Positioning Figure 8 9 Wide Rectangular Table Positioning 15 feet minimum 7 5 feet minimum 7 5 feet minimum 30 inches 44 inches minimum 6 feet minimum 12 feet maximum 8 feet recommended 206139 A B A B 30 inches 44 inches minimum 6 feet minimum 12 feet maximum 8 feet recommended 206150 ...

Page 227: ...e Easel section on page 8 11 making sure that the bottom of the target is 32 inches above the ground Step 5 Log in to the Cisco TelePresence System Administration interface Step 6 Select the table type by completing the following steps a Choose Troubleshooting Hardware Setup b Click the Configuration radio button The table configuration window appears as shown in Figure 8 2 c Click the Start butto...

Page 228: ...8 16 Cisco TelePresence System Administration Guide OL 21845 01 Chapter 8 Troubleshooting the CTS 1300 Managing CTS 1300 Hardware Setup Figure 8 11 Long Straight Table ...

Page 229: ...8 17 Cisco TelePresence System Administration Guide OL 21845 01 Chapter 8 Troubleshooting the CTS 1300 Managing CTS 1300 Hardware Setup Figure 8 12 Long Racetrack Table ...

Page 230: ...S 1300 Hardware Setup Figure 8 13 Short Straight Table e Click Apply Step 7 Choose Troubleshooting Hardware Setup Step 8 Click the Cameras radio button The Camera testing page appears Step 9 Click Start to start the camera test Step 10 Click Show Camera Target The camera target menu appears as shown in Figure 8 14 ...

Page 231: ...oom uses outside lighting or has any other conditions that could cause variable room lighting click the Enable radio button If your room lighting is not variable leave the default value b In the Auto Color Balance field perform one of the following actions If the room uses outside lighting or has any other conditions that could cause variable room lighting click the Enable radio button If your roo...

Page 232: ...field Step 12 Click Apply to apply your changes Calibrating the Center Camera To adjust the zoom and initial focus for the center camera Step 1 Place the large camera target with the easel in the position where the center two participants will sit with the front legs of the easel touching the edge of the table Step 2 Measure the distance between the corners of the easel and the corners of the disp...

Page 233: ...p 7 Focus the center camera by completing the following steps a Loosen the focus ring thumbscrew on the lens of the center camera b Rotate the focus ring until the black plus sign on the target is clearly in focus Note The camera lens has two adjustment rings one for focus and one for zoom as shown in Figure 8 17 The focus ring is the one that is nearest to the wall ...

Page 234: ...enter the red plus sign on the display inside the black plus sign on the target as shown in Figure 8 18 Figure 8 18 Remove Camera Target Figure 8 19 shows the screws that you use to adjust the camera Use a 2 5 mm Allen wrench Use the top two screws for left and right adjustment The lower screw for up and down adjustment The screws in the middle for adjustments on the horizontal plane rotational Fo...

Page 235: ...humbscrew for the zoom ring on the camera lens Note The zoom ring is labeled W T b Adjust the camera zoom so that the black curved lines on each side of the target touch the edge of the display screen as shown in Figure 8 20 c After you adjust the zoom make any required adjustments to the focus with the focus ring Right adjust screw Left adjust screw Up down adjust screw Side to side adjust screw ...

Page 236: ... light the auto adjust procedure terminates In this case add more light to the room to bring the gain value below 7 Then repeat the auto adjust procedure Step 13 Click Done Step 14 To determine the edge of the target when you calibrate and configure the left and right cameras mark the edges of the large camera target on the table with tape or a marker Calibrating the Right Camera To adjust the zoo...

Page 237: ... Step 5 Adjust the camera mounting plate to center the red plus sign on the display inside the black plus sign on the target Figure 8 19 shows the screws that you use to adjust the camera Use a 2 5 mm Allen wrench Use the top two screws for left and right adjustment The lower screw for up and down adjustment The screws in the middle for adjustments on the horizontal plane rotational Step 6 Adjust ...

Page 238: ...econds Note If there is insufficient light the auto adjust procedure terminates In this case add more light to the room and repeat the auto adjust procedure Step 10 Click Done to complete the procedure Calibrating the Left Camera To adjust the zoom and focus the left camera Note The directions left and right refer to the assembly as you face the display Step 1 Slide the large camera target to the ...

Page 239: ... Step 5 Adjust the camera mounting plate to center the red plus sign on the display inside the black plus sign on the target Figure 8 19 shows the screws that you use to adjust the camera Use a 2 5 mm Allen wrench Use the top two screws for left and right adjustment The lower screw for up and down adjustment The screws in the middle for adjustments on the horizontal plane rotational Step 6 Adjust ...

Page 240: ...enter camera Step 1 In the Cisco TelePresence Administration interface click the Center radio button Step 2 Click the Setup button located below the center screen icon Step 3 Click Show Focus Targets Red and green outline boxes display on the screen and red and green horizontal bars display on the bottom of the screen as shown in Figure 8 25 The horizontal bars indicate the sharpness of focus in t...

Page 241: ...s ring clockwise until the red and green horizontal bars on the bottom of the screen are reduced to very short lengths on the left Note Figure 8 25 shows a mirror image of the horizontal bars c Twist the focus ring counter clockwise until the red and green bars extend all the way to the right d Continue to twist the focus ring until the red and green bars are approximately the same length See Figu...

Page 242: ...rget e Position the target so that the topmost patterns are enclosed in the red box as shown in Figure 8 25 Step 6 Adjust the camera focus by completing the following steps a Loosen the thumbscrew for the lens focus ring b Twist the focus ring clockwise until the red and green horizontal bars on the bottom of the screen are reduced to very short lengths on the left Note Figure 8 25 shows a mirror ...

Page 243: ... red box as shown in Figure 8 25 Step 6 Adjust the focus on the left camera by completing the following steps a Loosen the thumbscrew for the lens focus ring b Twist the focus ring clockwise until the red and green horizontal bars on the bottom of the screen are reduced to very short lengths on the left Note Figure 8 25 shows a mirror image of the horizontal bars c Twist the focus ring counter clo...

Page 244: ...leshooting the CTS 1300 Managing CTS 1300 Hardware Setup Figure 8 26 Attaching the Foam Lens Covers to the Camera Lenses Step 2 Replace the camera cover onto the camera cluster then tighten the cover release screws to secure the cover to the camera as shown in Figure 8 27 206351 7 ...

Page 245: ...ct table type To select the correct table type complete the steps in the Positioning the Table and Starting the Calibration Procedure section on page 8 13 This section contains the following CTS 1300 configuration tasks Positioning the Table and Starting the Calibration Procedure page 8 34 Calibrating the Center Camera page 8 36 Calibrating the Right Camera page 8 37 Calibrating the Left Camera pa...

Page 246: ...inches high 30 inches is the optimal height Figure 8 28 Short Racetrack Table Positioning Step 3 Make sure that the camera assembly is level by completing the steps in the Removing the Camera Cover and Leveling the Cameras section on page 8 8 Step 4 Build the easel and attach the large camera target to the easel by completing the steps in the Attaching the Large Camera Target to the Easel section ...

Page 247: ...s any other conditions that could cause variable room lighting click the Enable radio button If your room lighting is not variable leave the default value b In the Auto Color Balance field perform one of the following actions If the room uses outside lighting or has any other conditions that could cause variable room lighting click the Enable radio button If your room lighting is not variable leav...

Page 248: ...the edge of the table Step 2 Measure the distance between the corners of the easel and the corners of the display to make sure that the target is parallel to the display as shown in Figure 8 30 Figure 8 30 Measuring the Distance between the Easel and Display Step 3 Return to the Cisco TelePresence System Administration page and choose Troubleshooting Hardware Setup Cameras Step 4 Click the Center ...

Page 249: ...o the focus with the focus ring Step 9 Tighten the thumbscrews for the zoom and focus rings Step 10 Click Hide Camera Targets to remove the alignment images Step 11 Click the Setup button then click the Auto Adjust button The auto adjust procedure completes This procedure takes several seconds Note If there is sufficient light for the system to operate the gain will be greater than 1 and less than...

Page 250: ... the display inside the black plus sign on the target The screws that you use to adjust the camera are shown in Figure 8 19 Use a 2 5 mm Allen wrench Use the top two screws for left and right adjustment The lower screw for up and down adjustment The screws in the middle for adjustments on the horizontal plane rotational Step 6 Adjust the camera zoom by completing the following steps a Loosen the t...

Page 251: ... Auto Adjust button The auto adjust procedure completes This procedure takes several seconds Note If there is insufficient light the auto adjust procedure terminates In this case add more light to the room and repeat the auto adjust procedure Step 10 Click Done to complete the procedure Calibrating the Left Camera To adjust the zoom and focus the left camera Note The directions left and right refe...

Page 252: ...de the black plus sign on the target The screws that you use to adjust the camera are shown in Figure 8 19 Use a 2 5 mm Allen wrench Use the top two screws for left and right adjustment The lower screw for up and down adjustment The screws in the middle for adjustments on the horizontal plane rotational Step 6 Adjust the camera zoom by completing the following steps a Loosen the thumbscrew for the...

Page 253: ...us the center camera Step 1 In the Cisco TelePresence Administration interface click the Center radio button Step 2 Click the Setup button that is located below the center screen icon Step 3 Click Show Focus Targets Red and green outline boxes display on the screen and red and green horizontal bars display on the bottom of the screen The horizontal bars indicate the sharpness of focus in the boxes...

Page 254: ... screen are reduced to very short lengths on the left Note Figure 8 35 shows a mirror image of the horizontal bars c Twist the focus ring counter clockwise until the red and green bars extend all the way to the right d Continue to twist the focus ring until the red and green bars are approximately the same length See Figure 8 35 to view the approximate horizontal bar alignment When the bars are ro...

Page 255: ...t so that the topmost patterns are enclosed in the red box Step 6 Adjust the camera focus by completing the following steps a Loosen the thumbscrew for the lens focus ring b Twist the focus ring clockwise until the red and green horizontal bars on the bottom of the screen are reduced to very short lengths on the left Note Figure 8 35 shows a mirror image of the horizontal bars c Twist the focus ri...

Page 256: ... ring b Twist the focus ring clockwise until the red and green horizontal bars on the bottom of the screen are reduced to very short lengths on the left Note Figure 8 35 shows a mirror image of the horizontal bars c Twist the focus ring counter clockwise until the red and green bars extend all the way to the right d Continue to twist the focus ring until the red and green bars are approximately th...

Page 257: ...Hardware Setup Step 4 Click the Cameras radio button Step 5 Click Start to display the image of the cameras in the displays Step 6 Note the field of view for each camera Step 7 Using non marking tape for example masking tape tape a mark on the table that denotes the edge of the field of view for each camera Place this mark approximately 18 inches 46 cm from the edge of the table and point the line...

Page 258: ...on top of the guides point directly toward the camera Step 12 Fasten the guides to the table using one of the following methods Remove the adhesive backing from the underside of the guide and stick it to the table making sure that the line on the guide points directly at the camera Attach the seat alignment guide anchor to the table and place the guide on the anchor by completing the following ste...

Page 259: ...e the information in Table 8 3 to troubleshoot problems with cameras Table 8 2 Room Configuration and Camera Setup Choices Physical Room Configuration Camera Auto Brightness and Camera Auto Color Balance Setup Choices No windows Disable One window Two adjacent windows corner office configuration Two opposing windows Windows on three sides Windows on four sides Enable Table 8 3 Troubleshooting Came...

Page 260: ... the Routing Power and Signal Cables section in the Cisco TelePresence System 1300 Assembly Use Care and Field Replacement Unit Guide No image Lens cap is in place Camera is not plugged in or is plugged in incorrectly Remove the lens cap Check power connections and switches on each display Verify that the video and Ethernet cables from each camera are plugged into the correct connectors on their r...

Page 261: ...the speaker cable is plugged into the correct receptor on the primary codec Tug on the plug to see if it is fully plugged in Push the plug in firmly until a click is heard Sound heard at wrong speaker Speaker cable is not connected in the correct connector Check that the speaker cable is plugged into the correct receptor on the primary codec Plug all speakers into the primary codec Sound is not sy...

Page 262: ...r These microphones establish where the person who is speaking is seated to determine voice activated camera switching By default Cisco TelePresence uses 3 microphones for a conference that uses video If you install more than three microphones Cisco TelePresence uses those microphones for audio conferences only Each microphone has a corresponding number of audio meters displayed on a single test s...

Page 263: ...oor to carry out the calibration process to ensure complete silence in the room Each display in the meeting room should show an audio meter showing the audio level being picked up by that display s microphone The center display should show three microphones A microphone that is not connected has a red slash The left and right displays should show three microphones unless the room is configured for...

Page 264: ... in and power is on Check that the microphone plug is firmly seated in the correct connector on the primary codec Check that the mute light on each microphone is lit An unlit light indicates that the microphone is not plugged in Lightly tap the microphone to see if sound registers Contact Cisco technical support if you are certain that the cabling is correct and power is applied to the system but ...

Page 265: ...ports see the release notes for your CTS software version on Cisco com A PiP softkey will be displayed on the phone only if a PiP is active Pip is not available for audio only calls To test an external presentation device Step 1 Log in to the Cisco TelePresence System Step 2 Navigate to Troubleshooting Hardware Setup Microphone switches to a segment that has no one talking Phantom switching Run th...

Page 266: ...aptop computer Note You should run this test only if you have presentation display devices installed Table 8 6 contains supported presentation devices listed by system The projector is set up successfully when the test pattern is displayed on the projection surface in the meeting room while running the test Tip When troubleshooting presentation devices start with the projector test pattern to see ...

Page 267: ...ick Test The test pattern screen appears as shown in Figure 8 39 Test Pattern It may take up to 15 seconds before you begin to see an image on the projection surface The image should be fully formed after approximately 45 seconds If the test pattern is displaying correctly you should see a grid projected on the projection surface In the center of the grid you should see a series of horizontal grey...

Page 268: ... projection surface The image should be fully formed after approximately 45 seconds If the input image is displaying correctly you should see an image projected on the projection surface If the image is out of focus use the projector focus ring to focus the image Step 6 Click Stop Test to end the test Step 7 Click Set LCD Projector Defaults to reset the projector to the default settings if necessa...

Page 269: ...llow If the LED light is not illuminated make sure that the power cable is plugged in Video cable is not connected to the projector or to the CTS primary unit Check that the video cable is plugged into the projector and into the correct connector on the CTS primary unit Contact Cisco technical support if you are certain that the cabling is correct and power is applied to the system but no image is...

Page 270: ...ation There is no image and a Bulb icon appears on the CTS main display The projector bulb has burned out Replace the projector bulb Tip Presentation devices automatically shut off when there is no longer a video signal to that presentation device An on screen timer counts down the remaining time to shut down The amount of time that it takes a device to shut down depends on your Cisco Unified CM c...

Page 271: ...trols the individual light units surrounding the displays in CTS conference rooms and enables the CTS to get more complete projector status information and to restores projector defaults To test the ACU Step 1 Log in to the Cisco TelePresence System Administration interface Step 2 Choose Troubleshooting Hardware Setup Step 3 Click the Other Devices radio button Step 4 Click Start in the Testing bo...

Page 272: ...re is enabled the Light State On button is highlighted If the light feature is disabled the Light State Off button is highlighted Click the Light State On or Light State Off button to change the current state of the light Step 5 To end the test click Stop When you end the testing the state of the light reverts to its default setting as specified in Cisco Unified Communications Manager Digital Medi...

Page 273: ...f a call DMP audio is not playing The configuration settings in Other Devices DMP Audio to DMP is incorrect Setting the DMP to PC allows you to hear DMP audio Presentation Devices Local presentation audio is not playing during a call The Secondary Audio Input Source setting may be wrong Check to see that the Secondary Audio Input Source setting matches the physical cabling When set to DMP audio in...

Page 274: ...formation call statistics and call errors for the Cisco TelePresence system There can be up to 20 individual files saved on the CTS and each file can contain up to 100 000 characters Administration login can be slow when presenting during point to point secure calls This is expected behavior Administration CLI login can take as much as 60 seconds during point to point secure calls when a hold resu...

Page 275: ... 1 Choose Troubleshooting Log Files Step 2 Select the Log Files tab The following fields are displayed Log Status Shows the status of the log capture including the percentage completed Time Generated Shows the time of the most recent log file capture Problem Problem Type drop down menu contains the following Audio speakers microphones Video displays cameras Phone Recording Other Unknown Step 3 Cho...

Page 276: ...42 shows the problem types that you can select when downloading log files Figure 8 42 Select Problem Type Drop Down Menu Step 5 Select the Download existing log files radio button The following message appears A WinZip download will start within several minutes Please wait Or Step 6 Select the Capture new log files Capture New Log Files radio button The following message appears Collecting Cisco T...

Page 277: ...pe you specified Step 4 Choose the number of messages to view at one time from the Rows Per Page drop down menu You can use the First Previous Next and Last buttons to navigate through the message list with the Navigating Long Lists option You can also Generate Detailed Message Reports Generate Detailed Message Reports To see additional details associated with a SIP message Step 1 Double click on ...

Page 278: ...P signaling path 3261 INVITE Indicates that a user or service is being invited to participate in a call session 3265 NOTIFY Immediately upon successful accepting or refreshing of a subscription a NOTIFY message is sent to communicate the current resource state to the subscriber This NOTIFY message is sent in the same dialog as that created by the SUBSCRIBE message 3261 OPTIONS Queries the capabili...

Page 279: ...ted Information For more information see the following documentation Session Initiation Protocol SIP home page on Cisco com Cisco TelePresence System Message Guide Testing Audio You can test the system audio in your meeting room and send the results to Cisco Systems technical support for analysis Note Audio recordings can be made only while the CTS system is in a call To record audio Step 1 Choose...

Page 280: ...to Negotiation off To manage Auto Negotiation Step 1 Choose Troubleshooting Network Connection Step 2 Click the On or Off radio button to enable or disable auto negotiation The Apply and Reset buttons are activated as shown in Figure 8 43 Note When Auto Negotiation is enabled the Duplex and Speed settings are read only Figure 8 43 Auto Negotiate On Step 3 Click Apply to save your settings or click...

Page 281: ...e for messages during the reset procedure Data in bold blue text indicates where the current system image is located for each codec in the system Locations of the factory image are listed To reset the system image to the factory default Step 1 Choose Troubleshooting Configuration Issues The Hardware Software Versions page appears listing the current hardware and software versions and active images...

Page 282: ...n Video picture is good but experiences repeated interruptions Video quality setting is set too high 1 Log into the Cisco Unified CM administration interface 2 Verify that the required settings have been made for configuring the video quality See the Cisco Unified Communications Manager Configuration Guide for the Cisco TelePresence System Note Higher bandwidth increases video quality but may also...

Page 283: ... Check the cable connection from the primary unit to the Cisco Unified IP Phone For cabling information see the Cisco TelePresence System 1300 Assembly Use Care and Field Replacement Unit Guide Log into the Cisco Unified Communications Manager administration interface Click on the IP address and verify phone registration Restore network operation See the Cisco Unified Communications Manager Config...

Page 284: ...o Telepresence phone idle screen does not appear Device configuration has not been done or has been done incorrectly Log into the Cisco Unified Communications Manager administration interface Verify that the required settings have been made for configuring the Cisco TelePresence system and Cisco Unified IP Phone See the Cisco Unified Communications Manager Configuration Guide for the Cisco TelePre...

Page 285: ...d software on the following CTS devices CTS 3000 CTS 3200 Before You Begin 1 Obtain your IP address from the CTS Cisco Unified IP phone by touching the following softkeys Manual more Info Note If you have more options on your phone touch the more softkey until you reach the end of the selections 2 Make a note of the IP address 3 Enter the IP address in your laptop s browser window 4 Click Yes to a...

Page 286: ...g the External Presentation Display page 9 21 Testing Presentation Devices page 9 23 Testing Other Devices page 9 36 Before You Begin Before you begin testing and troubleshooting your system check the system displays All of the Cisco TelePresence System Administration interface Hardware Setup features require the use of the displays in the meeting room Therefore we recommend the following 1 Verify...

Page 287: ...onfigure CTS for the first time see the following documentation Cisco TelePresence System 3000 Assembly Use Care and Field Replacement Unit Guide Cisco TelePresence System 3200 Assembly Use Care and Field Replacement Unit Guide Managing Displays A display is set up successfully when the color on the display has been adjusted for the lighting in the meeting room Note Each display must be adjusted i...

Page 288: ...imes expressed using terms such cool warm or daylight but can be expressed more precisely in kelvins K as a numeric value The following temperatures can be selected for adjusting the image on the Cisco TelePresence display screens 3500 K 4000 4100 K recommended 5000 K 6500 K 7500 K Tip In many cases the color temperature is printed on the light bulb If you are unable to ascertain the type and colo...

Page 289: ...t image appears on the screen Step 4 Click Start in the Testing box to start the adjustment process The Current Color Temperature test screen appears as shown in Figure 9 2 Note Each display in the meeting room should be showing a set of horizontal grey bars and that display s relative position The current color temperature setting is displayed Figure 9 2 Color Temperature Test Screen Step 5 Selec...

Page 290: ...is not plugged into the correct port on the primary codec Check that the cable from each display is plugged into the correct connector on its corresponding codec Plug the video to video cable into the display connector on the correct codec as follows Plug the center display into the primary codec Plug the participant s left display into the left secondary codec Plug the participant s right display...

Page 291: ...meras The cameras are set up correctly when images are centered and in focus on the display screens and the white balance has been configured The hardware setup software provides a camera Auto Adjust feature and a way to use targets to fine tune the camera s focus The following sections describe how to set up the CTS 3000 and CTS 3200 cameras for testing Attaching the Camera Targets and Removing t...

Page 292: ...k Help in the content area or see the troubleshooting tables in this section Auto Adjusting the Camera To auto adjust the camera click Auto Adjust This allows the CTS software to adjust the camera settings automatically You will see various images and colors on the displays during the adjustment Auto Adjust takes approximately 20 seconds Aligning the Camera To align the camera Step 1 Choose Troubl...

Page 293: ...era so that the edge of the table is positioned vertically exactly between the hash marks on either side of the display See Figure 9 3 for the location of the adjustment screws on the camera Note If one of the left right screws is covered by the camera cable do not disturb the cable but instead use the other screw to make all left right adjustments Figure 9 3 Camera Mounting Plate 201205 Up down s...

Page 294: ...ging CTS 3000 and CTS 3200 Hardware Setup Figure 9 4 Camera Target Alignment Center Display Figure 9 5 Camera Target Alignment Right Display Red plus sign within black cross Red lines Note curved lines touching screen border Table edge 205764 Red plus sign within black cross Red lines Table edge Red Vertical line 205765 ...

Page 295: ...tup Step 2 Click the Cameras radio button Step 3 Place the small camera target on the table as described in the Attaching the Camera Targets and Removing the Camera Cover section on page 9 7 Step 4 Click Setup then click Show Focus Target Step 5 Adjust the small target so that the green box encloses some of the patterns on the small target Step 6 Adjust the focus ring on the camera lens so the lin...

Page 296: ...tep 2 Click Reset to restore the original settings Attaching the Camera Hood Assembly After you complete the camera adjustment attach the camera hood assembly See Figure 9 7 Note Attach the top hood before attaching the bottom hood Caution Do not overtighten the screws or use a power screwdriver to tighten the screws In addition make sure that you use screws of the correct length 20 mm Overtighten...

Page 297: ...TelePresence System Administration Guide OL 21845 01 Chapter 9 Troubleshooting the CTS 3000 and CTS 3200 Managing CTS 3000 and CTS 3200 Hardware Setup Figure 9 7 Attaching the Camera Hood Assembly 201203 7 7 2 1 3 ...

Page 298: ...the camera using the targets Image colors are incorrect Video cable is only partially connected Color settings are not correct Tug on the plug to see if it is fully plugged in See the Routing Power and Signal Cables section in the following documents Cisco TelePresence System 3000 Assembly Use Care and Field Replacement Unit Guide Cisco TelePresence System 3200 Assembly Use Care and Field Replacem...

Page 299: ... be heard clearly from each one When running a test you can choose whether to cycle through the speakers automatically or manually Use the information in the following sections to test the speakers for your system Testing the Speakers page 9 15 Troubleshooting Speakers page 9 16 Related Information page 9 16 Testing the Speakers To test the speakers Step 1 Log in to the Cisco TelePresence System A...

Page 300: ...the correct receptor on the primary codec Tug on the plug to see if it is fully plugged in Push the plug in firmly until a click is heard Sound heard at wrong speaker Speaker cable is not connected in the correct connector Check that the speaker cable is plugged into the correct receptor on the primary codec Plug all speakers into the primary codec Sound is not synchronized with video Contact Cisc...

Page 301: ...s seated in the room Go to the following sections to test microphones Testing Microphones on the CTS 3000 page 9 17 Testing Microphones on the CTS 3000 page 9 17 Troubleshooting Microphones page 9 20 Related Information page 9 21 Testing Microphones on the CTS 3000 Note The effect of this calibration is applied only on CTS 3000 systems Do not use this tool on CTS 3200 systems To test microphones o...

Page 302: ...ick the Microphones radio button Step 4 Click Start in the Testing box to begin the test Step 5 Lightly tap each microphone and watch the audio meter on the corresponding display screen to see that sound registers Step 6 Click Refresh Microphones Status to update the connection status of all microphones Note If you have a Cisco TelePresence 3200 there are six microphones for the second row table I...

Page 303: ...ing the CTS 3000 and CTS 3200 Managing CTS 3000 and CTS 3200 Hardware Setup Figure 9 8 shows an example CTS 3200 microphone troubleshooting screen with the Refresh Microphone Status window activated Figure 9 8 Troubleshooting Microphones on the CTS 3200 Step 7 Click Stop to end the test ...

Page 304: ... the primary codec Check that the mute light on each microphone is lit An unlit light indicates that the microphone is not plugged in Lightly tap the microphone to see if sound registers Contact Cisco technical support if you are certain that the cabling is correct and power is applied to the system but no sound registers on the microphone Microphone icon with red pipe displays Microphone is not c...

Page 305: ...ew minutes and then stops working your presentation device might use an unsupported video protocol To see the list of displays that the CTS 3000 and CTS 3200 supports see the release notes for your CTS software version on Cisco com A PiP softkey will be displayed on the phone only if a PiP is active Pip is not available for audio only calls To test an external presentation device Microphone switch...

Page 306: ...0 and CTS 3200 Hardware Setup Step 1 Log in to the Cisco TelePresence System Step 2 Navigate to Troubleshooting Hardware Setup Presentation Devices Step 3 Click the Test Pattern radio button Step 4 Click Start to begin the test The test pattern should display on the external presentation display Step 5 Click Stop to end the testing ...

Page 307: ...ly when the test pattern is displayed on the projection surface in the meeting room while running the test Tip When troubleshooting presentation devices start with the projector test pattern to see if the projector is set up correctly and then proceed through VGA and other tests as necessary Use the information in the following sections to test presentation devices Checking the Test Pattern page 9...

Page 308: ...jector does not receive video for five minutes and 30 seconds the projector turns off If the test pattern is displaying correctly you should see a grid projected on the projection surface In the center of the grid you should see a series of horizontal grey bars You should also see a one pixel wide green border around the outside of the grid If the green border is not visible for systems with an Au...

Page 309: ... to end all testing Checking the Document Camera To test input from the document camera if available Step 1 Log in to the Cisco TelePresence System Administration interface Step 2 Choose Troubleshooting Hardware Setup Step 3 Click the Presentation Devices radio button Step 4 Click Start in the Testing box The Presentation Source buttons are activated Step 5 Select Document Camera and click Test It...

Page 310: ...ot receiving video the screen will be blue If the projector does not receive video for five minutes and 30 seconds the projector turns off If the test pattern is displaying correctly you should see a grid projected on the projection surface In the center of the grid you should see a series of horizontal grey bars You should also see a one pixel wide green border around the outside of the grid Step...

Page 311: ...ol down mode which will ignore a video signal for 30 seconds It will then stay in a standby mode and will power back up when a video signal is connected It will take 15 seconds for the projector to light back up Step 8 To check either VGA or document camera input perform the following steps a Click Presentation Devices on the Hardware Setup window b Perform one of the following steps to test the v...

Page 312: ... If the test pattern is displaying correctly you should see a grid projected on the projection surface In the center of the grid you should see a series of horizontal grey bars You should also see a one pixel wide green border around the outside of the grid Step 3 Set the display to display right side up by completing the following steps a Press the MENU key on the remote control Note The menu scr...

Page 313: ...m your selection Step 8 Select the screen size by completing the following steps a Press the Up Arrow and Down Arrow keys and highlight Screen b Press the Right Arrow key and select Screen to enter the Screen submenu c Press the Up Arrow and Down Arrow keys and highlight Normal d Press the Right Arrow key and select Normal e Press the Left Arrow key to confirm your selection Step 9 Eliminate overs...

Page 314: ...Left Arrow key to return to the main menu Step 12 Select the screen size by completing the following steps a From the main menu use the Up Arrow and Down Arrow keys to highlight the Screen function Press the Right Arrow key to select the Screen sub menu b Use the up and Down Arrow keys to select Normal then press OK c Press the Left Arrow key to return to the main menu Step 13 Select the video sou...

Page 315: ...llowing steps a Click Presentation Devices on the Hardware Setup window b Perform one of the following steps to test the video input Click the VGA radio button to test input from a VGA device Click the Document camera radio button to test input from the document camera If the input image is displaying correctly you should see an image projected on the projection surface Step 17 If the image is out...

Page 316: ... report the failure from an inactive projector until you complete these steps Tip Use the projector remote control or press the buttons on the projector to complete these steps Note If your system uses a Sanyo PLV Z700 projector skip this step a Press the Menu key for 20 seconds The letter S displays in the upper left corner of the screen b Press the Screen key for 3 seconds The service menu displ...

Page 317: ...o button to test input from the document camera If the input image is displaying correctly you should see an image projected on the projection surface Step 9 If the image is out of focus or is too small use the projector focus ring to focus the image and use the zoom lever to create the largest possible image Step 10 Click Stop in Cisco TelePresence System Administration to remove the test pattern...

Page 318: ... from its video cable connector Use the projector remote control to configure the projector for HD Video input If your system includes an Auxiliary Control Unit click Set Projector Defaults Object is blocking the path of the projector Remove any objects blocking the projector lens HD Video connector is not securely seated in the projector Seat the HD Video connector securely HD Video connector is ...

Page 319: ...switch on the back of the projector to the Off position then turn back to the On position If this problem recurs perform another power cycle Note Projector functionality is not affected by the alarms Note The Cisco TelePresence System can display information from multiple input devices during a meeting if multiple input devices are sending information the projector displays the input from the last...

Page 320: ...nt Unit Guide Cisco TelePresence System 3200 Assembly Use Care and Field Replacement Unit Guide For more system troubleshooting information see the Cisco TelePresence System Troubleshooting Guide on Cisco com Testing Other Devices Use the Other Devices Tab to check the following additional devices Auxiliary Control Unit page 9 37 Digital Media Player page 9 37 Troubleshooting Other Devices page 9 ...

Page 321: ...te the on off status of each port d Click the Turn Selected Lights On Off to test the selected light unit s e Click the Reset Auxiliary Control Unit to power cycle the Auxiliary Control Unit Step 5 Click Stop to end the test Digital Media Player The Digital Media Player DMP feature lets you select a secondary audio input source when you are not in a TelePresence call To test the DMP Step 1 Log in ...

Page 322: ...id a resume Presentation device functionality is changed When a CTS goes on hold the presentation device takes note whether or not it was the active presenter If the presentation device was the active presenter when it went on hold it will ask to present again when taken off hold and the presentation will be shown when the meeting resumes If it was not the active presenter it will not ask to prese...

Page 323: ...TelePresence system Click the appropriate tab at the top of the window to view the following information Sysop Log page 9 39 Log Files page 9 39 SIP Messages page 9 41 Sysop Log To manage sysop messages Step 1 Choose Troubleshooting Log Files Step 2 Select the Sysop Files tab to view system operation sysop messages including call information call statistics and call errors for the Cisco TelePresen...

Page 324: ...ys cameras Projector LCD document camera Phone Recording Other Unknown Figure 9 9 shows the problem types that you can select when downloading log files Figure 9 9 Select Problem Type Drop Down Menu Step 3 Choose from one of the following options None Default No log files will be captured unless a download option is selected Figure 9 10 shows the log download radio button options Download existing...

Page 325: ...IP Messages Use SIP Messages to view the current Session Initiation Protocol SIP messages log file SIP request and response methods are used to establish communications between components in the network and ultimately to establish a call or session between two or more endpoints Table 9 8 and Table 9 9 describe the SIP requests and message types To manage SIP messages Step 1 Choose Troubleshooting ...

Page 326: ...on in the following sections to initiate SIP requests and responses SIP Requests and Methods page 9 42 SIP Response Categories page 9 43 SIP Requests and Methods Table 9 8 summarizes the SIP requests and methods supported by the Cisco TelePresence System Administration software The first column lists the RFC that describes the SIP request messages or method Table 9 8 Supported SIP Requests and Met...

Page 327: ...ormation For more information see the following documentation Session Initiation Protocol SIP home page on Cisco com Cisco TelePresence System Message Guide 3262 PRACK Provides reliability for 1xx type messages see Table 9 8 3515 REFER Provides a mechanism allowing the party sending the REFER message to be notified of the outcome of the referenced request 3261 REGISTER Registers the address listed...

Page 328: ...ll Step 3 Click Stop Audio Recording to stop recording Step 4 After you complete the recording and download the results send the results to Cisco Systems technical support Related Information For more system troubleshooting information see the Cisco TelePresence System Troubleshooting Guide on Cisco com Testing the Network Connection Use the Network Connection window to view and modify the duplex ...

Page 329: ...3000 and CTS 3200 Testing the Network Connection Figure 9 11 Auto Negotiate On Step 3 Click Apply to save your settings or click Reset to restore the original settings Related Information For more system troubleshooting information see the Cisco TelePresence System Troubleshooting Guide on Cisco com ...

Page 330: ...m reset results in the following The CTS is reset to the software image as originally shipped All configuration settings are reset to the factory defaults If you select to reset the system to use factory defaults check the Cisco IP telephone for messages during the reset procedure Data in bold blue text indicates where the current system image is located for each codec in the system Locations of t...

Page 331: ...icture on the displays Table 9 10 Troubleshooting Cisco TelePresence Screen Resolution Problem Possible Cause Action Video picture is good but experiences repeated interruptions Video quality setting is set too high 1 Log into the Cisco Unified CM administration interface 2 Verify that the required settings have been made for configuring the video quality See the Cisco Unified Communications Manag...

Page 332: ...one is off Power to the primary unit is off Phone is not connected to the phone port on the primary unit The system does not recognize the phone or it is unregistered The network is down Check the power connection to the Cisco TelePresence System and verify that the system is turned on Check the cable connection from the primary unit to the Cisco Unified IP Phone See the assembly guide for your Ci...

Page 333: ...network See the assembly guide for your Cisco TelePresence system for correct cabling Cisco TelePresence System 3000 Assembly Use Care and Field Replacement Unit Guide Cisco TelePresence System 3200 Assembly Use Care and Field Replacement Unit Guide Restart Cisco Unified Communications Manager See the Cisco Unified Communications Manager Configuration Guide for the Cisco TelePresence System for Ci...

Page 334: ...9 50 Cisco TelePresence System Administration Guide OL 21845 01 Chapter 9 Troubleshooting the CTS 3000 and CTS 3200 Where to Go Next ...

Page 335: ...e CTS Cisco Unified IP phone by touching the following softkeys Manual more Info Note If you have more options on your phone touch the more softkey until you reach the end of the selections 2 Make a note of the IP address 3 Enter the IP address in your laptop s browser window 4 Click Yes to accept all security connection messages Note You cannot perform diagnostics during an active Cisco TelePrese...

Page 336: ...evices page 10 30 Before You Begin Before you begin testing and troubleshooting your system check the system displays All of the Cisco TelePresence System Administration interface Hardware Setup features require the use of the displays in the meeting room Therefore we recommend the following 1 Verify that the displays work by using the Hardware Setup Displays tests in this section 2 If the display...

Page 337: ...co TelePresence System 3010 Assembly Use Care and Field Replacement Unit Guide Cisco TelePresence System 3210 Assembly Use Care and Field Replacement Unit Guide Managing Displays A display is set up successfully when the color on the display has been adjusted for the lighting in the meeting room Note Each display must be adjusted individually Use the information in the following sections to adjust...

Page 338: ...times expressed using terms such cool warm or daylight but can be expressed more precisely in kelvins K as a numeric value The following temperatures can be selected for adjusting the image on the Cisco TelePresence display screens 3500 K 4000 4100 K recommended 5000 K 6500 K 7500 K Tip In many cases the color temperature is printed on the light bulb If you are unable to ascertain the type and col...

Page 339: ...he adjustment process The Current Color Temperature test screen appears as shown in Figure 10 2 Note Each display in the meeting room should be showing a set of horizontal grey bars and that display s relative position The current color temperature setting is displayed Figure 10 2 Color Temperature Test Screen Each display in the meeting room should now be showing a set of horizontal grey bars and...

Page 340: ...rom secondary codec is not plugged into the correct port on the primary codec Check that the cable from each display is plugged into the correct connector on its corresponding codec Plug the video to video cable into the display connector on the correct codec as follows Plug the center display into the primary codec Plug the participant s left display into the left secondary codec Plug the partici...

Page 341: ... It should be removed and left off until these procedures are complete Testing the CTS 3010 and CTS 3210 Cameras The cameras are set up correctly when images are centered and in focus on the display screens and the white balance has been configured The hardware setup software provides a camera Auto Adjust feature and a way to use targets to fine tune the camera s focus The following sections descr...

Page 342: ... 3010 and CTS 3210 Hardware Setup Figure 10 3 Camera Target Assembly Step 2 Attach the large target to the underside of the center table section by placing the round pads on the underside of the clamps into recesses that are drilled under the table Tip You can feel under the table to find the small round recesses 6 6 6 5 4 201192 ...

Page 343: ... of the table area To adjust the camera zoom complete the following steps Step 1 Click Show Camera Target Step 2 Loosen the thumbscrew on the zoom ring on the camera lens The zoom ring is labeled W T Step 3 Using the zoom ring and the left right up down and rotation adjustment screws on the camera perform the following adjustments Step 4 Make manual adjustments to the camera focused on the target ...

Page 344: ...nd CTS 3210 Hardware Setup Figure 10 4 Camera Adjustment Screws Figure 10 5 Correct Camera Target Alignment Center Display 201205 Lens Right adjust screw Left adjust screw Up down adjust screw Camera rotation screw Camera rotation screw Red plus sign within black cross Red lines Note curved lines touching screen border Table edge 205764 ...

Page 345: ... adjust the camera left and right or up and down or to make vertical adjustments use the adjusting screws as shown in Figure 10 4 If one of the left right screws is covered by the camera cable use the other screw to make all left right adjustments Figure 10 6 Correct Camera Target Alignment Right Display g Place the small target on the table in front of the large target and adjust the focus by com...

Page 346: ...ocusing the Camera section on page 10 12 Step 5 Tighten the thumbscrew on the zoom and focus rings Step 6 Click Hide Camera Target to remove the alignment images Step 7 To complete the zoom procedure click Done Step 8 Click Setup then click Auto Adjust to automatically adjust the camera settings You will see various images and colors on the displays during the adjustment Auto Adjust takes approxim...

Page 347: ...ocus Target Step 4 Adjust the small target so that the red box encloses the upper patterns on the large target and the green box encloses the patterns on the small target Figure 10 9 Positioning the Small and Large Targets Step 5 Adjust the focus on the camera by performing the following steps a Loosen the thumbscrew for the lens focus ring The ring is labeled N 8 207151 Large target Small target ...

Page 348: ... focus ring until the red and green bars are approximately the same length e Make any additional adjustments you need to make to the zoom adjustments Occasionally adjusting the focus can slightly change the zoom f Click Hide Focus Targets then click Done when you complete the adjustment Step 6 Remove the targets and place them in front of the left camera Step 7 Complete Step 1 through Step 5 for t...

Page 349: ... Do not overtighten the screws or use a power screwdriver to tighten the screws The recommended torque for the screws is 0 8N m 7 inch pounds In addition make sure that you use screws of the correct length 20 mm Overtightening the screws or using a screw that is too long can cause the plastic hoods to break Figure 10 11 Attaching the Camera Hood Assembly 201203 7 7 2 1 3 ...

Page 350: ...rrectly Camera is not aligned correctly Adjust and focus the camera using the targets Image colors are incorrect Video cable is only partially connected Color settings are not correct Tug on the plug to see if it is fully plugged in See the Routing Power and Signal Cables section in the following documents Cisco TelePresence System 3010 Assembly Use Care and Field Replacement Unit Guide Cisco Tele...

Page 351: ...peakers automatically or manually Use the information in the following sections to test the speakers for your system Testing the Speakers page 10 17 Troubleshooting Speakers page 10 17 Related Information page 10 18 Testing the Speakers To test the speakers Step 1 Log in to the Cisco TelePresence System Administration interface Step 2 Choose Troubleshooting Hardware Setup Step 3 Click the Speakers...

Page 352: ...c Tug on the plug to see if it is fully plugged in Push the plug in firmly until a click is heard Sound heard at wrong speaker Speaker cable is not connected in the correct connector Check that the speaker cable is plugged into the correct receptor on the primary codec Plug all speakers into the primary codec Sound is not synchronized with video Contact Cisco technical support Choppy audio during ...

Page 353: ...row of participants seated in the room Go to the following sections to test microphones Testing Microphones on the CTS 3010 and CTS 3210 page 10 19 Troubleshooting Microphones page 10 21 Related Information page 10 22 Testing Microphones on the CTS 3010 and CTS 3210 To test microphones on the CTS 3010 and CTS 3210 Step 1 Log in to the Cisco TelePresence System Administration interface Step 2 Choos...

Page 354: ...CTS 3010 and CTS 3210 Managing CTS 3010 and CTS 3210 Hardware Setup Step 8 Click Stop to end the test Figure 10 12 shows an example CTS 3200 Series microphone troubleshooting screen with the Refresh Microphone Status window activated Figure 10 12 Troubleshooting Microphones on the CTS 3200 Series ...

Page 355: ...on the primary codec Check that the mute light on each microphone is lit An unlit light indicates that the microphone is not plugged in Lightly tap the microphone to see if sound registers Contact Cisco technical support if you are certain that the cabling is correct and power is applied to the system but no sound registers on the microphone Microphone icon with red pipe displays Microphone is not...

Page 356: ...inutes and then stops working your presentation device might use an unsupported video protocol To see the list of displays that the CTS 3010 and CTS 3210 supports see the release notes for your CTS software version on Cisco com A PiP softkey will be displayed on the phone only if a PiP is active Pip is not available for audio only calls To test an external presentation device Microphone switches t...

Page 357: ...s for the Cisco TelePresence System 3000 Series chapter of the Cisco TelePresence Hardware Options and Upgrade Guide for information about cabling your system with an Auxiliary Control Unit Step 2 Start a test pattern display for the display by completing the following steps a Open a browser that is connected to the network b Enter the IP address of the primary codec to log in to Cisco TelePresenc...

Page 358: ...t presentation devices Checking the Test Pattern page 10 25 Troubleshooting the Presentation Display page 10 25 Checking the VGA page 10 27 Troubleshooting Presentation Devices page 10 28 Related Information page 10 30 Table 10 5 Supported Presentation Devices Presentation Device Included in Cisco TelePresence System Optional in Cisco TelePresence System Auxiliary Display 40 LCD CTS 3010 CTS 3210 ...

Page 359: ...ure the display for use with the Cisco TelePresence system Note Although the 40 inch display ships with a remote control Cisco strongly recommends that you not make any adjustments or changes from the factory default settings The TelePresence system restores the display to its factory default settings each night and any overrides to the default settings will not persist Troubleshooting the Present...

Page 360: ...re certain that the cabling is correct and power is applied to the system but no image is displayed Test pattern is not displayed Presentation display is set up to receive PC input instead of input from its video cable connector Use the presentation display remote control to configure the presentation display for HD video input If your system includes an Auxiliary Control Unit click Set LCD Defaul...

Page 361: ...art in the Testing box The Presentation Source buttons are activated Step 5 Select VGA and click Test It may take up to 15 seconds before you begin to see an image on the projection surface The image should be fully formed after approximately 45 seconds If the input image is displaying correctly you should see an image projected on the projection surface If the image is out of focus use the projec...

Page 362: ...isco TelePresence System can display information from multiple input devices during a meeting If multiple input devices are sending information the projector displays the input from the last presentation device sending information If an input device image is not being seen on the projector screen try the following VGA devices Unplug the device from the VGA cable wait 5 seconds and then plug the de...

Page 363: ...ut from its video cable connector Use the projector remote control to configure the projector for HD Video input If your system includes an Auxiliary Control Unit click Set Projector Defaults Object is blocking the path of the projector Remove any objects blocking the projector lens HD Video connector is not securely seated in the projector Seat the HD Video connector securely HD Video connector i...

Page 364: ...al Interface DVI resolution to XGA 60 at 1024 x 768 60 Hz See the Optional Hardware section of the Cisco Unified Communications Manager Configuration Guide for the Cisco TelePresence System for more information There is no image and a Bulb icon appears on the CTS main display The projector bulb has burned out Replace the projector bulb Tip Presentation devices automatically shut off when there is ...

Page 365: ...ate the on off status of each port d Click the Turn Selected Lights On Off to test the selected light unit s e Click the Reset Auxiliary Control Unit to power cycle the Auxiliary Control Unit Step 5 Click Stop to end the test Digital Media Player The Digital Media Player DMP feature lets you select a secondary audio input source when you are not in a TelePresence call To test the DMP Step 1 Log in...

Page 366: ... it did a resume Presentation device functionality is changed When a CTS goes on hold the presentation device takes note whether or not it was the active presenter If the presentation device was the active presenter when it went on hold it will ask to present again when taken off hold and the presentation will be shown when the meeting resumes If it was not the active presenter it will not ask to ...

Page 367: ...og files Session Initiation Protocol SIP messages and log files from the Cisco TelePresence system Click the appropriate tab at the top of the window to view the following information Sysop Log page 10 33 Log Files page 10 34 SIP Messages page 10 35 Sysop Log To manage sysop messages Step 1 Choose Troubleshooting Log Files Step 2 Select the Sysop Files tab to view system operation sysop messages i...

Page 368: ...blem Problem Type drop down menu contains the following Audio speakers microphones Video displays cameras Projector LCD document camera Phone Recording Other Unknown Figure 10 13 shows the problem types that you can select when downloading log files Figure 10 13 Select Problem Type Drop Down Menu Step 3 Choose from one of the following options None Default No log files will be captured unless a do...

Page 369: ...pture new log files Capture New Log Files radio button The following message appears Collecting Cisco TelePresence system log files This may take several minutes Please wait Step 7 The File Download window appears prompting you to open or save the file Click Save to send the gzip file to Cisco technicians to help solve the problem SIP Messages Use SIP Messages to view the current Session Initiatio...

Page 370: ... list to open the SIP Message Details dialog box The SIP Message Details dialog box opens containing the message details and Related SIP Messages Or Step 2 Highlight the SIP message and click the Details button The SIP Message Details dialog box opens containing the message details and Related SIP Messages Related SIP Messages The bottom portion of the SIP Message Details window lists SIP messages...

Page 371: ... Indicates that a user or service is being invited to participate in a call session 3265 NOTIFY Immediately upon successful accepting or refreshing of a subscription a NOTIFY message is sent to communicate the current resource state to the subscriber This NOTIFY message is sent in the same dialog as that created by the SUBSCRIBE message 3261 OPTIONS Queries the capabilities of servers 3262 PRACK P...

Page 372: ...your meeting room and send the results to Cisco Systems technical support for analysis Note Audio recordings can be made only while the CTS system is in a call To record audio Step 1 Choose Troubleshooting Audio Step 2 Click Start Recording Audio to start recording all audio in the local meeting room including audio from remote meeting rooms Recording will continue up to a maximum of two minutes u...

Page 373: ...ation The Apply and Reset buttons are activated as shown in Figure 10 15 Note When Auto Negotiation is enabled the Duplex and Speed settings are read only Figure 10 15 Auto Negotiate On Step 3 Click Apply to save your settings or click Reset to restore the original settings Related Information For more system troubleshooting information see the Cisco TelePresence System Troubleshooting Guide on Ci...

Page 374: ...m Locations of the factory image are listed To reset the system image to the factory default Step 1 Choose Troubleshooting Configuration Issues The Hardware Software Versions page appears listing the current hardware and software versions and active images Step 2 Click the Reset to Factory Image and Factory Configuration and Restart Cisco TelePresence System button The system image location is cha...

Page 375: ...ion Cisco TelePresence System 3010 Assembly Use Care and Field Replacement Unit Guide Cisco TelePresence System 3210 Assembly Use Care and Field Replacement Unit Guide Table 10 12 contains problem scenarios and troubleshooting solutions for network cabling Table 10 11 Troubleshooting Cisco TelePresence Screen Resolution Problem Possible Cause Action Video picture is good but experiences repeated i...

Page 376: ...k configuration has not been done or has been done incorrectly Log into the Cisco Unified Communications Manager administration interface and verify that the required settings have been made for configuring the Cisco TelePresence system and Cisco Unified IP Phone Cisco IP Phone does not register with the IP network Cisco Unified Communications Manager is down or disabled The network is down Check ...

Page 377: ...the Cisco TelePresence system see the Cisco TelePresence System Message Guide on the Cisco TelePresence Administration Software Error and System Messages home page on Cisco com For information about upgrading hardware in an existing CTS 3000 Series installation including removing the projector and adding new speakers speaker covers and LCD display see the Removing the Projector and Adding a Presen...

Page 378: ...10 44 Cisco TelePresence System Administration Guide OL 21845 01 Chapter 10 Troubleshooting the CTS 3010 and CTS 3210 Where to Go Next ...

Page 379: ... Monitoring the Cisco TelePresence System Revised March 2011 OL 21845 01 Contents This chapter contains the following sections Call Statistics page 11 2 Network Statistics page 11 5 Table 11 1 shows the tools that are available in the Monitoring window Figure 11 1 Monitoring Window ...

Page 380: ... an in progress call including the following Call Start Time Call Duration Call Type Remote meeting number Call State Actual Bit Rate Negotiated Bit Rate Historical Call Statistics not including current call if any Lists historical information about calls including the following Call Statistics Clear Time Last Call Start Time Last Call Duration Number of Calls Since System Setup Time in Calls Sinc...

Page 381: ...cs fields appear b Click once to de select Additional fields are hidden Statistics are listed in columns labeled as if you were looking at the front of the system sitting at the conference table For example on a CTS 3000 or CTS 3200 the labels indicate statistics from the left center and right codecs and presentation codec if installed and from auxiliary devices when connected When you select one ...

Page 382: ...e Total Bytes Total Packets Receive Is Active Media Type Total Bytes Total Packets Lost Packets Lost Packets Call Lost Packets Period Duplicate Packets Late Packets Failed SRTP Authentication Packets Average Jitter Call see jitter call Average Jitter Period see jitter period Note For more information about jitter and packet loss see the Understanding Jitter and Packet Loss Reporting section of the...

Page 383: ... None default 1 2 5 10 13 60 Step 4 Click Refresh to update the statistics immediately Network Statistics Use Network Statistics to view packet transmission statistics collected from the network Statistics are listed in columns labeled as if you were looking at the back of the system For example on a CTS 3000 or CTS 3200 the labels would indicate statistics from the left center and right codecs To...

Page 384: ...time you viewed these statistics Statistic types include the following False Carrier Sensor Errors Receiver Not Okay Errors Number of TxOctets Number of TxBroadcastPkts Number of TxMulticastPkts Number of TxUnicastPkts Step 3 Set an interval for updating these reports by choosing the time from the Refresh drop down menu Choices in minutes include the following None default 1 2 5 10 13 60 Step 4 Cl...

Page 385: ...845 01 Chapter 11 Monitoring the Cisco TelePresence System Where to Go Next Where to Go Next For more information about system statistics and messages including System Operations Sysop Log messages see the Cisco TelePresence System Message Guide on Cisco com ...

Page 386: ...11 8 Cisco TelePresence System Administration Guide OL 21845 01 Chapter 11 Monitoring the Cisco TelePresence System Where to Go Next ...

Page 387: ...rks solution extends the reach of Cisco TelePresence to remote tactical locations where terrestrial bandwidth is not available This solution incorporates existing Cisco TelePresence endpoint and infrastructure products with new software releases designed to function more effectively on poor high delay networks The following features and benefits are supported Relaxed latency jitter and packet loss...

Page 388: ...atellite Bandwidth You will need a minimum of 3 MB bandwidth at 720p good motion handling in a single channel per carrier SCPC configuration over a single hop satellite link Note Because the Cisco TelePresence video and audio are traveling up to the satellite and back down to an earth station significant 500 ms or more latency is introduced into the signal The result is noticeable delay in the con...

Page 389: ...ied IP Phone and the Cisco TelePresence System Enhanced Phone User Interface MIDlets See the Cisco Unified Communications Manager Configuration Guide for the Cisco TelePresence System Step 2 After making sure that the license is available on your computer log in to the Cisco Unified CM Administration page and follow these steps a From the Navigation drop down menu in the upper right corner select ...

Page 390: ...each CTS satellite endpoint Enabling the Satellite Feature After the satellite license has been loaded on Cisco Unified CM and the CTS satellite endpoints have been identified you are ready to enable the satellite feature using CTS command line interface CLI commands For information about using CTS CLI commands see the Cisco TelePresence System Command Line Interface Reference Guide To enable the ...

Page 391: ...o TelePresence 3000 Series built in projector automatically displays images from the most recently activated device Ceiling cameras are perfect for capturing images of objects that are too valuable to ship or cannot easily be copied or sent electronically Cisco recommends and supports document cameras made by WolfVision specifically the WolfVision Visualizer This is a special live camera system de...

Page 392: ...twork devices such as IP phones and multimedia applications Open telephony application interfaces make possible services such as multimedia conferencing and interactive multimedia response systems See also CUCM See the Cisco Unified Communications Manager Configuration Guide for the Cisco TelePresence System for more information codec The brain of the CTS The primary codec connects with the networ...

Page 393: ...one state to another to show the status of the system display screen icon System information icons that may be displayed on the Cisco TelePresence System CTS display screen System information includes call connection status alerts meeting alerts and maintenance alerts DMP Digital Media Player Cisco Digital Media Players are highly reliable IP based endpoints that can play high definition live and ...

Page 394: ...to business B2B in isolation from all other Internet users In contrast business to consumer B2C models involve known servers of one or more companies communicating with previously unknown consumer users An extranet can be understood as an intranet mapped onto the public Internet or some other transmission system not accessible to the general public but managed by more than one company s administra...

Page 395: ...meter registries IDR An IDR frame is a special kind of I frame used in MPEG 4 AVC encoding IDR frames can be used to create Advanced Video Coding AVC streams which can be easily edited Immersive Telepresence Endpoints CTS 3210 CTS 1300 Cisco TelePresence T3 Provides an immersive interactive in person experience See also personal system incandescent lamp A lamp that allows an electric current to pa...

Page 396: ... accessory for the Cisco Digital Media Player DMP for use in your digital signage network or your enterprise TV network It is used for displaying video images or computer data during a Cisco TelePresence meeting See the Cisco LCD Professional Series Displays home page on Cisco com for more information See also DMP LED Light emitting diode Indicators on the CTS that determine whether the user is si...

Page 397: ...formation MPEG 4 AVC A patented collection of methods defining compression of audio and visual AV digital data See also H 264 MPEG 4 AVC and IDR multipoint meeting Multipoint is where you are able to connect more than two sites in one video conference This normally requires a bridge although some video conference units are also able to connect multiple sites MXE Media eXperience Engine The Cisco M...

Page 398: ...TelePresence System The virtual in person experience of Cisco TelePresence directly into the private office The CTS 500 and CTS 1000 are considered to be personal systems See also Immersive Telepresence Endpoints PiP Presentation in Picture Data or graphics content sharing through an external monitor known as presentation in picture PiP format for space constrained offices Using the PiPCtrl softke...

Page 399: ... Recommended screen resolution for Cisco TelePresence is 1024 x 768 SD Standard definition display secondary codec Codecs that assist the primary codec in the large Cisco TelePresence 3000 3200 systems Secondary codecs process audio and video signals and send them to the primary codec which multiplexes the signals into separate single RTP streams Self View Enables you to see yourself on the main d...

Page 400: ...ysop System Operation sysop Logs Sysop messages describe system activity Some messages can help you identify and resolve system operation problems These messages are available to the user from the CTS Administration interface See the Managing Log Files section of the troubleshooting chapter for your CTS device Syslog System Logs syslog Debugging logs that are collected from your system and used by...

Page 401: ...ly mode and configured with a set of media features typically not used in Cisco only deployments This helps the CTS and CTMS inter operate with third party TIP devices TIP allows only endpoints with Restricted media settings to join Cisco TelePresence meetings TIP endpoints are expected to be able to send restricted media and to drop endpoints that can only transmit un restricted media See the Tel...

Page 402: ...eparate hardware hosts sharing the same storage Each of these transitions is completely transparent to any users on the virtual machine at the time it is being migrated See the Cisco TelePresence System Commercial Express Installation Guide on Cisco com for more information VPN model fixed path The VPN model uses a fixed more secure path for packet delivery VPNs only allow authorized personnel to ...

Page 403: ... file location 3 12 monitoring 1 3 Cisco Unified Communications Manager Settings window 3 12 codec statistics from 11 2 Configuration Obtaining the IP address 3 7 Upgrading to new CTS firmware releases 3 8 Configuration Issues window 4 45 6 36 7 38 8 68 9 46 10 39 CTS 500 32 microphones 5 4 set up the display 5 2 speakers 5 3 D Device information hardware software information 2 5 status informatio...

Page 404: ... 8 L language displayed 3 20 light display image and 4 3 6 4 7 4 8 5 9 4 10 4 log file downloading 4 39 4 40 4 41 6 30 6 32 7 32 7 34 8 62 8 63 8 65 9 39 9 40 9 41 10 33 10 34 10 35 viewing 4 39 4 40 4 41 6 30 6 32 7 32 7 34 8 62 8 63 8 65 9 39 9 40 9 41 10 33 10 34 10 35 Log Files window 4 39 4 40 4 41 6 30 6 32 7 32 7 34 8 62 8 63 8 65 9 39 9 40 9 41 10 33 10 34 10 35 Logout function 1 7 M MAC a...

Page 405: ...0 trap receiver SNMP 3 17 Troubleshooting Cameras Camera top to bottom switching 4 21 Image colors are incorrect 4 21 Image not positioned correctly 4 21 No image 4 21 Displays no image 4 6 IP Phone cabling 4 48 does not register 4 48 does not register network 4 49 phone idle screen missing 4 49 Logging In Administration login is slow 4 38 Main Display CTS 500 shroud light 4 38 Microphones Choppy ...

Page 406: ...ngs in Unified CM 4 47 Troubleshooting the CTS 500 32 5 6 camera setup or troubleshooting fails 5 6 eye height check box is empty 5 6 Unified CM settings 5 6 U username setting 3 19 V video codec statistics 11 2 settings 3 15 troubleshooting 4 47 6 37 7 39 8 70 9 47 10 41 VLAN ID administrative 3 11 operational 3 11 ...

Reviews: