PN A51387A
B
5-9
Setting View and Print Preferences
Creating a Preferences File
5
To include a list of interpolation point data:
1.
In the Size pane of the Preferences / Printed Report window (page
2.
Click
(
Select
)
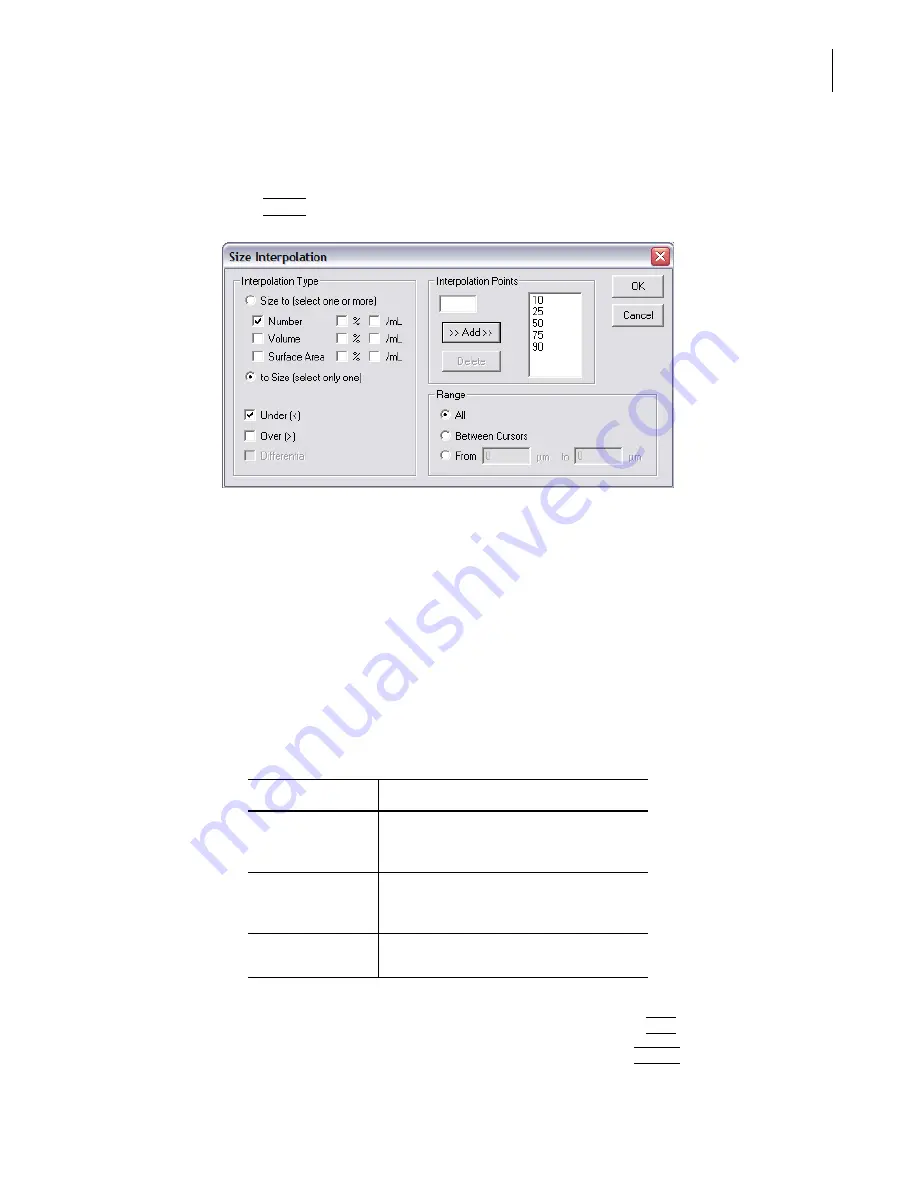
to set the interpolation points and range. The Size Interpolation window opens.
3.
In the Interpolation Type pane of the Size Interpolation window:
a.
Select Size to if you want to create interpolation points based on particle diameter size (that
is, particle diameters define bin edges). You can select up to nine statistics to display based
on particle size interpolation points.
b.
Select to Size if you want to create interpolation points based on the statistic you select in
the Interpolation Type pane (Number, Volume, Surface Area). You can select only one
statistical interpolation point to correlate to particle size.
c.
Select Number, Volume, Surface Area, %, and/or /mL to display selected statistics in
columns.
d.
Select Under (<), Over (>), or (if you selected Size to), Differential.
4.
In the Interpolation Points pane:
a.
To add an interpolation point, enter the new point and click
(
Add
)
.
b.
To delete an interpolation point, select the point and click
(
Delete
)
.
Table 5.4
Interpolation Display Data
If you select...
Then columns will display...
Under (<)
Statistical results below the interpolation
point. The interpolation point becomes the
upper edge of the bin.
Over (>)
Statistical results above the interpolation
point. The interpolation point becomes the
lower edge of the bin.
Differential
The number of particles between
interpolation points.
Summary of Contents for Multisizer 4
Page 12: ...xii List of Figures ...
Page 14: ...xiv List of Tables ...
Page 22: ...PN A51387AB xxii Introduction Before You Start Warnings and Cautions ...
Page 42: ...PN A51387AB 1 20 Analyzer Overview Preparing the Analyzer for Sample Runs ...
Page 160: ...PN A51387AB 6 16 Analyzing a Sample Using Blank Runs ...
Page 232: ...PN A51387AB 10 8 Regulatory Compliance Additional Security Features ...


