


6-60
TI71M01D06-01EN 3rd Edition: 2012.12.01
STEP 1 Checking the coordinate system setting
Check that the three setting items related to the coordinate system to be used, selection of
rotation coordinate system/linear coordinate system, rotation direction and scaling, are
specified correctly. See Section 6.1.8, "Coordinate System" for more information.
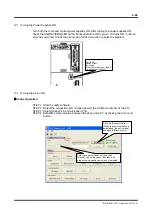
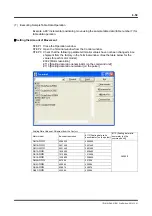
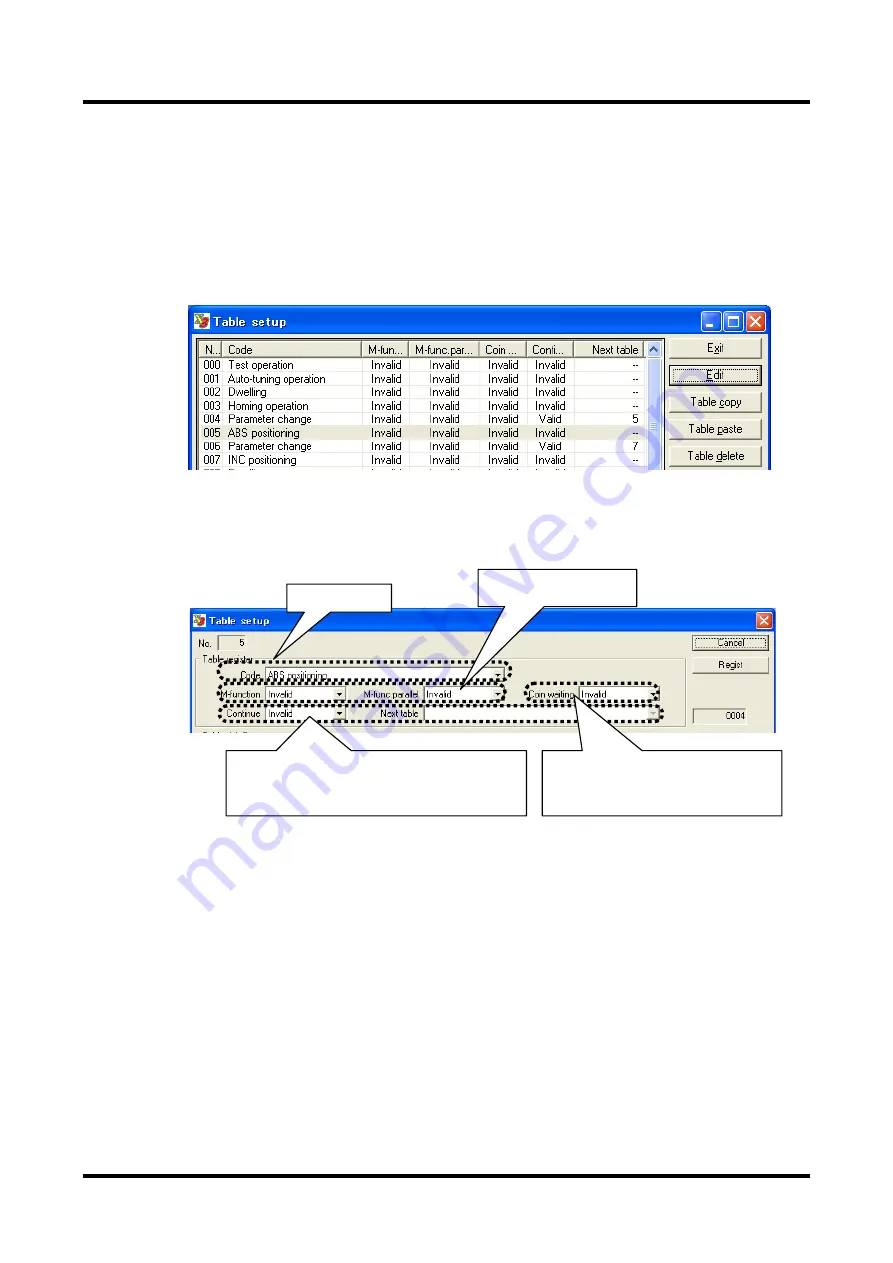
STEP 2 Selecting a table number
1 Click the [Table Data] button in the utility software.
2 Select the table data you want to edit and click the [Edit] button. The setup window
appears.
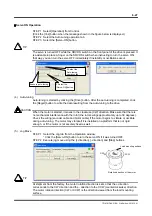
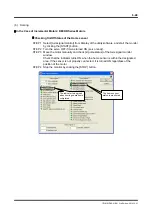
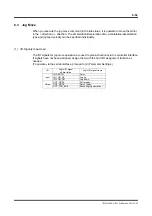
STEP 3 Setting a table register
Select an table register in the setup window.
Then set the operation code, M function, coin waiting function and continue function for the
selected operation register.
STEP 4 Setting table data
The setting items for table data vary depending on the operation code. See the explanation
sections for each operation (6.4.3 to 6.4.11).
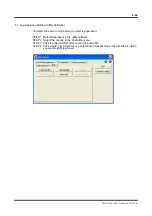
STEP 5 Registering table data
Click the [Regist] button to commit the edited settings.
Click the [Cancel] button to discard the edited settings; the table data is not changed.
STEP 6 Setting #parameters
Set #parameters as necessary. See the explanation sections for each operation, 6.4.3 to
6.4.11.
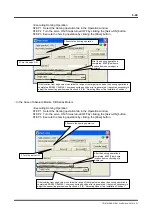
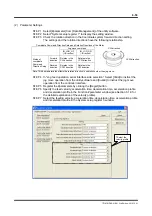
4 Specify "Valid" for the continue function and set the
table number to be executed next if you want to
perform the next table operation after the operation of
this table data is completed.
4 Set the coin waiting function. The timing
of the OUT_MODE_EXE and OUT_POS
signals output at the end of the operation is
changed according to this setting.
4 Specify "Valid" to use the
M function.
3 Select a code.