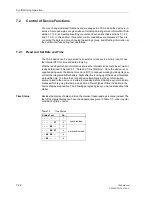
Control During Operation
7-39
7SA6 Manual
C53000-G1176-C156-2
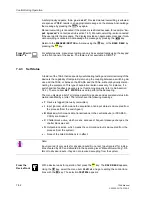
From the
DeviceFront
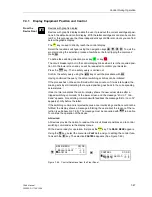
With a device ready for operation first press the
key. The MAIN MENU appears.
Select the item
Control
with
and move to the selection of control options using
. The selection
CONTROL
appears.
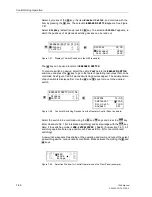
With
select the item
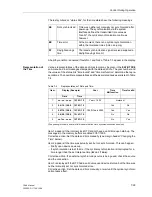
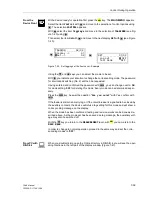
Taggings
and move to the selection of
TAGGINGS
(see Fig-
ure 7-40) using
.
Then select the item Set with
and move to the next display
SET
with
(see Figure
7-40).
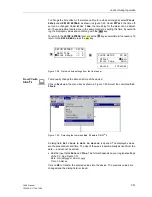
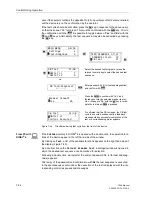
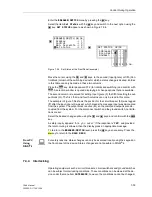
Figure 7-40
Set taggings at the front cover - Example
Using the
and
keys you can select the mode to be set.
With
you indicate your intention to change the corresponding mode. The password
for interlocked switching (No. 2) will then be requested.
Having entered and confirmed the password with
, you can change over to:
ON
for mode setting,
OFF
for deleting this mode. Every mode can be determined seper-
ately.
Press the
key. Answer the question "
Are you sure?
" with Yes, confirm with
.
If the feeder is still current-carrying, or if the circuit-breaker is signalled to be closed by
the auxiliary contacts, the device will refuse tag setting for this mode and will show a
corresponding message on the display.
When the mode has been confirmed, testing and revision works can be done as de-
scribed above. As the mode set has been saved as tag message, the auxialiary volt-
age may also be switched off.
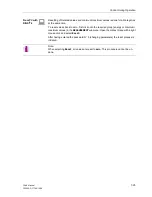
With the
key you return to the
MEASUREMENT
level, with
you can return to the
MAIN MENU
.
In order to change to normal operation proceed in the same way and set the corre-
sponding modes to "
OFF
".
From PC with
DIGSI
®
4
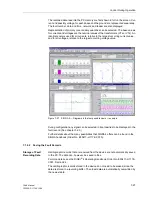
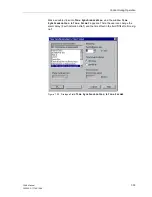
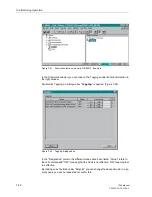
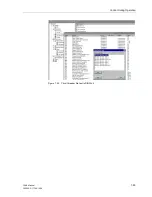
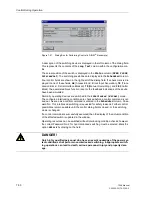
When you doubleclick to open the Online directory in DIGSI® 4 you will see the oper-
ating functions in the left part of the display window (Figure 7-41).
MENU
TAGGING
02/02
--------------------
Display –>
01
>
Set –>
02
SET
01/03
--------------------
>
Log out
>
OFF
Test mode
OFF
ENTER
ENTER
ENTER
MENU
:
Содержание siprotec 7SA6
Страница 2: ...Siemens Aktiengesellschaft Book No C53000 G1176 C156 2 ...
Страница 18: ...xviii 7SA6 Manual C53000 G1176 C156 2 ...
Страница 32: ...Introduction 1 14 7SA6 Manual C53000 G1176 C156 2 ...
Страница 82: ...Hardware and Connections 2 50 7SA6 Manual C53000 G1176 C156 2 ...
Страница 119: ...SIPROTEC 4 Devices 4 25 7SA6 Manual C53000 G1176 C156 2 Figure 4 20 CFC Logic example ...
Страница 190: ...Configuration 5 62 7SA6 Manual C53000 G1176 C156 2 ...
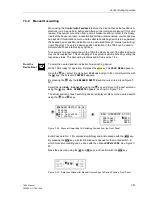
Страница 559: ...Control During Operation 7 45 7SA6 Manual C53000 G1176 C156 2 Figure 7 45 Circuit breaker trip test in DIGSI 4 ...
Страница 652: ...Installation and Commissioning 8 78 7SA6 Manual C53000 G1176 C156 2 ...
Страница 724: ...Technical Data 10 56 7SA6 Manual C53000 G1176 C156 ...
Страница 800: ...Appendix A 76 7SA6 Manual C53000 G1176 C156 2 ...
Страница 866: ...Appendix B 66 7SA6 Manual C53000 G1176 C156 2 ...

