Control During Operation
7-22
7SA6 Manual
C53000-G1176-C156-2
Further set points can be set if their measured and metered values have been config-
ured via CFC (see Section 5.3).
The exceeding or undershooting of set points is output as event log (see Subsubsec-
tion 7.1.1.2).
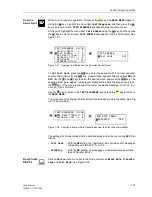
From the
DeviceFront
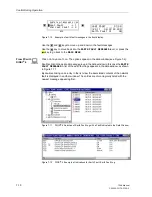
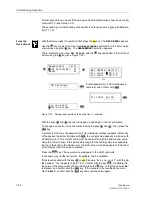
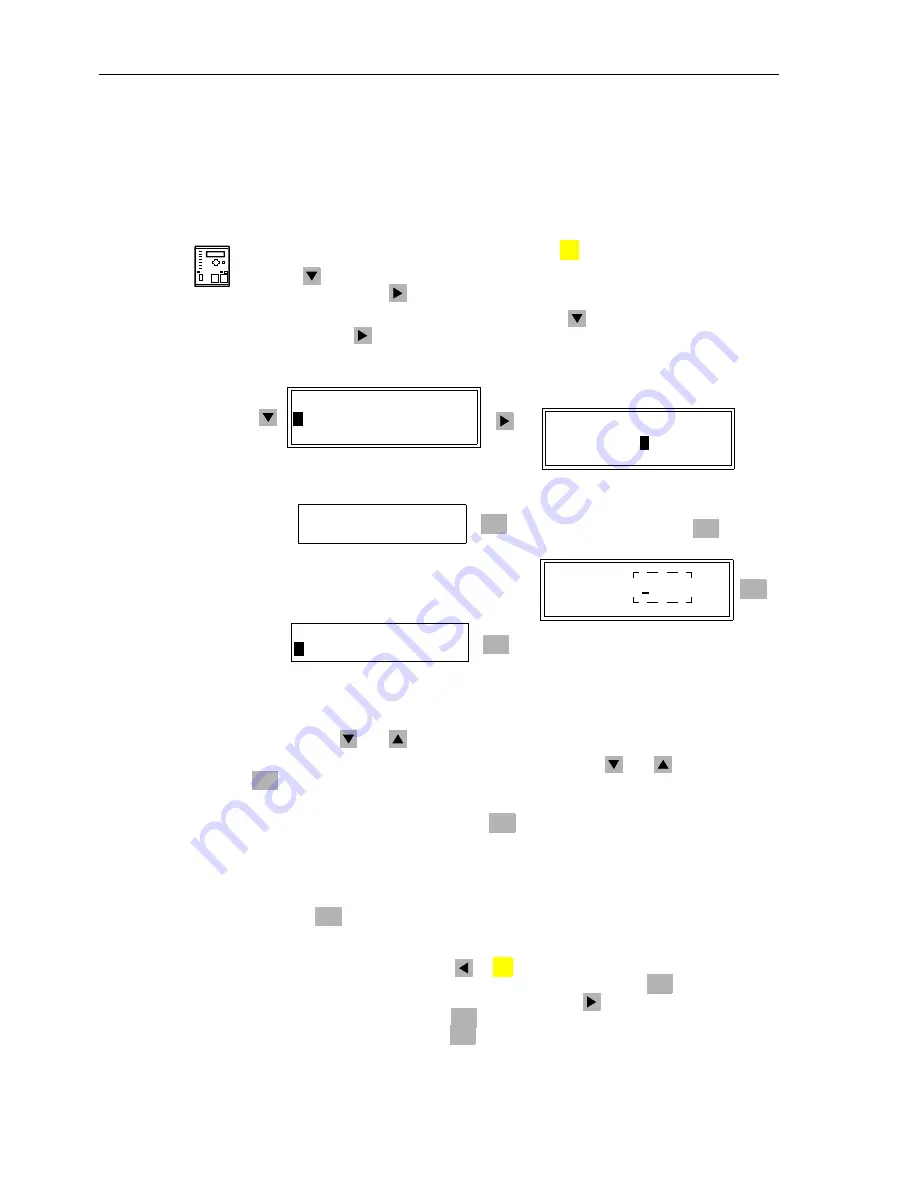
With the device ready for operation, first press the
key. The
MAIN MENU
appears.
Use the
key to select the menu item
Measurement
and switch to the list of meas-
ured values using the
key. The
MEASUREMENT
selection appears.
There, select the menu item
Set Points
with the
key and switch to the list of set
points using the
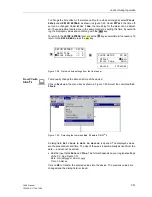
key (see Figure 7-23).
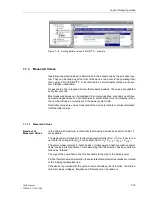
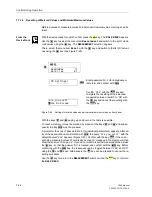
Figure 7-23
Setting of set-points on the device front — example
With the keys
and
the user can page up and down in the set point table.
To change a set point, it must be marked using the keys
and
. Then press the
key.
A prompt for the entry of password No. 5 (for individual settings) appears. After entry
of the password and confirmation with
, the current value appears in a frame with
a flashing cursor. The current value must be overwritten with the desired new value
using the numeric keys. If the permissible range for the setting value is exceeded to
the top or the bottom, the maximum or minimum set point value appears at the bottom
of the display when the value is entered.
Press the
key. The new value now appears in the list of set points.
In the same way, further set points, if available, can be modified.
If this level is exited with the key
or
the query “
Are you sure?
”, with the de-
fault answer “
Yes
” appears (Figure 7-23). Confirm with the key
, to validate the
the value. If the value must not be modified, press the
key, so that the answer “
No
”
is marked, and confirm with the
key. If the value is to be modified once more,
mark “
Abort
”, confirm with the
key and enter the value again.
MENU
Measurement
13/14
---------------------
>
Set Points(MV)
71
Reset
81
etc.
ENTER
ENTER
PW Settings?
= ------
Enter password Nr. 5 (for individual pa-
rameters) and confirm with
ENTER
IL1 Limit
90.0%
ENTER
Are you sure?
>
Yes No Escape
SET POINTS (MV)01/11
---------------------
IL1 Limit
100.0 A
IL2 Limit
100.0 A
ENTER
ENTER
ENTER
MENU
ENTER
ENTER
ENTER
Содержание siprotec 7SA6
Страница 2: ...Siemens Aktiengesellschaft Book No C53000 G1176 C156 2 ...
Страница 18: ...xviii 7SA6 Manual C53000 G1176 C156 2 ...
Страница 32: ...Introduction 1 14 7SA6 Manual C53000 G1176 C156 2 ...
Страница 82: ...Hardware and Connections 2 50 7SA6 Manual C53000 G1176 C156 2 ...
Страница 119: ...SIPROTEC 4 Devices 4 25 7SA6 Manual C53000 G1176 C156 2 Figure 4 20 CFC Logic example ...
Страница 190: ...Configuration 5 62 7SA6 Manual C53000 G1176 C156 2 ...
Страница 559: ...Control During Operation 7 45 7SA6 Manual C53000 G1176 C156 2 Figure 7 45 Circuit breaker trip test in DIGSI 4 ...
Страница 652: ...Installation and Commissioning 8 78 7SA6 Manual C53000 G1176 C156 2 ...
Страница 724: ...Technical Data 10 56 7SA6 Manual C53000 G1176 C156 ...
Страница 800: ...Appendix A 76 7SA6 Manual C53000 G1176 C156 2 ...
Страница 866: ...Appendix B 66 7SA6 Manual C53000 G1176 C156 2 ...


