6 Job Flow Sheets
172
Selecting/Changing a Job Flow Sheet
This section describes how to select or edit a job flow sheet created on a network computer
with Job Flow Editor.
Note
•
If characters not supported by the machine are used in the name or description of a job flow sheet, the
characters will not be displayed or will be garbled on the screen.
•
To communicate with network computers, enable the SOAP port on the machine.
•
A job flow sheet created on a network computer can be deleted, but cannot be changed or duplicated.
However, you can temporarily change some items that are permitted to be changed.
For information on how to enable the port, refer to "Port Settings" (P.358).
1
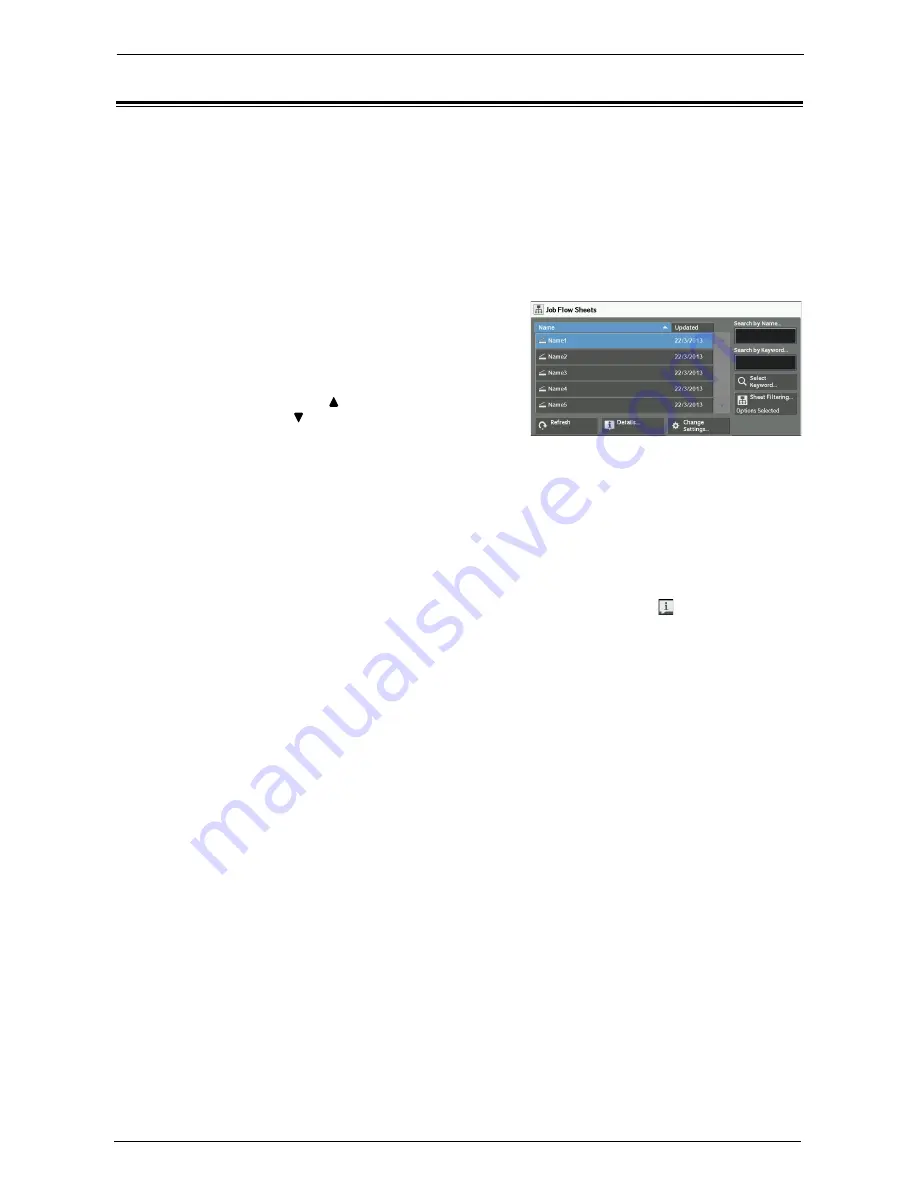
Select a job flow sheet.
Note
•
Displayed job flow sheets may vary depending
on the settings of the Authentication feature.
For more information, refer to "Job Flow Sheet
Types and Overview" (P.544).
•
Select [ ] to return to the previous screen or
[ ] to move to the next screen.
•
You can sort the list in ascending or
descending order by selecting either [Name]
or [Updated].
Refresh
Displays refreshed information.
Details
Displays the [Details] screen. You can confirm the details of a job flow such as the name, last
updated date, target, owner and save location. When you select the [ ] button, the whole
text of the description which was registered when creating the job flow sheet is displayed.
Change Settings
Displays the [Change Settings] screen. You can change the job flow settings.
Refer to "[Change Settings] Screen" (P.173).
Search by Name
Searches for job flows that partially match the entry. The machine searches through job flow
names that were registered upon each job flow creation. The entry can be up to 128
characters long.
Search by Keyword
Searches for job flows that fully match the entry. The machine searches through keywords
that were registered upon each job flow creation. The entry can be up to 12 characters long.
You can select from preset keywords if they have been registered in the System
Administration mode.
Select Keyword
Displays the [Select Keyword] screen. Select a keyword registered in the System
Administration mode to search for job flows. Job flows that fully match the entry are
searched. The machine searches through keywords that were registered upon each job flow
creation.
Sheet Filtering
Displays the [Sheet Filtering] screen on which you can filter the job flow sheets displayed.
Refer to "[Sheet Filtering] Screen" (P.174).
Содержание C7765DN
Страница 1: ...Dell C7765dn Color Multifunction Printer User s Guide Regulatory Model C7765dn ...
Страница 32: ...1 Before Using the Machine 32 ...
Страница 144: ...3 Copy 144 ...
Страница 155: ...Operations during Faxing 155 3 Set Resolution Original Size and the density 4 Select Save 5 Press the Start button ...
Страница 156: ...4 Fax 156 ...
Страница 168: ...5 Scan 168 ...
Страница 272: ...13 Maintenance 272 ...
Страница 294: ...14 Machine Status 294 ...
Страница 468: ...16 Dell Printer Configuration Web Tool Settings 468 ...
Страница 510: ...19 Scanner Environment Settings 510 ...
Страница 559: ...Configuration for Authentication 559 10 Select Close repeatedly until the Tools screen is displayed 11 Select Close ...
Страница 564: ...22 Authentication and Accounting Features 564 ...
Страница 764: ...28 Using Shortcut Menu 764 ...
Страница 796: ...29 Using Access Google Drive 796 2 Check the content status 3 Select Close ...
Страница 802: ...29 Using Access Google Drive 802 ...
Страница 816: ...30 Google Cloud Print 816 ...
Страница 829: ...www dell com dell com support KB3206EN0 5 ...


