


13 Maintenance
252
6
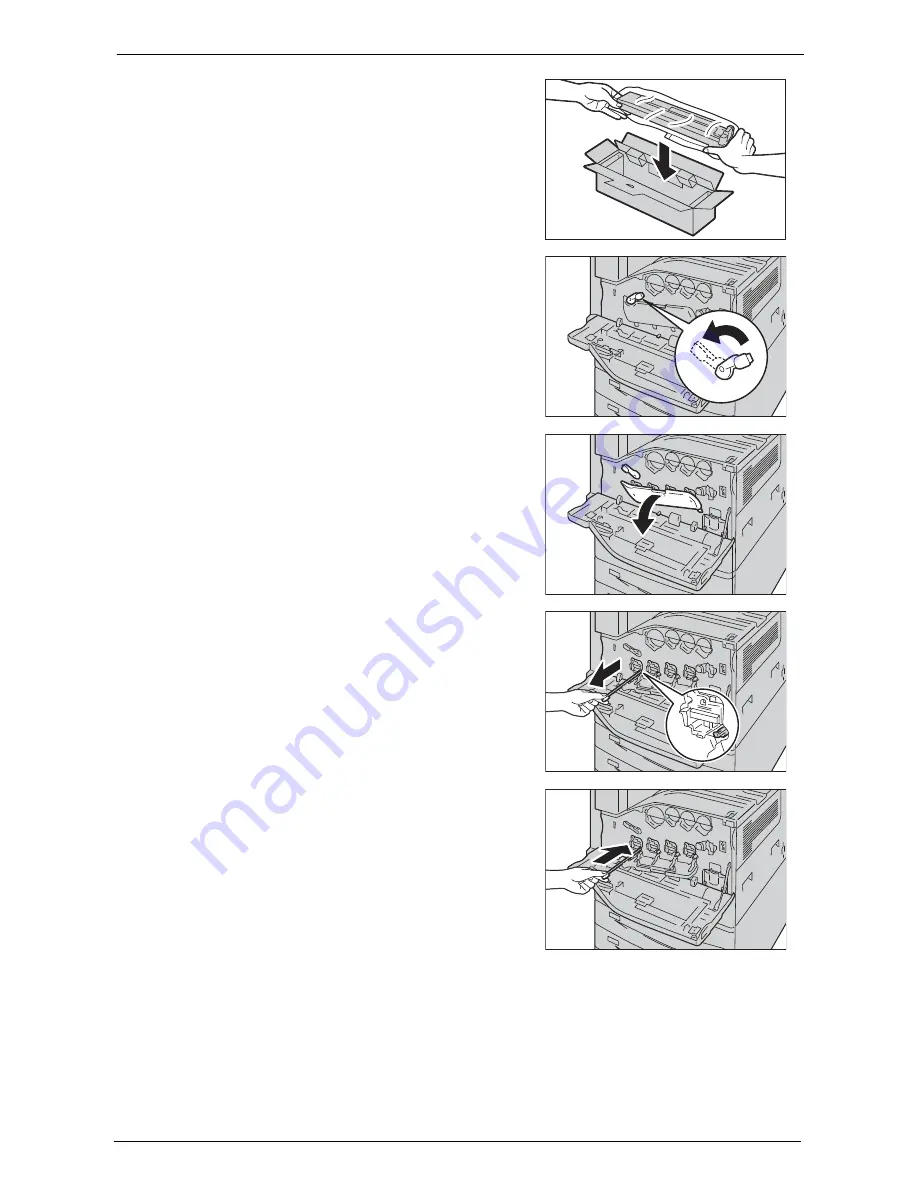
Carefully place the old waste toner container into
the empty box with both hands.
7
Rotate the release lever of the drum cartridge
cover counterclockwise.
8
Lower the cover.
Note
•
You can now see the drum cartridge.
9
Slowly slide out the cleaning bar housed within
the LED printhead until it stops. The cleaning
bars are located in the cleaning connection just
under the drum cartridges R1, R2, R3, and R4.
Note
•
Slide out the cleaning bar until you see "
zzz
".
•
Do not remove the cleaning bar from the housing.
10
Slowly slide the cleaning bar back into place.
Note
•
Clean the four LED printheads R1 to R4 by sliding
the cleaning bar back and forth for two or three
times respectively.
Содержание C7765DN
Страница 1: ...Dell C7765dn Color Multifunction Printer User s Guide Regulatory Model C7765dn ...
Страница 32: ...1 Before Using the Machine 32 ...
Страница 144: ...3 Copy 144 ...
Страница 155: ...Operations during Faxing 155 3 Set Resolution Original Size and the density 4 Select Save 5 Press the Start button ...
Страница 156: ...4 Fax 156 ...
Страница 168: ...5 Scan 168 ...
Страница 272: ...13 Maintenance 272 ...
Страница 294: ...14 Machine Status 294 ...
Страница 468: ...16 Dell Printer Configuration Web Tool Settings 468 ...
Страница 510: ...19 Scanner Environment Settings 510 ...
Страница 559: ...Configuration for Authentication 559 10 Select Close repeatedly until the Tools screen is displayed 11 Select Close ...
Страница 564: ...22 Authentication and Accounting Features 564 ...
Страница 764: ...28 Using Shortcut Menu 764 ...
Страница 796: ...29 Using Access Google Drive 796 2 Check the content status 3 Select Close ...
Страница 802: ...29 Using Access Google Drive 802 ...
Страница 816: ...30 Google Cloud Print 816 ...
Страница 829: ...www dell com dell com support KB3206EN0 5 ...


