Job Assembly
143
Original Orientation
Allows you to specify the orientation of the document so that the machine can identify the
top of the document.
Note
•
If the [Original Orientation] setting differs from the actual document orientation, the machine may not
detect the top of the document correctly.
• Upright Images
Select this option when placing the top edge of the document against the top side of the
document glass or document feeder.
• Sideways Images
Select this option when placing the top edge of the document against the left side of the
document glass or document feeder.
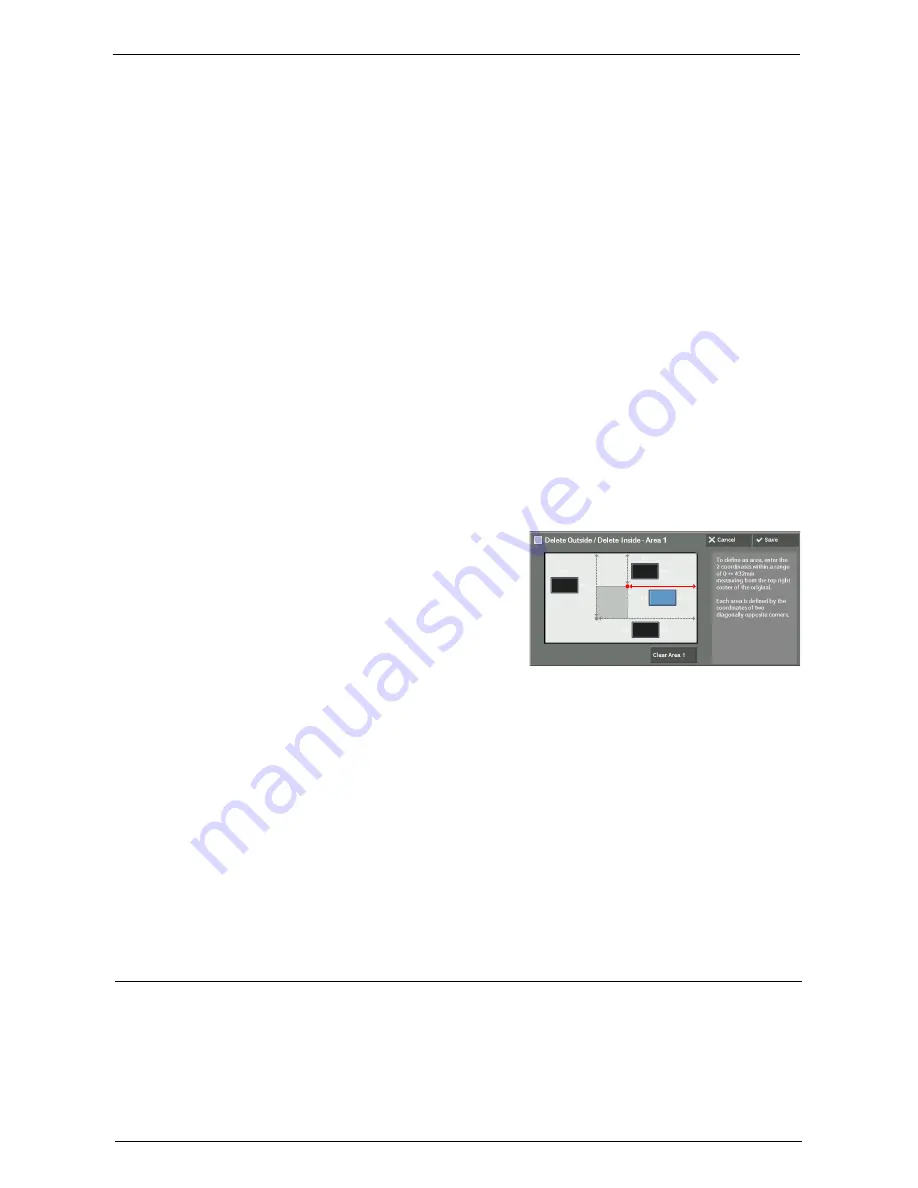
[Delete Outside / Delete Inside - Area 1 (Area 2 or Area 3)] Screen
This screen allows you to specify the area to be deleted. The area is defined by the rectangle
formed between the points X1, Y1 and X2, Y2. The origin point is the top right corner of a
document.
You can specify a value in the range from 0 to 432 mm for the width (X) and the length (Y)
in 1 mm increments.
Note
•
Specify the 2 coordinates from the top right corner of the document.
•
When specifying multiple areas, the specified areas can overlap each other.
•
When [Reduce / Enlarge] is set, the specified area will be reduced or enlarged accordingly.
1
Select [Area 1], [Area 2], or [Area 3].
2
Select the text box for [X1], and enter the value for X1 using the numeric keypad.
3
Select the text box for [Y1], and enter the value for Y1 using the numeric keypad.
4
Select the text box for [X2], and enter the value for X2 using the numeric keypad.
5
Select the text box for [Y2], and enter the value for Y2 using the numeric keypad.
Note
•
If all of [X1], [Y1], [X2], and [Y2] are set to [0], the area will be invalid. If no other area is specified, the
Delete Outside/Delete Inside feature cannot be used.
•
Pressing the <C (Clear)> button clears the value you have entered.
Clear Area 1 (Area 2 or Area 3)
Clears all the values set for Area 1 (Area 2 or Area 3).
Stored Programming (Calling a Stored Program for Build Job)
This feature allows you to call a stored program for Build Job.
For more information, refer to "Calling a Stored Program for Build Job" (P.184).
Содержание C7765DN
Страница 1: ...Dell C7765dn Color Multifunction Printer User s Guide Regulatory Model C7765dn ...
Страница 32: ...1 Before Using the Machine 32 ...
Страница 144: ...3 Copy 144 ...
Страница 155: ...Operations during Faxing 155 3 Set Resolution Original Size and the density 4 Select Save 5 Press the Start button ...
Страница 156: ...4 Fax 156 ...
Страница 168: ...5 Scan 168 ...
Страница 272: ...13 Maintenance 272 ...
Страница 294: ...14 Machine Status 294 ...
Страница 468: ...16 Dell Printer Configuration Web Tool Settings 468 ...
Страница 510: ...19 Scanner Environment Settings 510 ...
Страница 559: ...Configuration for Authentication 559 10 Select Close repeatedly until the Tools screen is displayed 11 Select Close ...
Страница 564: ...22 Authentication and Accounting Features 564 ...
Страница 764: ...28 Using Shortcut Menu 764 ...
Страница 796: ...29 Using Access Google Drive 796 2 Check the content status 3 Select Close ...
Страница 802: ...29 Using Access Google Drive 802 ...
Страница 816: ...30 Google Cloud Print 816 ...
Страница 829: ...www dell com dell com support KB3206EN0 5 ...


