3 Copy
128
Transparency Options (Inserting Blank Sheets between Transparencies)
This feature allows you to insert blank separators between output transparency sheets. At the
same time, you can make copies for handouts.
Note
•
Using transparency sheets for color (with white border) may cause a malfunction or paper jam.
•
When loading A4 size transparencies on Tray 5 (Bypass), we recommend that you load them in portrait
orientation.
•
Load transparency sheets in a tray in the same orientation as the paper to be used for handouts and
separators.
1
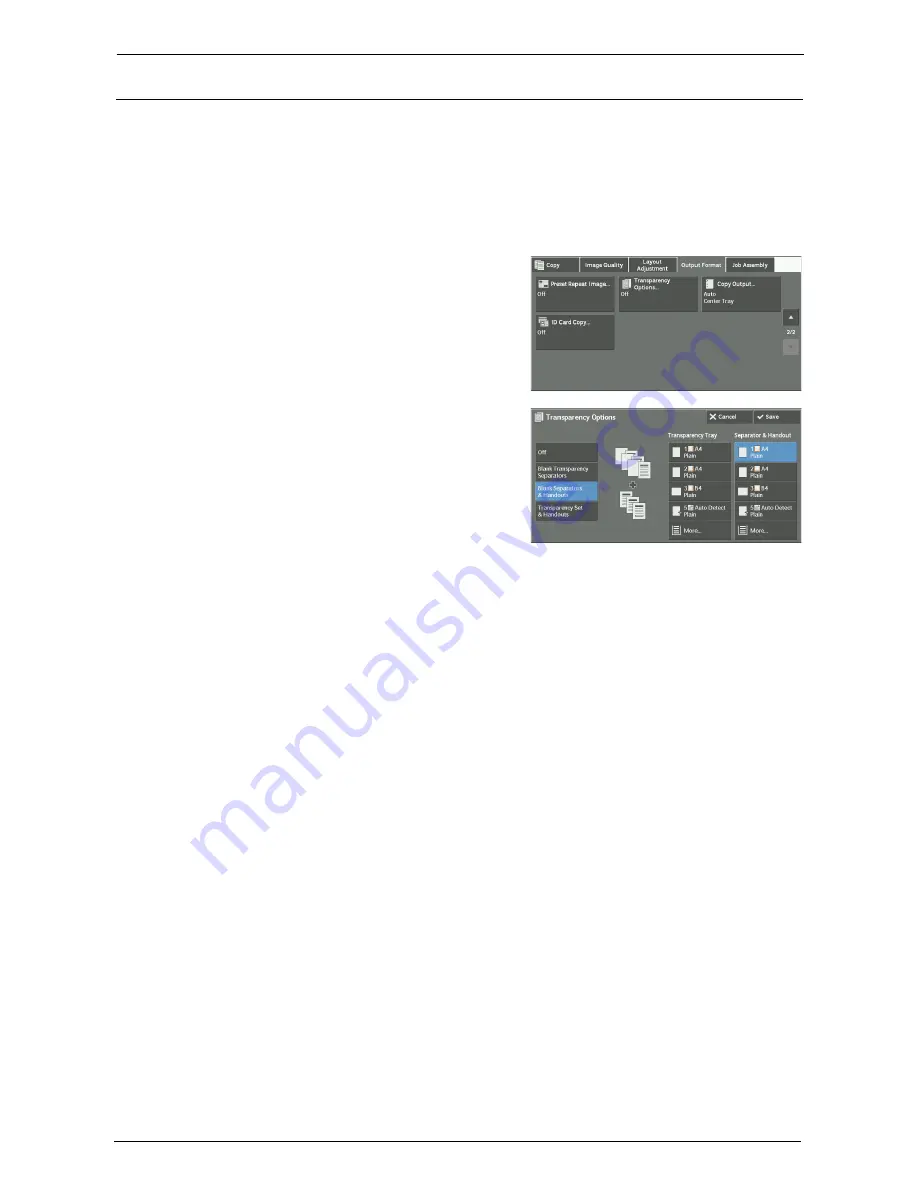
Select [Transparency Options].
2
Select any option.
Off
Does not insert separators.
Blank Transparency Separators
Inserts a separator each time a transparency is copied. Only one set of copies can be made.
Blank Separators & Handouts
Inserts a separator each time a transparency is copied. At the same time, the required
number of copies is made for handouts.
Transparency Set & Handouts
Makes copies on transparencies. At the same time, the required number of copies is made
for handouts.
Transparency Tray
Allows you to select the paper tray to be used for the transparencies.
Select [More] to display the [Paper Supply - Transparency] screen on which you can select a
tray.
Note
•
When you use the bypass tray, select [Bypass] on the [Paper Supply - Transparency] screen. Select
other than [Auto Detect] for [Paper Size] on the [Tray 5] screen.
•
For [Transparency Tray], select one of the paper trays. Auto Paper Select feature is not available.
•
The paper tray that you selected for [Transparency Tray] cannot be selected for [Separator Tray],
[Separator & Handout], or [Handout Tray] at the same time.
When [Bypass] is selected, the [Tray 5] screen is displayed. For more information, refer to "[Tray 5]
Screen" (P.79).
Содержание C7765DN
Страница 1: ...Dell C7765dn Color Multifunction Printer User s Guide Regulatory Model C7765dn ...
Страница 32: ...1 Before Using the Machine 32 ...
Страница 144: ...3 Copy 144 ...
Страница 155: ...Operations during Faxing 155 3 Set Resolution Original Size and the density 4 Select Save 5 Press the Start button ...
Страница 156: ...4 Fax 156 ...
Страница 168: ...5 Scan 168 ...
Страница 272: ...13 Maintenance 272 ...
Страница 294: ...14 Machine Status 294 ...
Страница 468: ...16 Dell Printer Configuration Web Tool Settings 468 ...
Страница 510: ...19 Scanner Environment Settings 510 ...
Страница 559: ...Configuration for Authentication 559 10 Select Close repeatedly until the Tools screen is displayed 11 Select Close ...
Страница 564: ...22 Authentication and Accounting Features 564 ...
Страница 764: ...28 Using Shortcut Menu 764 ...
Страница 796: ...29 Using Access Google Drive 796 2 Check the content status 3 Select Close ...
Страница 802: ...29 Using Access Google Drive 802 ...
Страница 816: ...30 Google Cloud Print 816 ...
Страница 829: ...www dell com dell com support KB3206EN0 5 ...


