15 Tools
332
Force Annotation
The string such as a user name and a date (Annotation) is forcibly printed out according to
the layout template associated with each job type.
Note
•
When a watermark or Universal Unique ID is to be printed on the copies, it may overlap the text printed
by the Force Annotation feature.
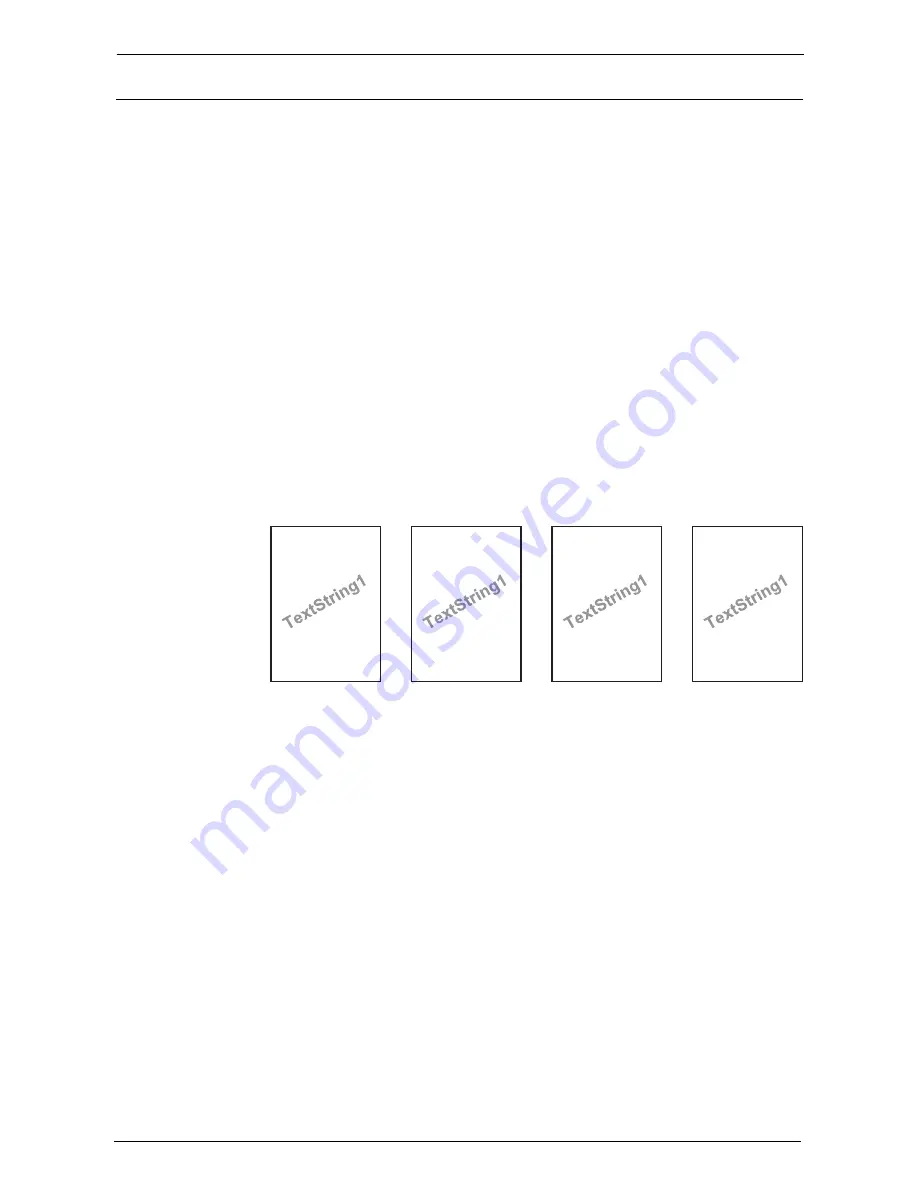
The layout templates, Preset 1 to Preset 4, are provided with the machine. The printed items
with the templates as follows:
• Preset 1 and Preset 2
The string registered on [Create Text String 1] is printed faintly at an angle in the center
of paper.
The following items are printed at the bottom right for Preset 1 or bottom left for Preset
2 of paper.
- first line: file name and the IP address of the computer that send a print job
- second line: user name, user ID, card ID, and date and time
• Preset 3 and Preset 4
The string registered on [Create Text String 1] is printed faintly at an angle in the center
of paper.
The following items are printed at the bottom right for Preset 3 or bottom left for Preset
4 of paper.
- user ID and date and time
Note
•
Some items may not be printed depending on the job type and performance conditions.
•
Force annotation is not printed on a blank paper generated by the machine.
•
When the Force Annotation is enabled, you cannot select [Auto Detect] for [Tray 5].
•
A time printed faintly using the Force Annotation feature may differ from the time the print job is
submitted depending on the status and settings of the machine and the contents of the print job. In this
case, the print job start time is printed as a watermark.
For information about how to enter characters, refer to "Entering Text" (P.57).
Apply Layout Template to Copy/Prints Jobs
Set the association with layout templates. You can associate layout templates with the
following types of jobs.
• Copy
• Client Print
• Print Stored File
• Media Print
• Print Fax
• Print E-mail
• Report
DocName-192.0.2.1
UserName-CardID-UserID-2011/03/01 13:08
DocName-192.0.2.1
UserName-CardID-UserID-2011/03/01 13:08
UserID-2011/03/01 13:08
UserID-2011/03/01 13:08
Содержание C7765DN
Страница 1: ...Dell C7765dn Color Multifunction Printer User s Guide Regulatory Model C7765dn ...
Страница 32: ...1 Before Using the Machine 32 ...
Страница 144: ...3 Copy 144 ...
Страница 155: ...Operations during Faxing 155 3 Set Resolution Original Size and the density 4 Select Save 5 Press the Start button ...
Страница 156: ...4 Fax 156 ...
Страница 168: ...5 Scan 168 ...
Страница 272: ...13 Maintenance 272 ...
Страница 294: ...14 Machine Status 294 ...
Страница 468: ...16 Dell Printer Configuration Web Tool Settings 468 ...
Страница 510: ...19 Scanner Environment Settings 510 ...
Страница 559: ...Configuration for Authentication 559 10 Select Close repeatedly until the Tools screen is displayed 11 Select Close ...
Страница 564: ...22 Authentication and Accounting Features 564 ...
Страница 764: ...28 Using Shortcut Menu 764 ...
Страница 796: ...29 Using Access Google Drive 796 2 Check the content status 3 Select Close ...
Страница 802: ...29 Using Access Google Drive 802 ...
Страница 816: ...30 Google Cloud Print 816 ...
Страница 829: ...www dell com dell com support KB3206EN0 5 ...


