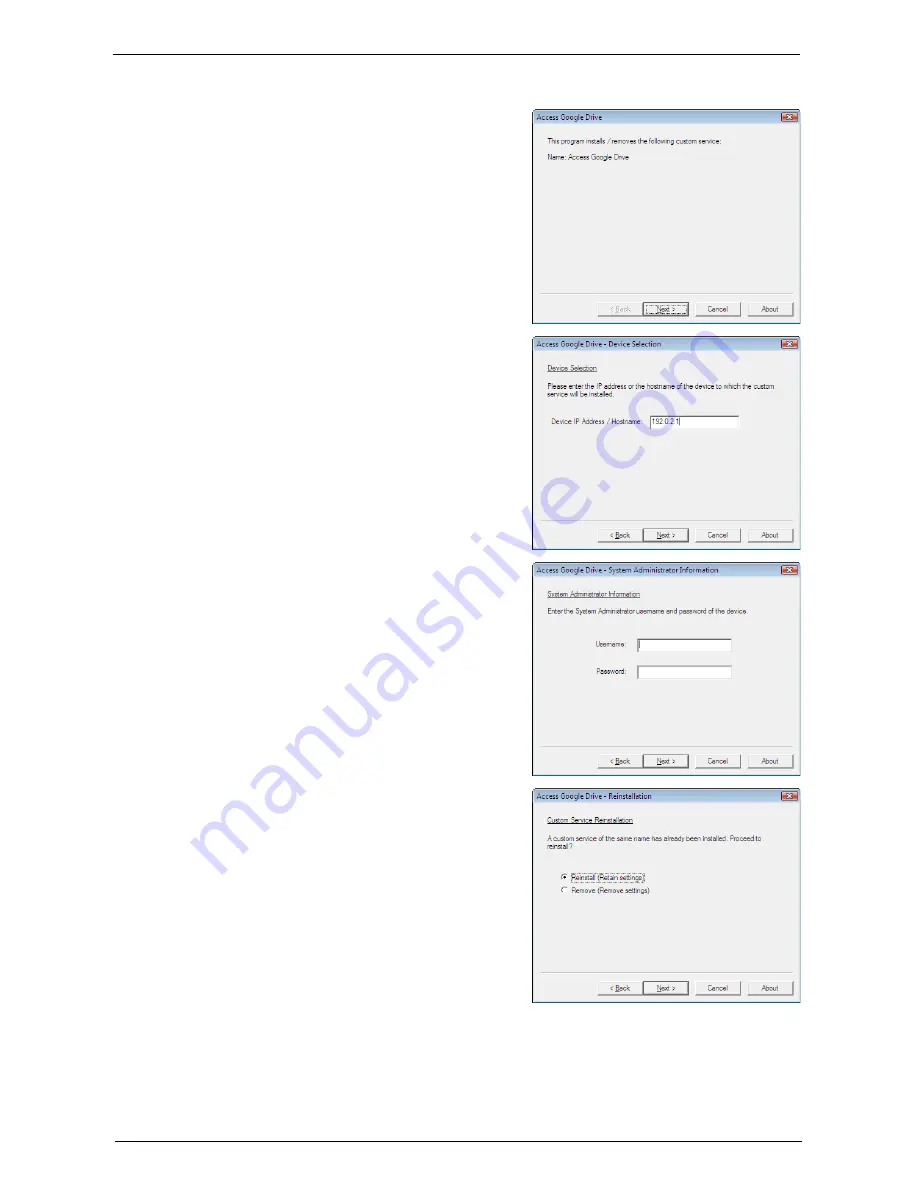
Installation Procedures
725
1
On your computer, double-click the exe file in the installation tool.
2
Click [Next].
3
Enter the IP address or hostname of your
machine, and then click [Next].
Example: 192.0.2.1
4
Enter the system administrator’s user ID and
password, and then click [Next].
5
Select [Reinstall (Retain settings)] for version
upgrade, or [Remove (Remove settings)] for
uninstallation, and then click [Next].
6
Click [Next].
7
Click [Finish].
Note
•
Several minutes may take before the
installation process completes.
•
If the [Reboot device] check box is selected,
the machine must be rebooted. Click [Finish] to
reboot the machine.
•
To uninstall or upgrade this feature from
another machine in succession, check [Install
on another device] and click [Finish]. You can
start from step 2.
Содержание C7765DN
Страница 1: ...Dell C7765dn Color Multifunction Printer User s Guide Regulatory Model C7765dn ...
Страница 32: ...1 Before Using the Machine 32 ...
Страница 144: ...3 Copy 144 ...
Страница 155: ...Operations during Faxing 155 3 Set Resolution Original Size and the density 4 Select Save 5 Press the Start button ...
Страница 156: ...4 Fax 156 ...
Страница 168: ...5 Scan 168 ...
Страница 272: ...13 Maintenance 272 ...
Страница 294: ...14 Machine Status 294 ...
Страница 468: ...16 Dell Printer Configuration Web Tool Settings 468 ...
Страница 510: ...19 Scanner Environment Settings 510 ...
Страница 559: ...Configuration for Authentication 559 10 Select Close repeatedly until the Tools screen is displayed 11 Select Close ...
Страница 564: ...22 Authentication and Accounting Features 564 ...
Страница 764: ...28 Using Shortcut Menu 764 ...
Страница 796: ...29 Using Access Google Drive 796 2 Check the content status 3 Select Close ...
Страница 802: ...29 Using Access Google Drive 802 ...
Страница 816: ...30 Google Cloud Print 816 ...
Страница 829: ...www dell com dell com support KB3206EN0 5 ...


