Copy
75
Auto %
Automatically determines the copy ratio based on the document size and the paper size
specified in [Paper Supply], and copies the document to fit into the paper.
Note
•
This cannot be selected together with [Auto Select] under [Paper Supply].
Ratios (3rd to 4th buttons on the screen)
Displays preset copy ratios.
You can change the copy ratio associated with each button. For information on the settings, refer to
"Reduce/Enlarge - Button 3 - 4" (P.349).
More
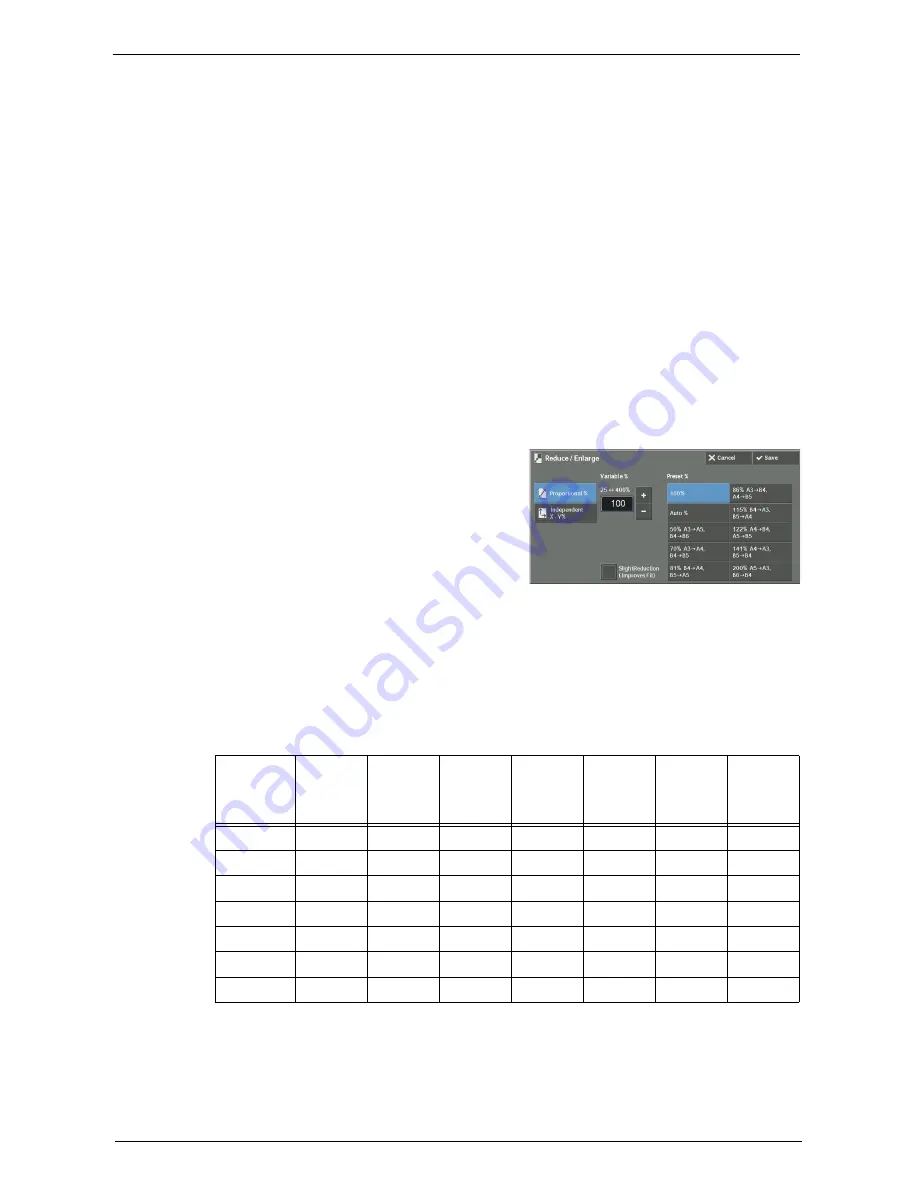
Displays the [Reduce / Enlarge] screen on which you can set [Proportional %] and
[Independent X - Y%].
For information on the settings on the [Reduce / Enlarge] screen, refer to "When [Proportional %] is
Selected" (P.75) or "When [Independent X - Y%] is Selected" (P.76).
When [Proportional %] is Selected
You can select a ratio from the standard copy ratios, or can enter a ratio directly.
1
Select a copy ratio, or specify a value.
Variable %
Specify a ratio in the range from 25 to 400% in 1% increments. To specify a value, use the
numeric keypad or [+] and [-]. Specifying "100%" allows you to make copies at the same
image size as the original document.
When you make enlarged/reduced copies from standard sized documents on standard sized
paper, the following copy ratios will be applied.
How to load a document depends on the size and orientation of a document. For more information,
refer to "Step 1 Loading Documents" (P.60).
For information on paper that can be loaded, refer to "Paper Types" (P.226).
Copy
/
Original
A6
B6
A5
B5
A4
B4
A3
A6
100%
122%
141%
173%
200%
245%
283%
B6
82%
100%
116%
142%
164%
200%
232%
A5
71%
86%
100%
122%
141%
174%
200%
B5
58%
70%
81%
100%
115%
141%
163%
A4
50%
61%
70%
86%
100%
122%
141%
B4
41%
50%
58%
70%
81%
100%
115%
A3
35%
43%
50%
61%
70%
86%
100%
Содержание C7765DN
Страница 1: ...Dell C7765dn Color Multifunction Printer User s Guide Regulatory Model C7765dn ...
Страница 32: ...1 Before Using the Machine 32 ...
Страница 144: ...3 Copy 144 ...
Страница 155: ...Operations during Faxing 155 3 Set Resolution Original Size and the density 4 Select Save 5 Press the Start button ...
Страница 156: ...4 Fax 156 ...
Страница 168: ...5 Scan 168 ...
Страница 272: ...13 Maintenance 272 ...
Страница 294: ...14 Machine Status 294 ...
Страница 468: ...16 Dell Printer Configuration Web Tool Settings 468 ...
Страница 510: ...19 Scanner Environment Settings 510 ...
Страница 559: ...Configuration for Authentication 559 10 Select Close repeatedly until the Tools screen is displayed 11 Select Close ...
Страница 564: ...22 Authentication and Accounting Features 564 ...
Страница 764: ...28 Using Shortcut Menu 764 ...
Страница 796: ...29 Using Access Google Drive 796 2 Check the content status 3 Select Close ...
Страница 802: ...29 Using Access Google Drive 802 ...
Страница 816: ...30 Google Cloud Print 816 ...
Страница 829: ...www dell com dell com support KB3206EN0 5 ...


