13 Maintenance
254
1
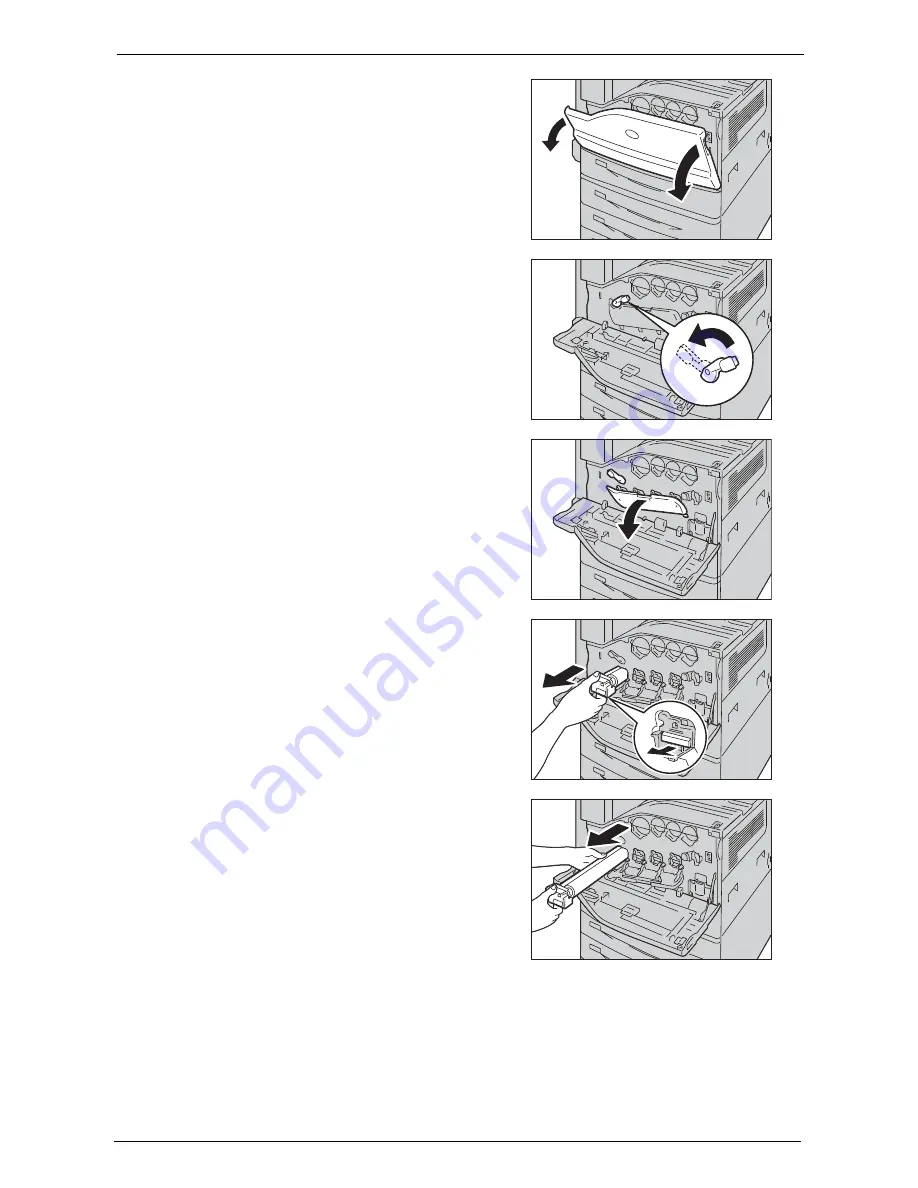
Make sure that the machine is not operating,
and open the front cover.
2
Rotate the release lever of the drum cartridge
cover counterclockwise.
3
Lower the cover.
Note
•
The drum cartridge is unlocked.
4
Grasp the handle of the drum cartridge R1, R2,
R3, or R4 indicated in the message and gently
slide out the cartridge.
Note
•
When removing the drum cartridge, be careful
not to drop it on the floor.
•
The illustrations in this section explains how
to replace the drum cartridge R1, as an
example.
5
Hold the bottom of the drum cartridge as
shown in the illustration, and pull it out from
the machine.
Note
•
Be careful not to touch the toner attached to
the cartridge.
6
Take the new drum cartridge out of the box, and insert the used drum cartridge into the
supplied plastic bag and place it into the box.
Note
•
Do not place the new drum cartridge in an upright position.
Содержание C7765DN
Страница 1: ...Dell C7765dn Color Multifunction Printer User s Guide Regulatory Model C7765dn ...
Страница 32: ...1 Before Using the Machine 32 ...
Страница 144: ...3 Copy 144 ...
Страница 155: ...Operations during Faxing 155 3 Set Resolution Original Size and the density 4 Select Save 5 Press the Start button ...
Страница 156: ...4 Fax 156 ...
Страница 168: ...5 Scan 168 ...
Страница 272: ...13 Maintenance 272 ...
Страница 294: ...14 Machine Status 294 ...
Страница 468: ...16 Dell Printer Configuration Web Tool Settings 468 ...
Страница 510: ...19 Scanner Environment Settings 510 ...
Страница 559: ...Configuration for Authentication 559 10 Select Close repeatedly until the Tools screen is displayed 11 Select Close ...
Страница 564: ...22 Authentication and Accounting Features 564 ...
Страница 764: ...28 Using Shortcut Menu 764 ...
Страница 796: ...29 Using Access Google Drive 796 2 Check the content status 3 Select Close ...
Страница 802: ...29 Using Access Google Drive 802 ...
Страница 816: ...30 Google Cloud Print 816 ...
Страница 829: ...www dell com dell com support KB3206EN0 5 ...


